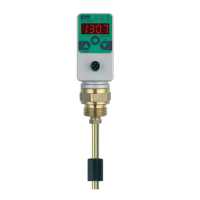
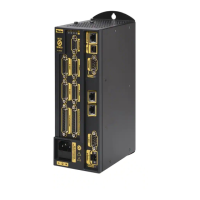
S3C Case Controller
Site Functional Performance Test
SD-453 / 082018
DOCUMENT: Steps to perform a F.P.T. utilizing Sporlan’s Tech Check App (referred to as “the app”).
GOAL: Verify all functions of the S3C controller are working correctly and ensure proper performance.
SYSTEM: S3C Case Controller controlling individual cases, 1 EEPR per circuit and EEVs in the case.
NOTE: In the app an override is denoted by the box with the sensor reading changing to yellow. Once the
override is disabled, the box will change back to the regular screen color. For example, when an override is
applied to close the solenoid valve, the solenoid state is highlighted in yellow. See Figure A.
STEP 1 CONNECT DISPLAY CASE TO
THE APP
Hold down the rightmost button on the Display Module
(DM) until the orange light at the bottom right starts flashing.
See Figure B.
If the Autoconnect feature is turned on in the app, the
controller will automatically connect to your app. If it does
not connect automatically, click on the controller as shown
in Figure C.
STEP 2 SENSORS
VERIFY EVERY DAT OR RAT SENSOR ON THE
CASE
Use compressed air, an ice bath or hold the temperature
sensor in your hand to change the temperature of the
Discharge Air Temperature (DAT) or Return Air Temperature
(RAT) sensor. See Figure D. Verify the temperature changes
accordingly in the app. See Figure E.
Note: Walk-ins utilize a RAT sensor.
STEP 3 SETTINGS
CHECK EACH CASE
Settings are shown on the Parameters screen under the
Controller Settings section of the app. Do this by clicking
the pencil icon in the top right corner as shown in Figure
F. Ensure these settings match what is shown on the case
cutsheet provided by the case manufacturer or what is shown
on the store drawings under the refrigeration schedules and
defrost / case parameter schedules.
VERIFY:
• Superheat Target: Superheat to which the case
controller is controlling.
• Control Temp: Either the Discharge Air Temperature
or Return Air Temperature setting to which the
equipment should operate.
• Defrost Termination: Temperature set point at which
the defrost will terminate.
• Defrost Schedule / Frequency per day: Scheduled
times for when defrost will start per day which also
states how many defrosts will be performed per day.
• Defrost Failsafe Time: Maximum allowable time that
a defrost will be active. Once this time is reached the
defrost will be terminated.
STEP 4 DEFROST
PERFORM ON EVERY CASE
Initiate a defrost through the app by going back to the
parameters screen. Then, click on the Manual Defrost
button under the Available Overrides section. See Figure
G. When the pop-up screen appears, change the setting from
Off to On, then hit the Save button. Ensure that all of the
cases in the circuit go into defrost. (This is proof that all of the
S3C controllers on that same circuit are communicating and
functioning correctly.) See Figure H.
FOR OFFTIME DEFROST:
Verify the EEPR, all EEVs, and the Solenoid are shown
closed on the app. Ensure the fans continue to run and the
Control State, which is shown in the app, changes from
Refrigeration to Defrost. You should see a slow increase
in suction pressure (SP) as well as in coil outlet temperature
(COT) and DAT. The superheat (SH) will slowly go to 0 as the
SP increases. See Figure I.
FOR ELECTRIC DEFROST:
Ensure the fans turn off (fans typically turn off for electric