34
ate loss of any warranty
claim.
• The device may only be
opened by an authorised
electrician. Always con-
tact our service centre for
repairs.
• Switch the drive off, dis-
connect the device from
the power supply and al-
low the device to cool off
if you want to clean, ad-
just, store the device or
to exchange an access-
ory part.
• Handle the device with
care and keep it clean.
• Store the device out of
reach of children.
Preparation
WARNING! Risk of injury due to
unintentional start-up. Do not in-
sert the plug into the outlet until the
device is fully prepared for use.
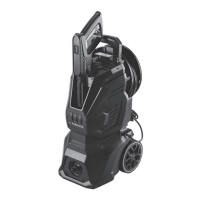
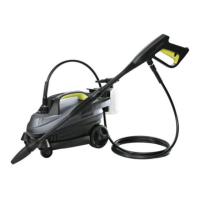
Control elements
Familiarise yourself with the operating
elements before using the device for
the first time.
Trigger gun (6)
• Switch lever (24)
• Pulling the switch lever: Activ-
ates the pressure jet
• Releasing the switch lever: De-
activates the pressure jet
• Child safety lock (25) (Viewed
from behind)
The switch lever is locked .
You can pull the switch lever .
WARNING! Risk of injury due to
pressure jet! Lock the switch lever
every time you take a break.
• Pressure indicator (8)
The more red lines visible, the
higher the pressure.
U-handle (2)
With the bow-type handle pulled out,
you can conveniently roll the device.
• Pulling out the handle:
Pull the curved handle upwards.
• Pulling in the handle:
Press the release (3) on the bow-
type handle and pull the bow-type
handle down.
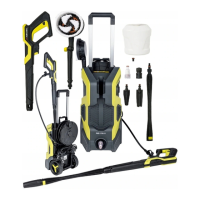
Setting up the device
1. Place the device horizontally on a
level surface.
2. Make sure that the high-pres-
sure hose (11) passes through the
guide for the high-pressure hose
(23).
3. Insert the high-pressure hose (11)
into the high-pressure connection
on the trigger gun (6).
Establishing a water supply
You have two options to supply the
device with water:
• Household water connection
• Suctioning standing, clean water,
e.g. rain barrel
Household water connection
Requirements
• Supply hose: Garden hose with fit-
ted quick connector with garden
hose adaptor (31); 13mm (½");
length between 5m and 30m
• Minimum pump capacity: 330l/h
(5,5l/min)