22
12.3 INSTALLATION
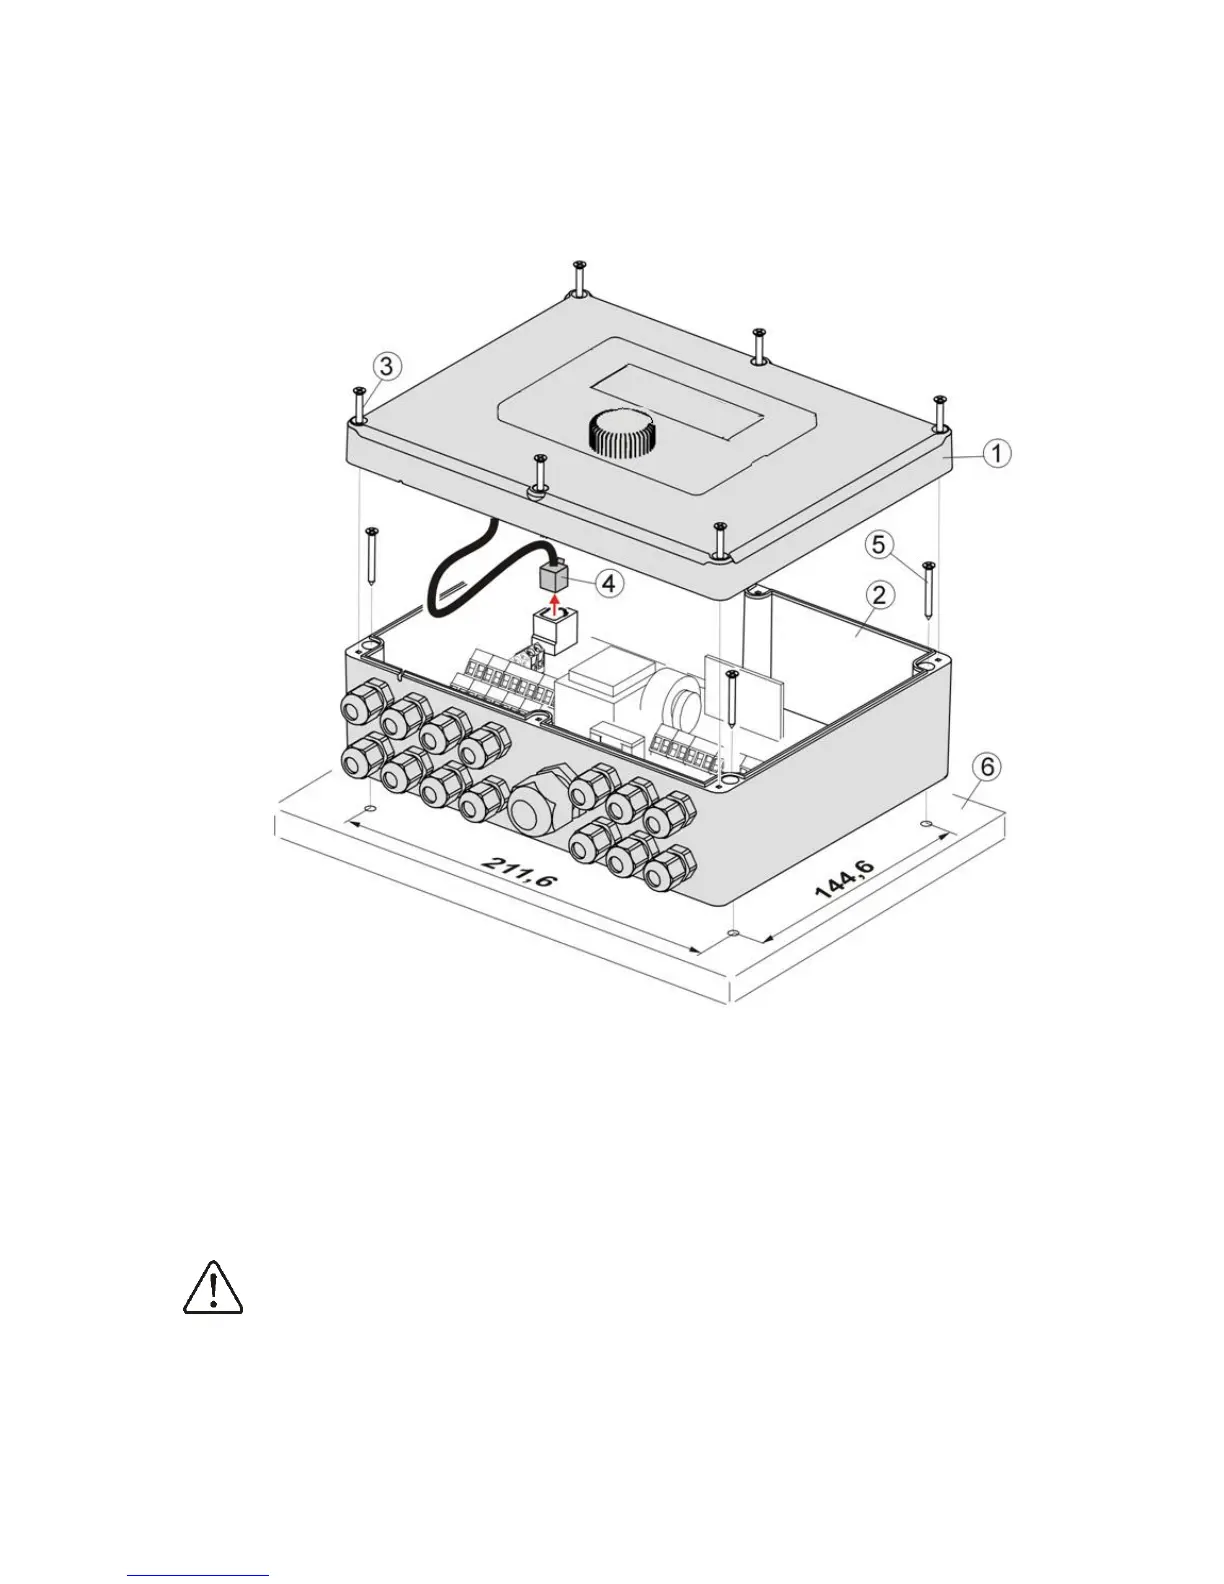
The controller is adapted to be installed on flat assembly surface. In order to screw it to assemble
surface please undo the screws (3) and carefully lift the cover (1), then undo the plug (4). Then
remove the cover (1) in a safe place. Using screws (5) stuck through holes in the cover (2) screw
the controller to assembly surface (6).
Pic. 19 Embedding controller on assembly surface, where: 1 – cover, 2 – base, 3 – screw for
cover, 4 – plug, 5 – screw for assembly surface, 6 – assembly surface.
12.4 ELECTRIC CIRCUIT CONNECTION
The controller is adapted to current 230V~, 50Hz. Features of installation:
3 way (with protecting wire),
made according with valid law.
Attention: After deactivating the controller with the keypad, there still can be a
dangerous voltage on the connections. Before starting assembly works it is
obligatory to disconnect the electrical power and make sure that there is no danger
electrical power on claps and wires.