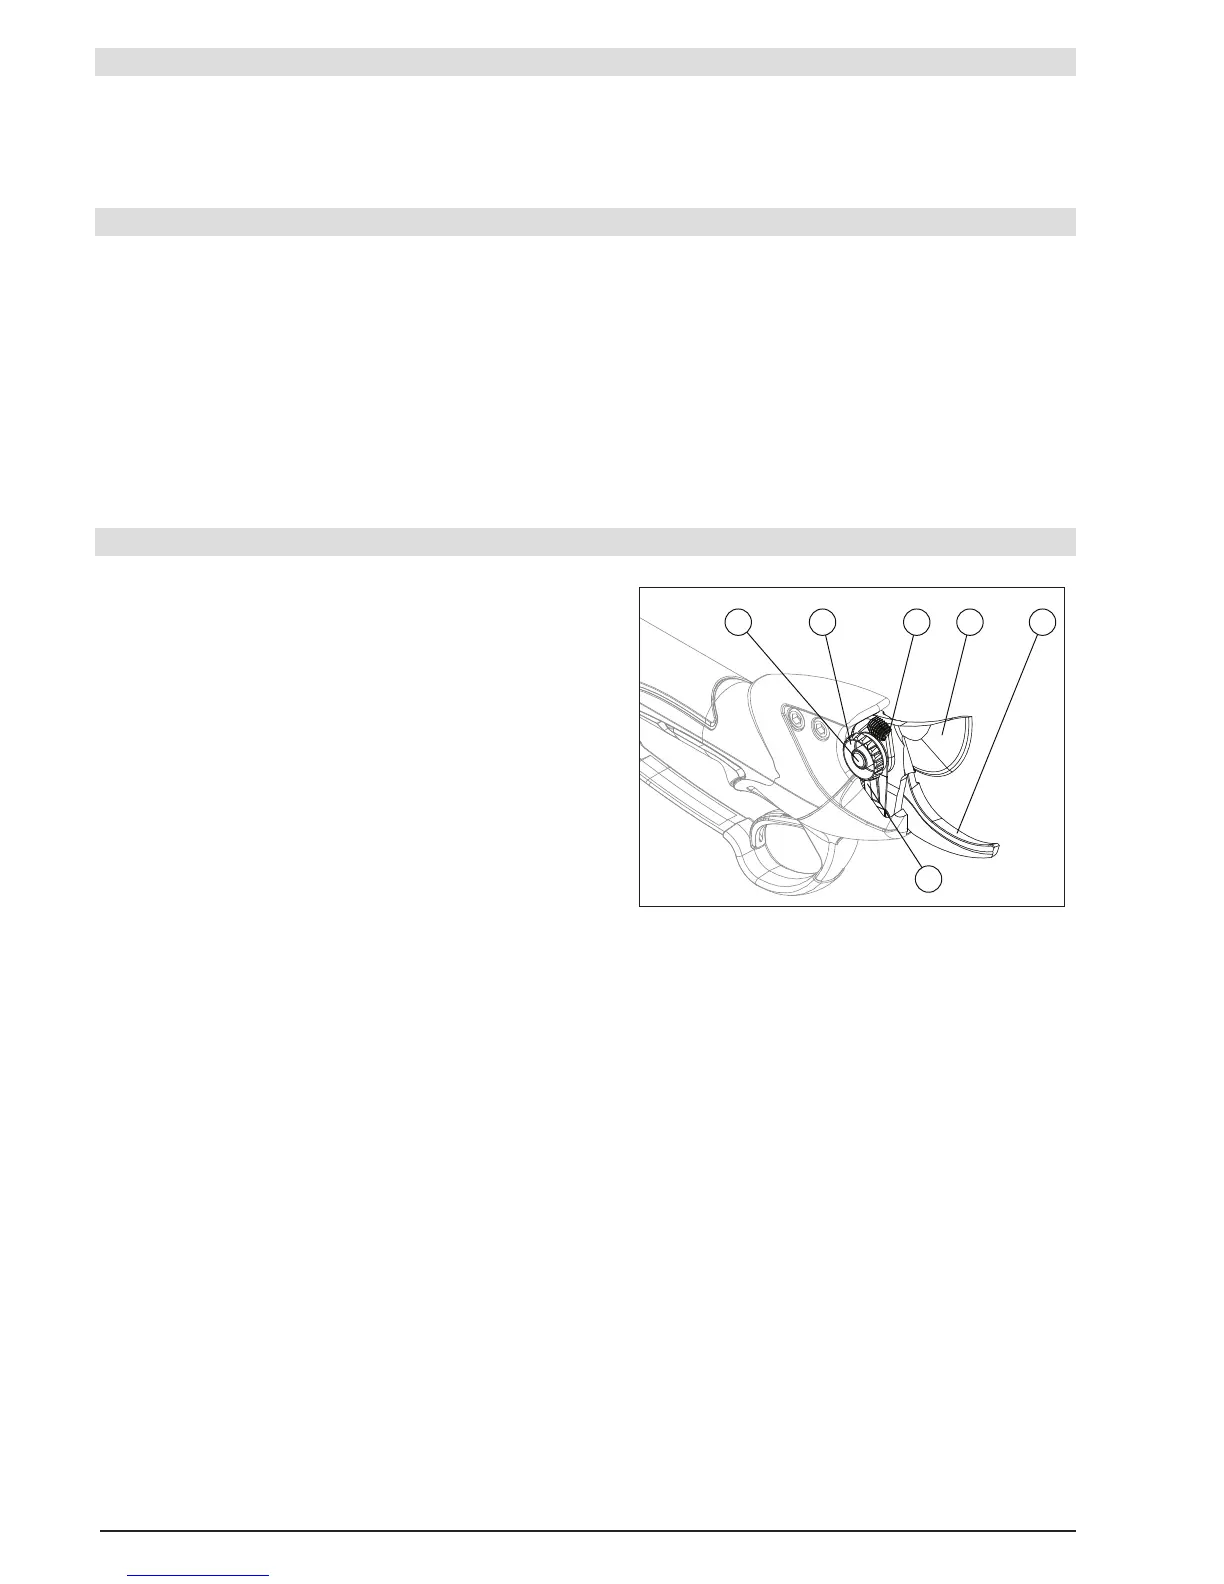
22
1 5 4 2 3
6
• There must be no lateral play.
• The play in the cutting direction must be detectable by hand.
For this:
• Carry out these operations with the blade open and battery turned off. (see gure 1 page 5)
• Tighten the adjustment wheel (5) until the knurled adjustment washer no longer turns.
• Loosen the wheel (5) a quarter turn.
• Check tightening of the blade:
- The knurled washer (4) must be able to rotate with the blade open.
- The knurled washer (4) must not turn with the blade closed.
• Manually readjust tightening if needed using the wheel (5).
- By turning the wheel (5) in the clockwise direction to tighten.
- By pressing the pawl (6) and rotating the wheel (5) counter-clockwise to loosen.
• Over-tightening may cause incorrect operation, poor cutting at the blade tip, and signicant reduction in
battery life.
CHECK THE TIGHTNESS OF THE BLADE
• It takes a few hours cutting to become familiar with the pruning shears.
• If cutting is no longer sharp and effortless, this means that it is using more energy than necessary. Check
the sharpening, the tightening of the blade and the general condition of the pruning shears.
NOTES
SHARPENING
This is important because it determines the quality of the cut and the durability of blades, the mechanical
parts and the battery life. Its frequency depends of course of the wood cut (hardness and diameter), the
pruning pace and sharpness of the blades (a special grinding stone was supplied to you). Therefore, during
the rst days of use, it is necessary to frequently check the condition of the cutting blade to maintain its
edge by refreshing the cutting line a bit and often (a quick look every fteen minutes will quickly give you an
idea of this frequency).
IT IS IMPERATIVE TO REMOVE THE BURR FROM THE CUTTING EDGE OF THE BLADE AND RESHARPEN A
FIRST TIME AFTER THE FIRST 15 MINUTES.
1– Blade shaft
2– Blade
3– Hook
4– Knurled adjustment washer
5– Clamping wheel
6– Pawl of the locking blade