PRUNING SHEARS AND 150 BATTERY VINION & PRUNION
26_116772-H
6.1. SHARPENING
This is important because it determines the quality of the cut and the durability of blades, the mechanical parts and
the battery life. Its frequency depends of course of the wood cut (hardness and diameter), the pruning pace and
sharpness of the blades (a special grinding stone was supplied to you).
It is therefore necessary, during the first few days of use, to check the condition of the blade edge frequently (a
check every quarter of an hour makes it possible to assess the condition of the wire)
In order to maintain this cutting edge, regularly and carefully refresh the cutting wire.
Important
It is essential to remove the burrs (wire edge) from the cutting edge of the blade, and to file it off within the
first 15 minutes of use.
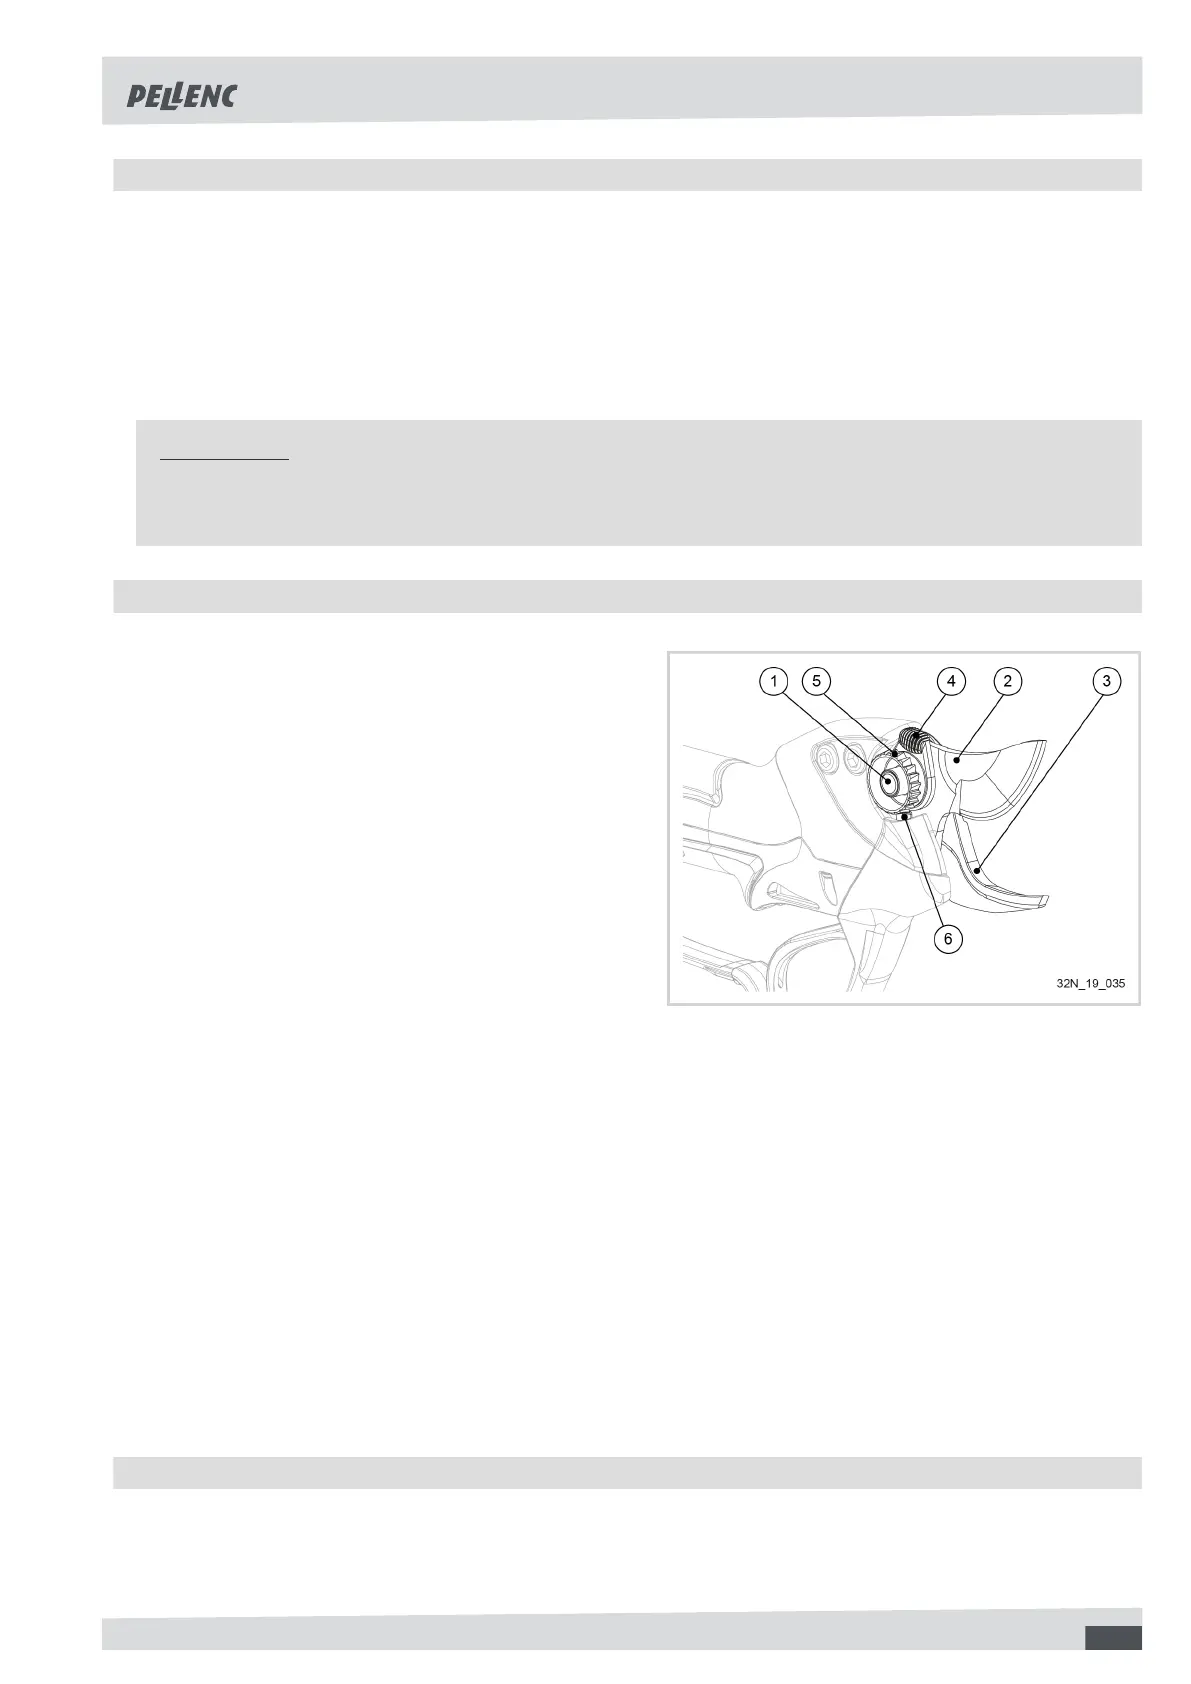
6.2. CHECK THE TIGHTNESS OF THE BLADE
1. Blade shaft
2. Blade
3. Hook
4. Knurled adjustment washer
5. Clamping wheel
6. Pawl of the locking blade
Points to check for proper tightening:
• There must be no lateral play.
• The play in the cutting direction must be detectable by hand.
For this:
1. Perform these operations with the blade open and the battery off. (see figure 1 on page 6)
2. Tighten the adjustment wheel (5) until the knurled adjustment washer no longer turns.
3. Check tightening of the blade:
• The knurled washer (4) must be able to rotate with the blade open.
• The knurled washer (4) must not turn with the blade closed.
4. Manually readjust tightening if needed using the wheel (5).
• By turning the wheel (5) in the clockwise direction to tighten.
• By pressing the pawl (6) and rotating the wheel (5) counter-clockwise to loosen.
5. Over-tightening may cause incorrect operation, poor cutting at the blade tip, and significant reduction in battery
life.
6.3. CHANGING BLADE OR SHAFT
Follow the instructions in the order given:
1. Open the blade fully.
27