23800 /3610
22. Slow speed cam shaft (E401)
E401 — E405 — LW17 x 3 — W70
* Up and down play of (E401) should be within 0.1mm.
23. Shutter seat plate assembly (E200)
a) Cock the shutter
b) Put on selector gear collar (E123)
c) High speed cam assembly (0-E210)
d) Install (E200) taking care of jointing part with slow speed cam shaft.
24. Bulb coupler lever spring (C263)
25. Switch plate assembly (0-J521) Main SW
— CNL-D 1.7 x 3.5 x 2
* When installing it, take care of shortage or leakage to camera body.
26. Installing seat assembly (0-A508) — CSS 1.7 x 2.2 x 2
27. Coupler lever assembly (0-C244)
a) Cord holder (J525) — Coupler lever spring hook screw (C214)
b) (0-C244) — Coupler lever retainer screw (C248) — left handed
c) Coupler lever spring (C266)
d) Check the function of (0-C244)
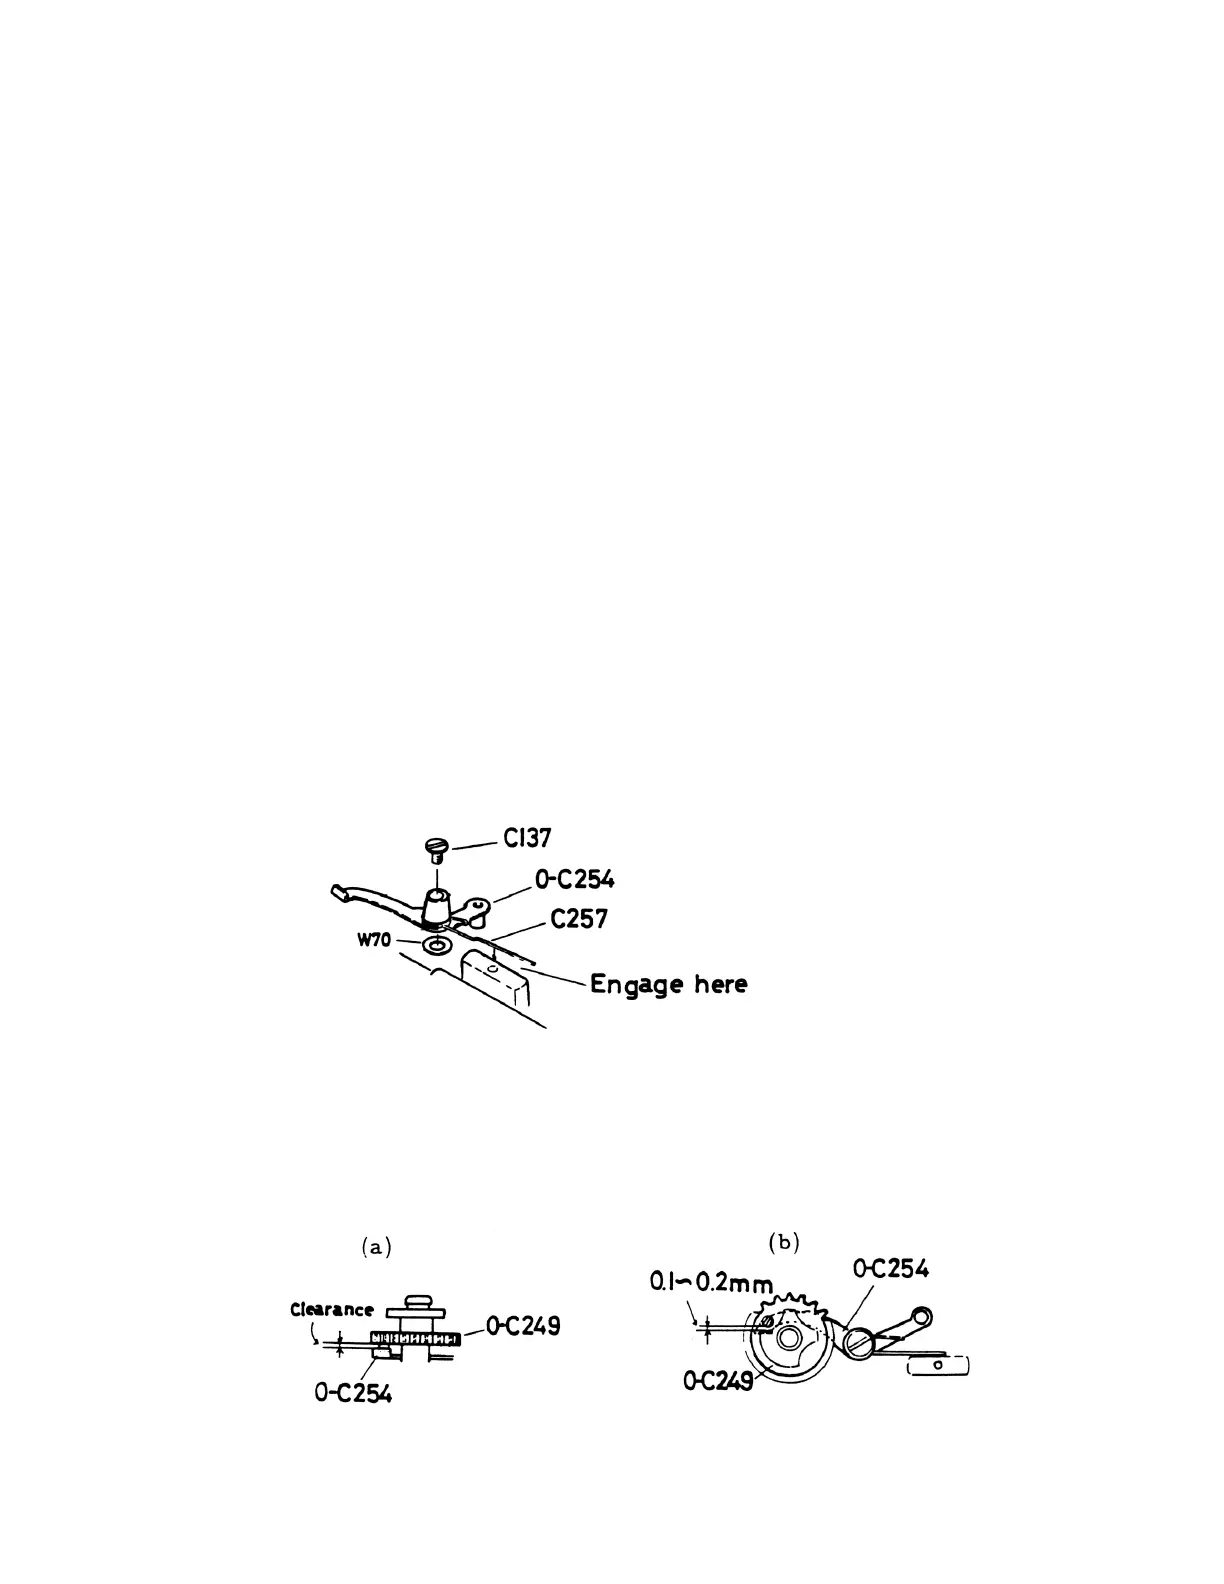
28. Pinion coupler lever assembly (0-C254)
W70 — 0-C254 — C257 — C137
29. Pinion coupler gear assembly (0-C249)
* After installing (0-C249), (0-C254) should not touch to (0-C249).
See Figure (a)
* After winding up, the least clearance (0.1 — 0.2) is necessary between the rivet of
(0-C249) and the lever of (0-C254).
See Figure (b)