23800 /366
Assembly procedure
1. Bottom mec.plate assembly (C200)
a.) Sprocket (C236)
b.) Bottom mec.plate assembly (C200) — positioning with (C202)
c.) C268, C267, CNS 1.7 x 2.5
2. Spool
a.) Install spool (0-C20) and Spacer (C29)
b.) Top shaft receptacle (C17-01)
c.) Bottom shaft receptacle (C202)
Vertical clearance of Spool is adjusted with W73
(t=0.5 or 0.6mm)
d.) Idle gear (C264)
3. Rewinding actuator lever assembly (0-C241)
As shown in Parts list
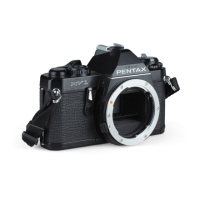
4. Coupler gear assembly (0-C222) — (C226) = left handed
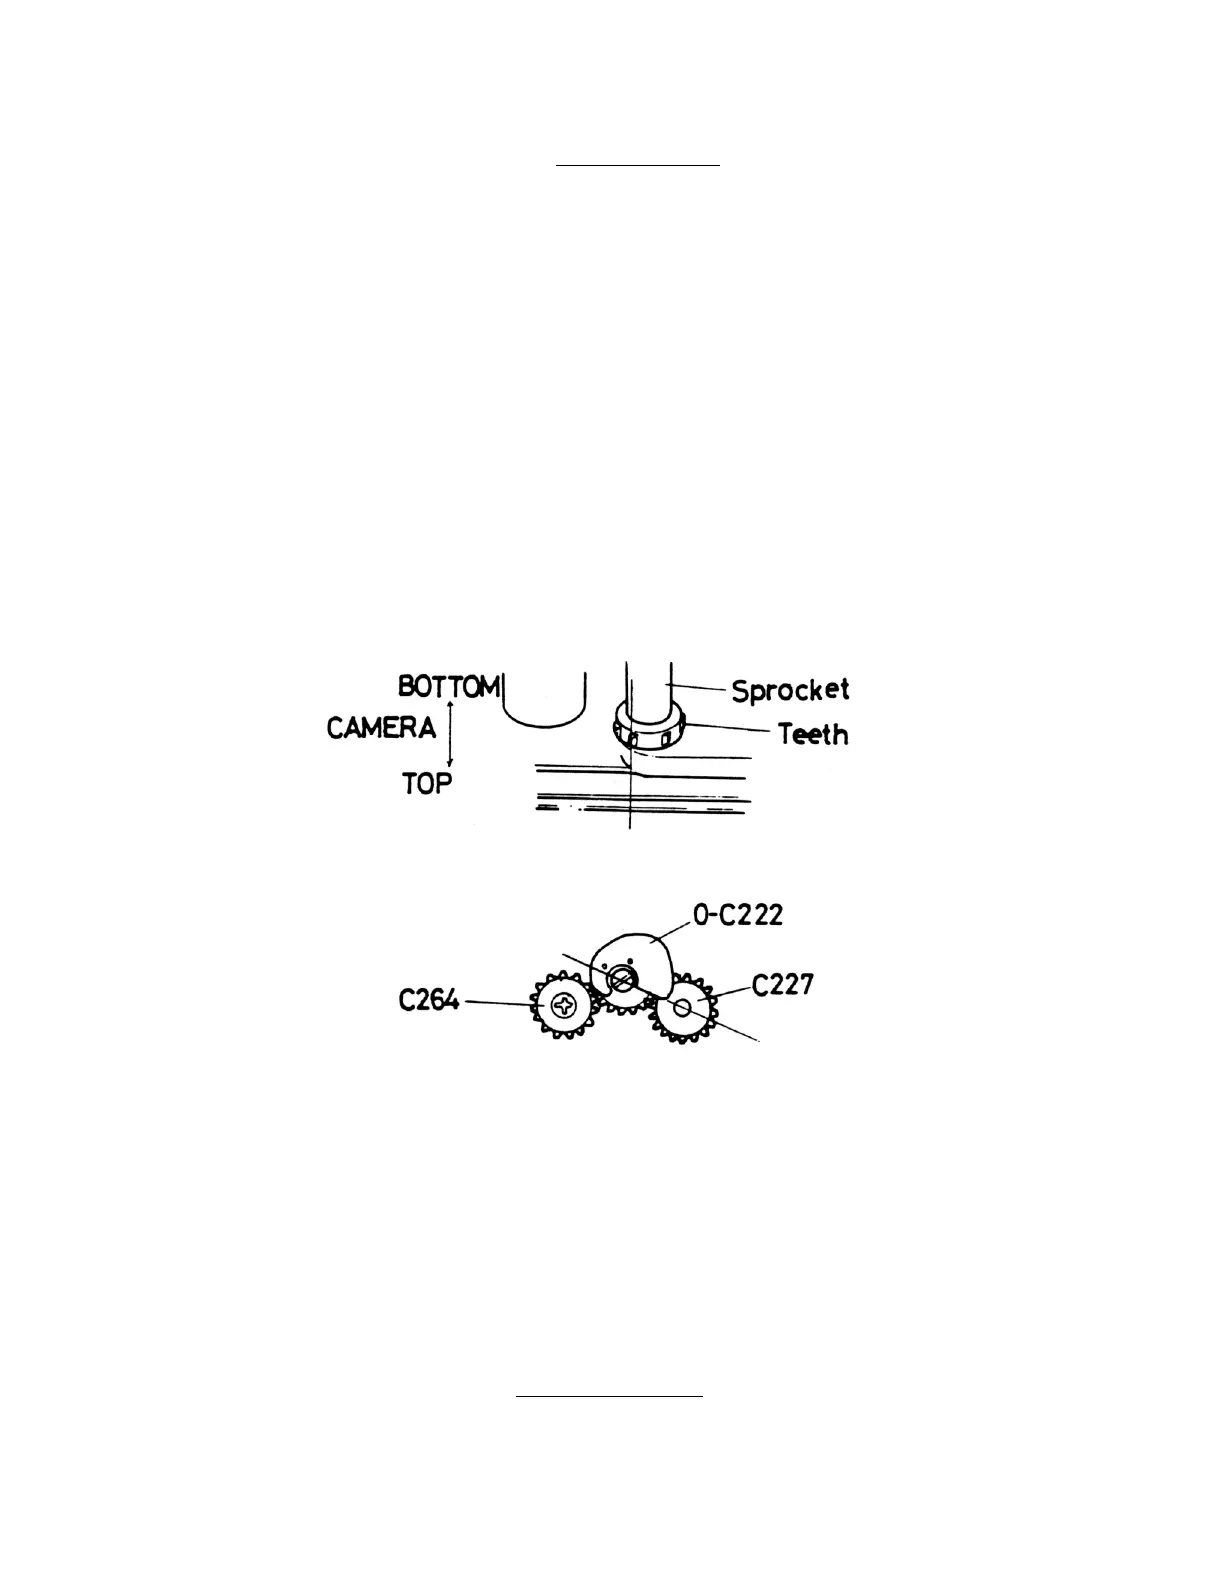
a.) Sprocket teeth is positioned as shown in Figure
b.) When installing Coupler gear assembly (0-C222), it should be positioned as shown below,
besides sprocket teeth should not be moved.
5. Shutter curtains
a.) Top mec.plate assembly (0-C1) — C27, C28
Curtain strings should not be off from rollers.
b.).Curtain plate assembly (0-A25)
Arrangement of both curtains is opposite from SP type camera.
6. Worm (E42) and Worm wheel (E41)
Turn worm wheel two rounds to give the tension to both curtains.
7. Check 2nd curtain position after releasing 1st curtain
a.) Install High speed lever assembly (0-E126) temporarily.
Cock the shutter, and release 1st curtain, 2nd curtain should be staying at 5mm distant
from picture frame.
Shutter cocking tool — 23800K-E113, E124-A.