23800 /362
9. P.C.board assembly (J500) — CNM 1.7 x 2.5 x 2
Base plate screw (A41-01)
10. Unsolder lead wires. 8 pcs
11. Mirror housing complete assembly (B000)
a.) After loosening Screw (M75), disconnect Idle gear assembly (0-M74) and Supporter plate
assembly (0-M53).
b.) Remove Mirror housing complete assembly (B000) together with Prism seat assembly
(0-M1), Penta prism assembly (0-L3) and Cell frame (J201).
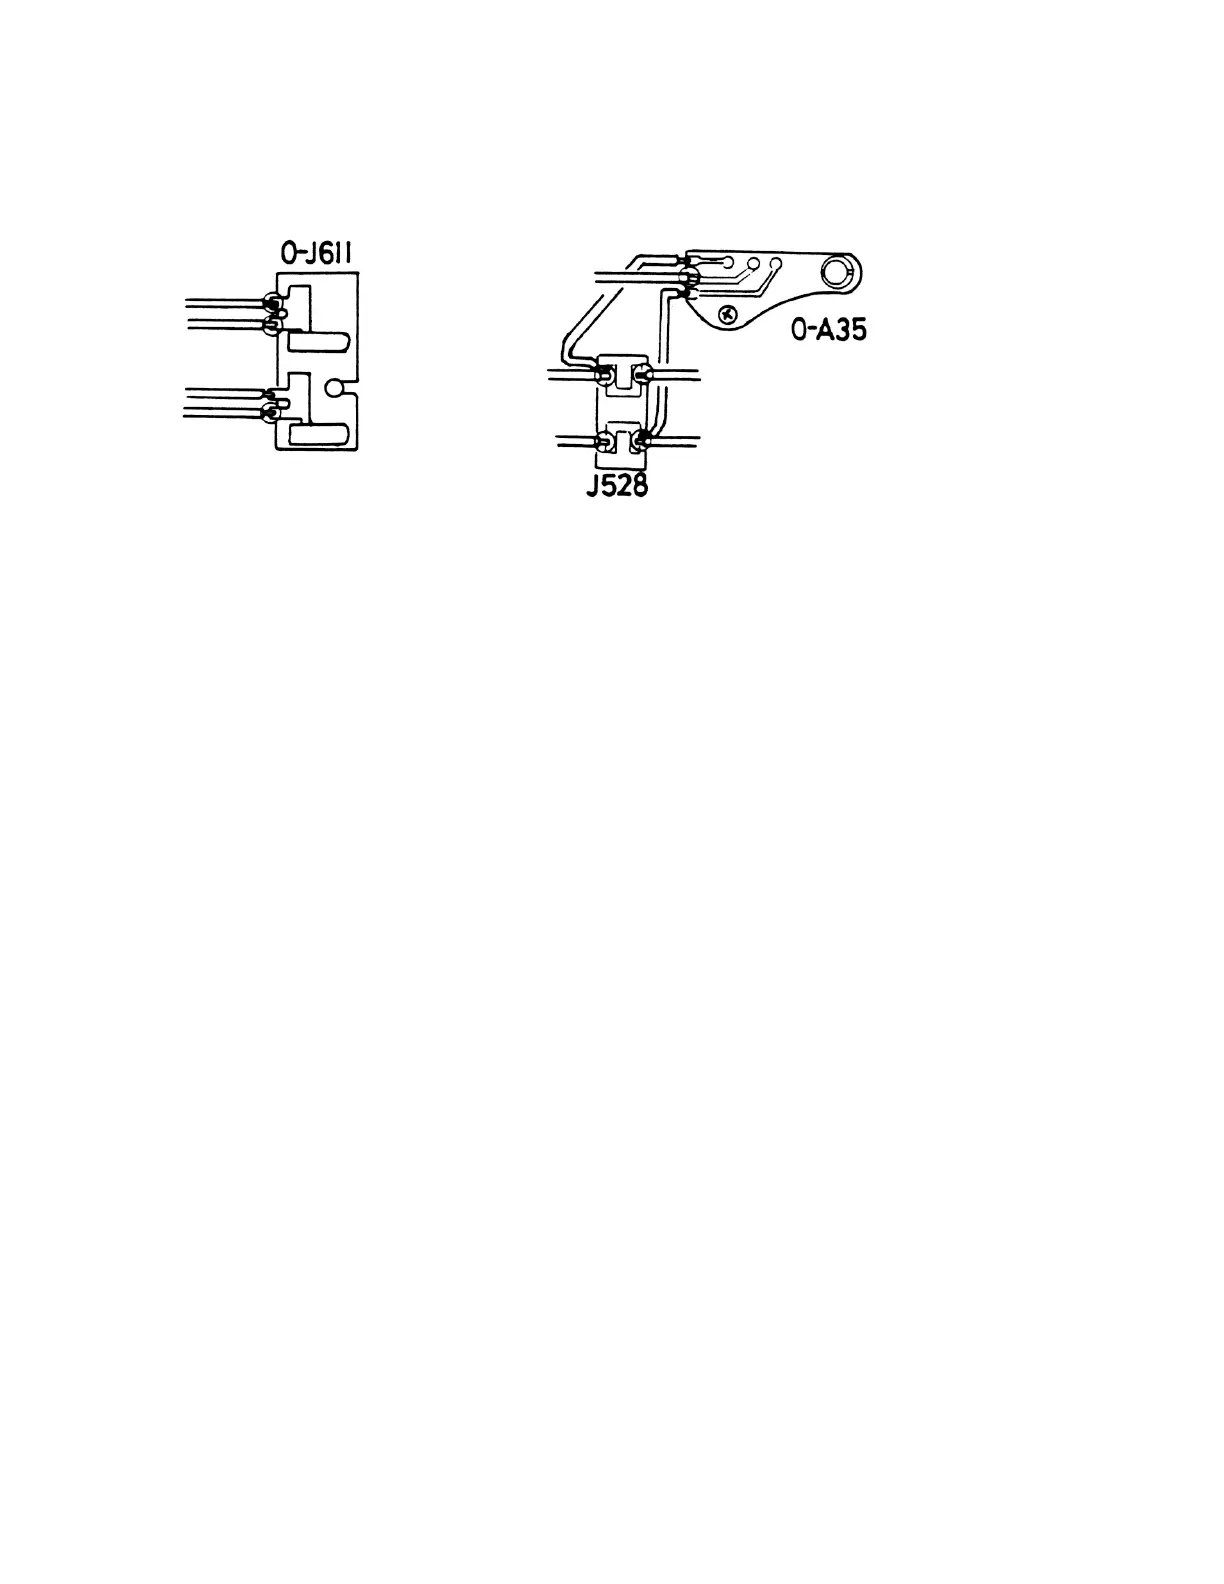
12. Terminal contact assembly (0-J611) — CNS 1.7 x 2.5
13. Battery seat assembly (0-A8) — CNS 1.7 x 2.5 x 2
14. Restitution spring assembly (0-M62)
a.) Idle gear assembly (0-M74), Idle gear supporter plate (M73)
Screw (M75)
b.) Remove Bobbin (M85) — CNL-B 1.4 x 2.0
Without turning brass gear.
c.) Adjusting plate assembly (0-M68), Pulley seat assembly (0-M76)
Left handed screw (M72)
d.) Restitution spring.assembly (0-M62), Hinge retainer spring (A5)
— CNM 1.7 x 2.5 x 2, W3
15. Governor actuator plate (C252) — Screw (C253), CNL-E 1.7 x 2.5
After removing (C252), install CNL-E 1.7 x 2.5 again.
16. Slow governor assembly (C100) at 1/125 shutter speed.
— CNM 1.4 x 2.0, CNM 1.7 x 2.0
17. Governor restitution plate (E407), (E408), (E409), W3
18. Slow speed cam assembly (0-E402), Nut (E406) — 23800K-E406-A
Caution:
a.) Remove Nut (E406) grabbing slow speed cam shaft (E401) with plier, without turning
(E401).
b.) Remove (0-E402) by loosening two set screw, at 1 sec shutter speed.