94 SEBU8605-01
Maintenance Section
Engine Crankcase Breather Element - Replace
NOTICE
Care must be ta
ken to ensure that fluids are contained
during performance of inspection, maintenance, test-
ing, adjusting and repair of the product. Be prepared to
collect the flu
id with suitable containers before open-
ing any compartment or disassembling any compo-
nent containing fluids.
Dispose of all fluids according to Local regulations and
mandates.
The crankca
se breather is a very important
component in order to keep your engine emissions
compliant.
•
The fi lter element within the crankcase breather
must be serviced at the prescribed service interval.
•
The correct filter element must be installed before
the engine is operated.
•
Theinstallationofthefilter element is very
important.
•
The quality of the filter element that is installed is
very important.
•
The filter element protects the engine from
excessive quantities of oil from entering the
induct
ion system. The filter element also protects
the engine aftertreatment system.
Note: E
xcessive quantities of oil that enter the
induction system of the engine can rapidly increase
the engine speed without control.
For information on aftermarket products, refer
to Operation and Maintenance Manual, “Engine
Desc
ription”. Within that section, refer to the title
“Aftermarket Products and Perkins Engines”.
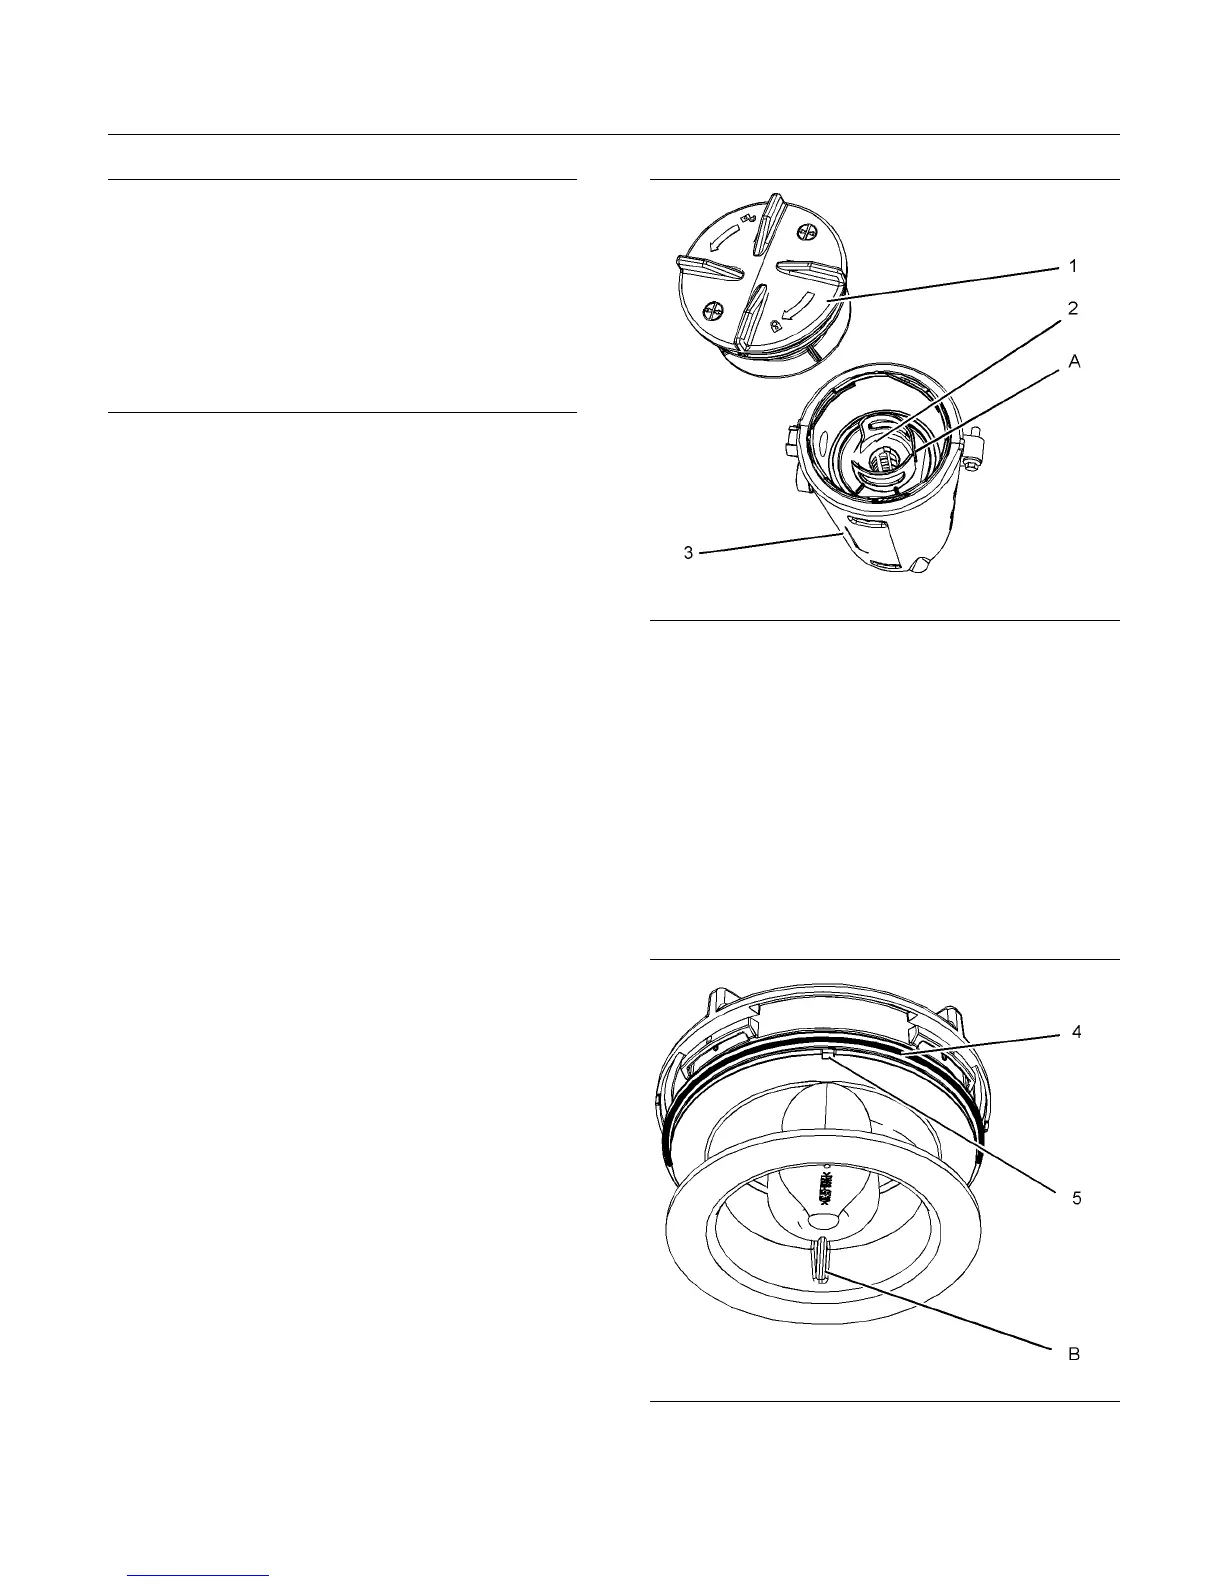
g02415998
Illustration 59
Typical example
1. Ensure that dirt cannot enter the breather
assembly. Ensure that the outside body of the
breather assembly is clean and free from damage.
Place a container under the breather assembly.
2. Rotate the cap (1) counterclockwise into the
unlocked position. Remove the cap from the body
of the breather (3).
3. Note the orientation of the filter element (2).
Remove the filter element .
g01884135
Illustration 60
(B) A lignment position
4. Remove the old seal (4) and install a new seal.