Chapter 4 35943
Page 22
How to renew an atomiser
Cautions:
• A new clamp (A5) must be used every time an atomiser is tted to the engine.
• Do not allow dirt to enter the fuel system. Before a connection is disconnected, clean thoroughly the
area around the connection. After a component has been disconnected, t a suitable cover to all open
connections.
• Use a separate spanner to prevent movement of the outlets of the fuel injection pump when the high-
pressure pipes are released or tightened.
• When the atomiser is tted into the cylinder head, ensure that the sharp edges do not damage the “O” ring.
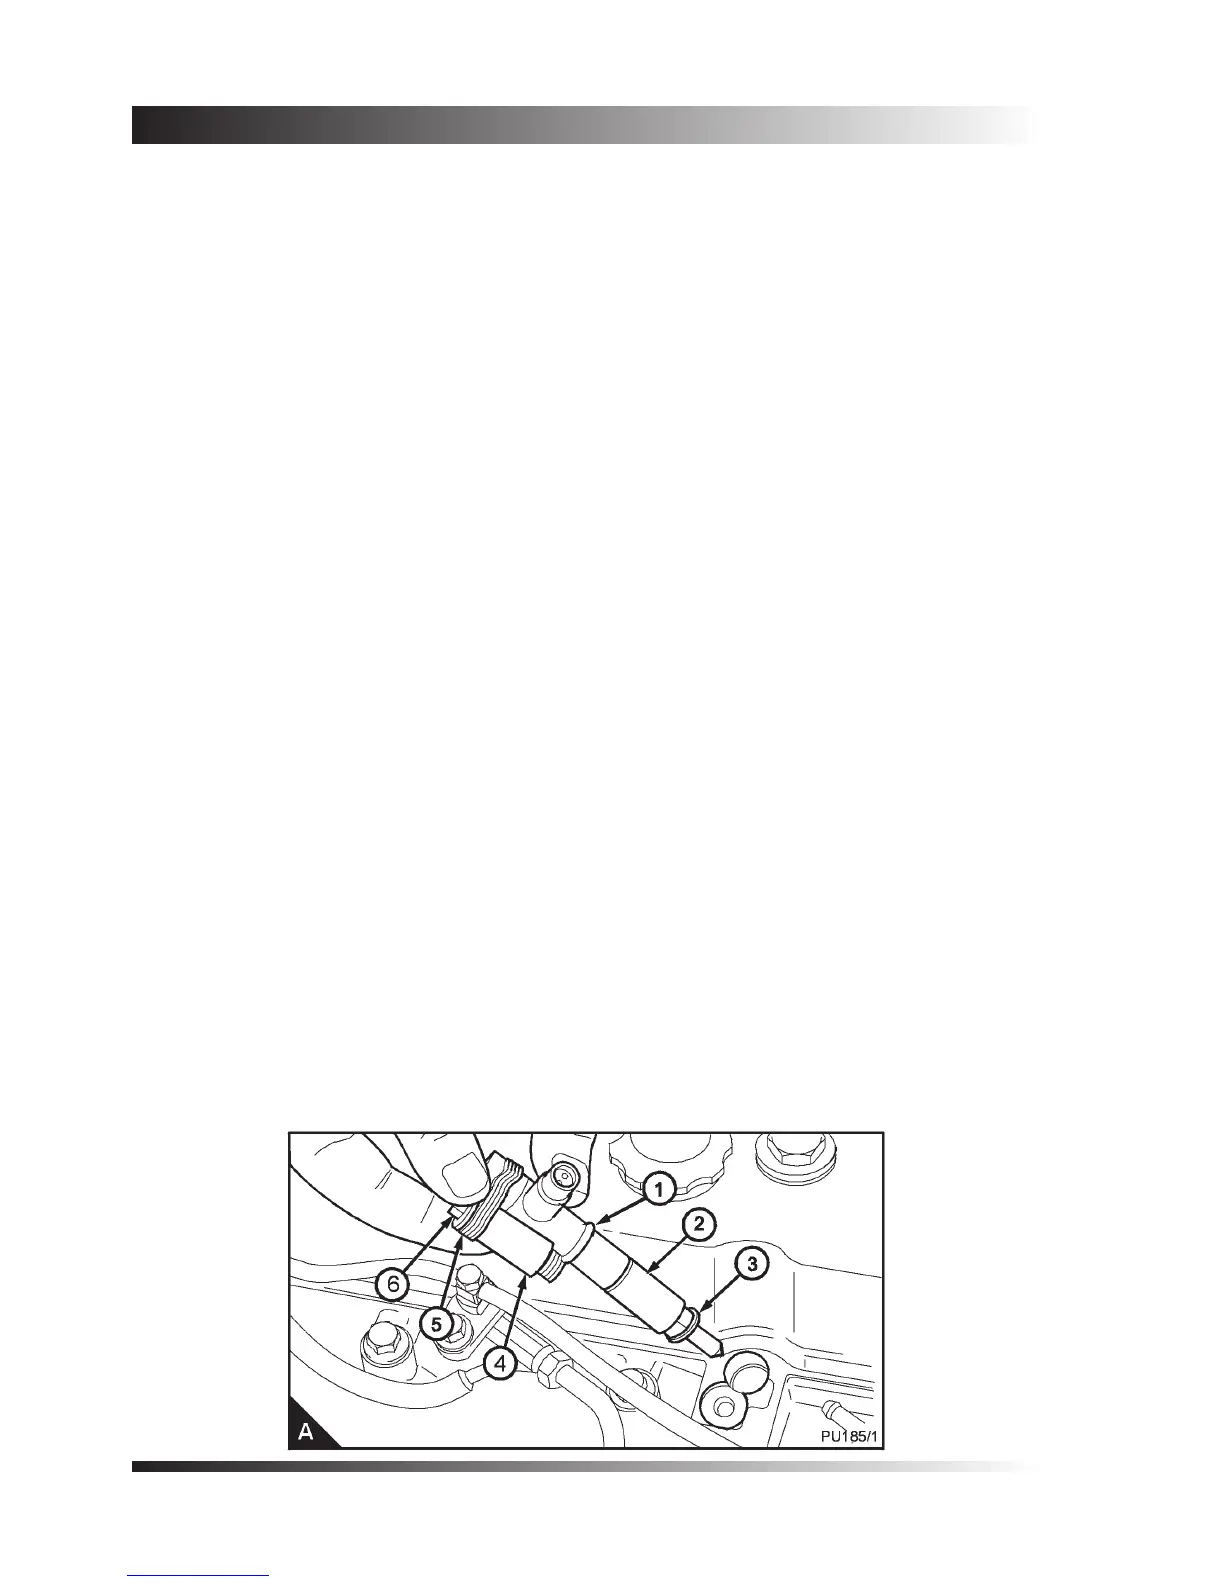
Note: Identication letters for the atomiser are shown on the nozzle holder (A2).
1. Clean thoroughly the area around the atomiser to be removed.
2. Remove the fuel leak-off pipe.
3. Remove the union nuts of the high-pressure pipe from the atomiser and from the fuel injection pump. Do
not bend the pipe. If necessary, remove the pipe clamps.
4. Remove the setscrew (A6) of the atomiser clamp and remove the clamp (A5), the spacer (A4), the
atomiser and its seat washer (A3).
5. Put the new atomiser in position together with a new seat washer and a new ‘O’ ring (A1). Fit the
atomiser into the cylinder head with a new clamp, the spacer, and engage the screw. Ensure that the
atomiser is not tilted and tighten the setscrew to 22 Nm (16 lbf ft) 2,2 kgf m.
Cautions:
• If there is a leakage from the union nut, ensure that the pipe is correctly aligned with the atomiser inlet.
• Do not tighten the union nuts of the high-pressure pipes more than the recommended torque tension as
this can cause a restriction at the end of the pipe. This can affect the supply of fuel to the atomiser.
6. Fit the high-pressure fuel pipe and tighten the union nuts to 27 Nm (20 lbf ft) 2,8 kgf m. If necessary, t
the pipe clamps.
7. Renew the sealing washers and t the leak-off pipe. Tighten the banjo bolts to 9 Nm (7 lbf ft) 0,9 kgf m.
8. Eliminate air from the fuel system, see page 23.
9. Operate the engine and check for leakage of fuel and air.