N39453 Chapter 4
Page 83
How to t
1. Remove all covers and caps from the component and connections.
2. Put a new seat washer into the seat recess in the cylinder head.
Note: Some new atomiser’s have the seat washer (AG3) tted on the atomiser.
3. Ensure that the atomiser seal is not damaged. Apply a small amount of clean fuel oil to the seal (AG2).
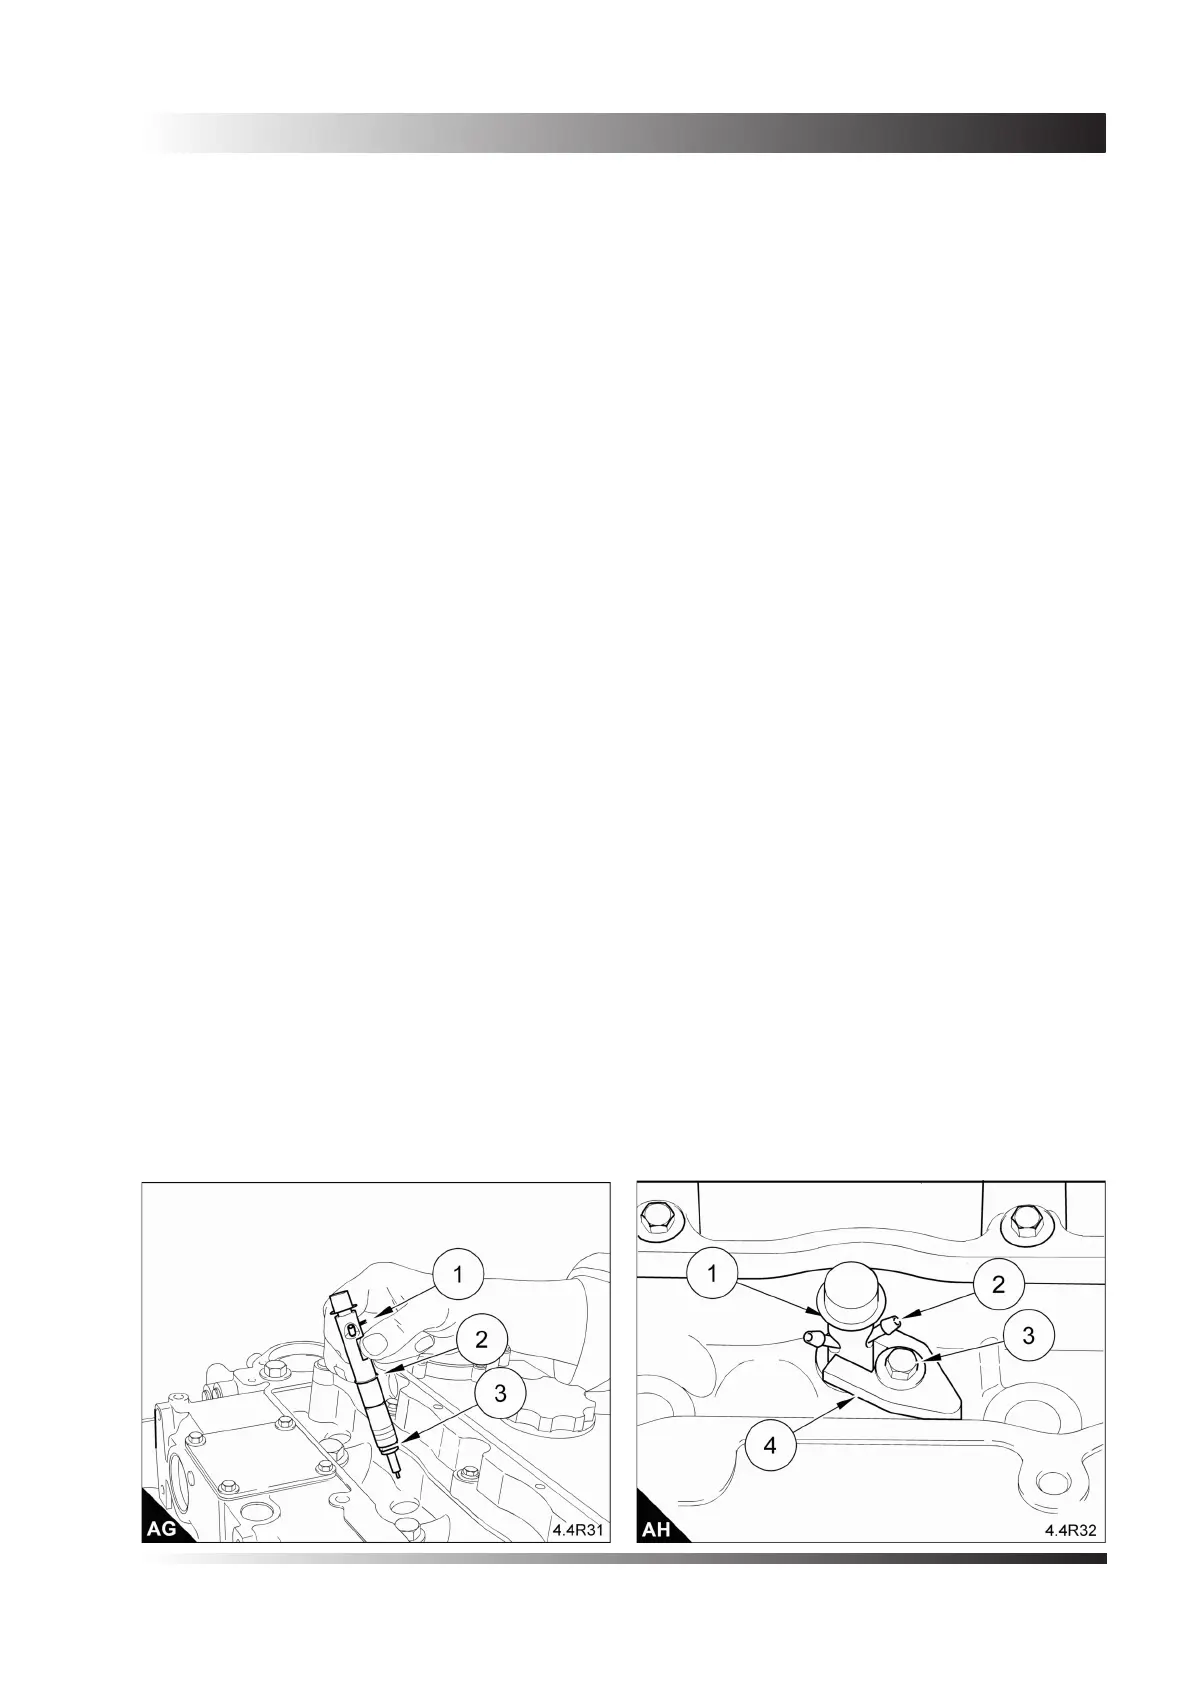
• The atomiser must be tted so that the pin or the union (AG1) faces away from the atomiser clamp (AH4).
• If tted the leak-off hose is a push t and will need replacing if the hose leaks.
4. Put the atomiser (AH1) into its recess in the cylinder head.
5. Fit the clamp (AH4) and the setscrew (AH3). Tighten the setscrew to 35 Nm (26 lbf ft) 3,5 kgf m.
Caution: Do not tighten the union nuts of the high-pressure pipes more than the recommended torque tension.
If there is a leakage from the union nut, ensure that the pipe is correctly aligned with the atomiser inlet. Do not
tighten the atomiser union nut more, as this can cause a restriction at the end of the pipe. This can affect the
fuel delivery.
6. Remove the plastic cap, t the high-pressure fuel pipe and tighten the union nuts to 30 Nm (22 lbf ft) 3,0
kgf m.
7. If removed earlier, t the clamps to the high pressure fuel pipes.
8. Where necessary, t the fuel leak-off hose to the connectors (AH2).
9. Check the “O” ring on the breather pipe and replace if necessary. Apply a small amount of clean engine
oil to the “O” ring and t the breather pipe into the rocker cover. Tighten the fastener to 9 Nm (7 lbf ft) 0,9 kgf
m. Fit the breather hose and clip if tted.
10. If removed, t the crossover pipe.
11. Run the engine and check for leakage of fuel and air. Correct any leakage.
12. Stop the engine.
13. Ret the atomiser cover and tighten the setscrews to 6 Nm (4 lbf ft) 0,6 kgf m.