L=.J
A
~
~
~
~-
(
iU
0
I
I
..JTTI
Eyelet embroidery
Traditional eyelet embroidery which previously
had
to
be
made laboriously by hand
can
now
be made
quite
easily
with
the
help
of
an
eyelet plate (special accessory).
This
is
very effective on blouses, bed- or table
linen.
Use utility stitches such
as
the
zigzag
stitch, blind stitch, elastic stitch or fancy
stit-
ches
of
the
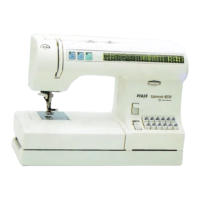
knob (model 6152,
6232)
.
For
classic eyelet embroidery, program
G,
with
a stitch
width
3 - 5
~
mm is very suitable.
- Remove
the
sewing
foot
.
- Set
the
presser bar lifter at the darning
position
(see
page
51).
- Place
the
eyelet plate
on
the
needle plate,
making sure pin A fits
in
the
middle cutout
of
the needle plate. Then push
the
plate
down at
the
front.
-
Place
the
marked fabric
taut
in
an
embroi-
dery hoop. Cut one or
two
of
the
fabric
threads and push
the
fabric over
the
pin
in
the eyelet plate. The fabric must
fit
snugly
around
the
pin.
- Draw up
the
bobbin thread and hold it
for
the first
few
stitches.
- You can
now
stitch around the
cut
with
the
selected program.
When
you do
this
it is
important
to
turn
the
fabric slowly and
evenly. The stitches should
be
very close
to
each
other
.
- Afterwards secure
with
straight stitch.
TIP: If you choose another program, e.g. a
decorative stitch
from
the
Mod
el
6152
or
6232,
or a blind sti
tch
,
in
which
the
cut
is
only partly stitched around or not at all, you
must then use key A
to
stitch around
the
cut.
71
,.,
a
3
 Loading...


