P12a
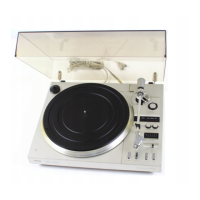
The Plate Printer i.e. “disc press”
1. THE DISC PRESS ... large flat top holds records onto SPINDLE.
A. Rotate the control disc to its home position (the
A. Turn the control disc into the home/rest position
,
the toothless [ toothed..review this]
part of the control disc/ opposite the main axis, and place the phono sensor on the switch. Now bring
the disc presser on the shoulder of the central spindle. The open end of the guide rod [97]FIG 8 must
now be completely free of the control/steering hook. If this is not the case, the flat press must be slightly
bent/ curved downwards.. The angle between the guide bar and the disc press is now becoming
something
smaller, so that the rod does not [DOES or does not?] fall so deep.
B. The plate user must be able to easily move up and down [back and forth] motion.
The guide rod/pole should slide up and down [in both directions ] in the middle of the groove of the
bearing housing (98)FIG 8. This can be promoted by adjusting/setting the bearing house with the 3 fixed
tapping screws on the mounting plate.
C. Now unscrew the 2 fastening screws (A fig.8) onto the
plate presser and adjust/set in such a way that the slide is removed about 1 mm from the top of the
center spindle pin. When the 2 screws are tightened in that position, the plate press must fall
downwards (or just very low pressure]
little extra pressure).
D. The plate presser must not touch the center pin/SPINDEL when it has been raised as far as possible
and
After being arched, it may be moved back and forth above the spindle/pin. If necessary, the plate press
must be slightly bent. In that case, it should also be again
checked.
E. Now place a 30 cm (12 ") RECORD on the shoulder of the spindle /pen and
press it with the disc press /platendrukker/disc printer. The height of the disc/plate with respect to the
mounting plate must now be the same everywhere and possibly bending the press disc.
27