Service Modes, fault finding and repair tips
GB 14 L9.2E5.
1.
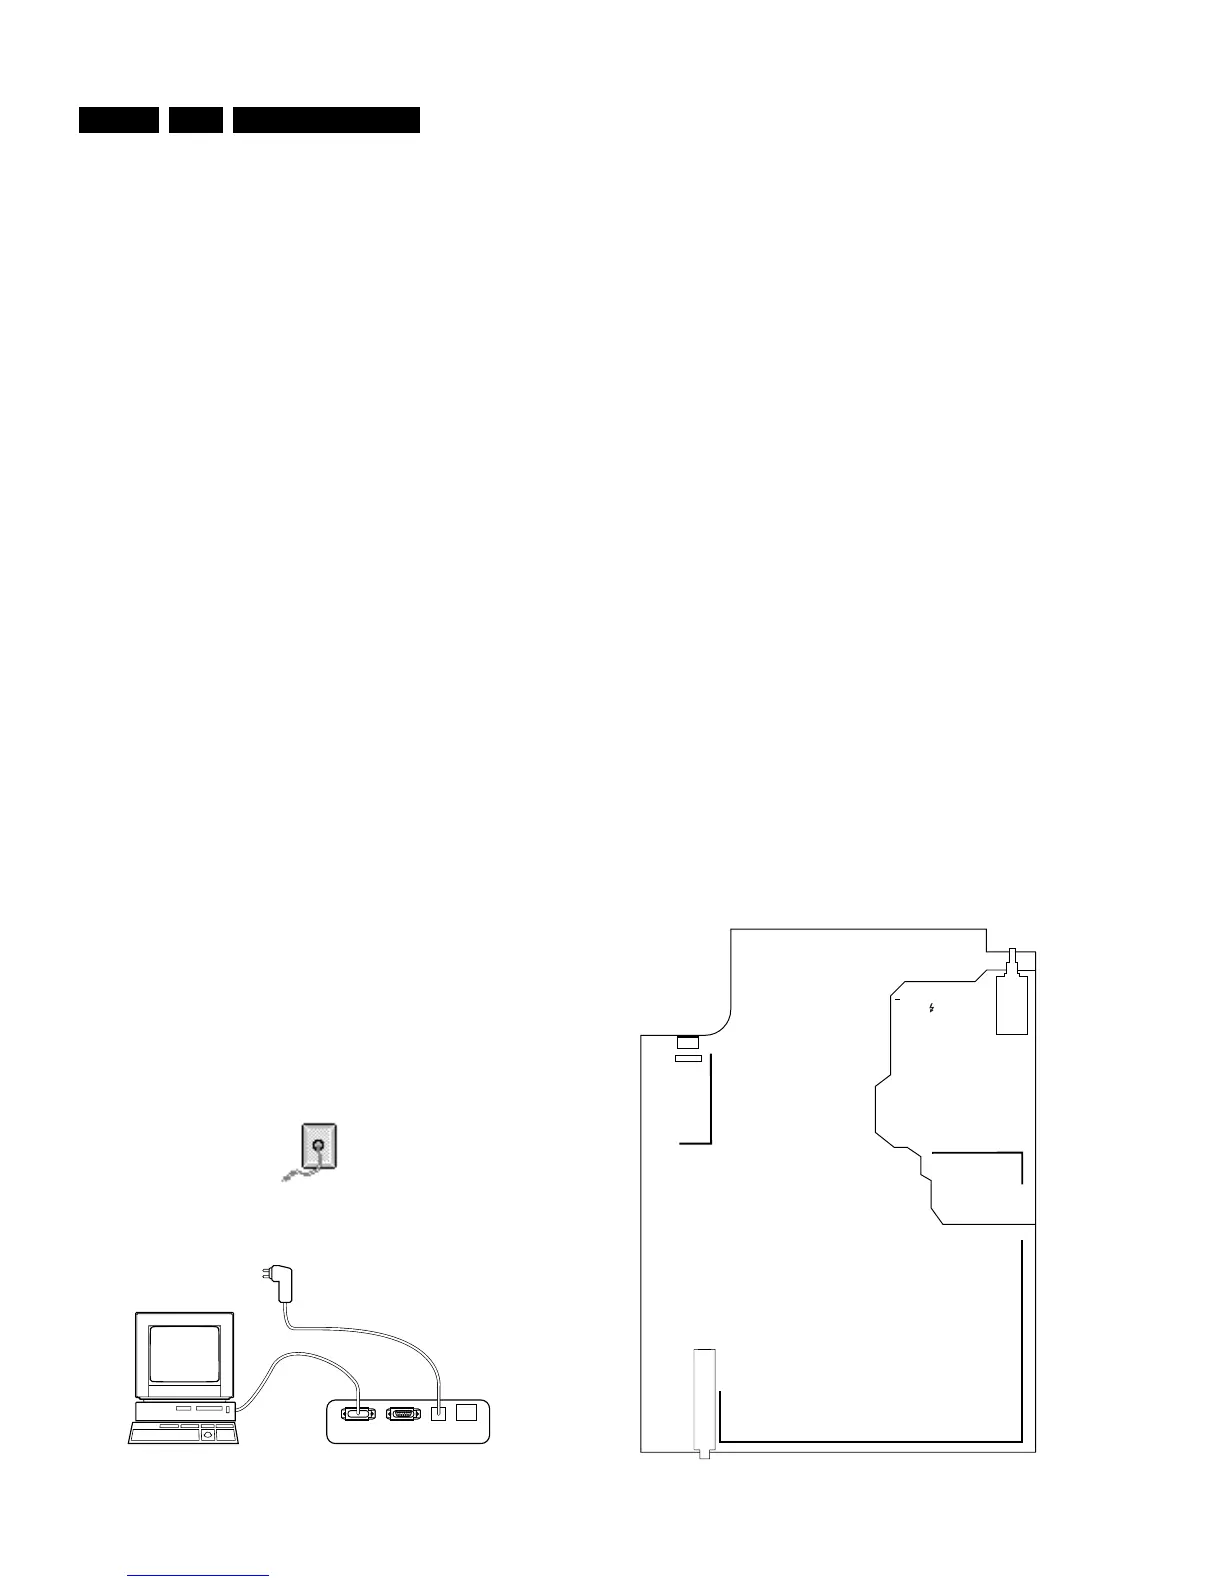
Connect the RS232 interface cable to a free serial
(COMM) port on the PC and the ComPair interface PC
connector (connector marked with "PC").
2.
Place the ComPair interface box straight in front of the
television with the infrared window (marked "IR")
directed to the television LED. The distance between
ComPair interface and television should be between
0.3 and 0.6 meter. (Note: make sure that (also) in the
service position, the ComPair interface infra red
window is pointed to the standby LED of the television
set (no objects should block the infra red beam)
3.
Connect the mains adapter to the connector marked
"POWER 9V DC" on the ComPair interface
4.
Switch the ComPair interface OFF
5.
Switch the television set OFF with the mains switch
6.
Remove the rear cover of the television set
7.
Connect the interface cable (4822 727 21641) to the
connector on the rear side of the ComPair interface
that is marked "I2C" (See Figure 5.8)
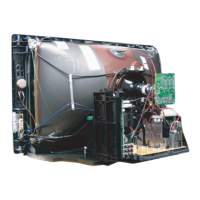
8.
Connect the other end of the interface cable to the
ComPair connector on the monocarrier (see figure 5.9)
9.
Plug the mains adapter in the mains outlet and switch
ON the interface. The green and red LEDs light up
together. The red LED extinguishes after approx. 1
second (the green LED remains lit).
10.
Start-up Compair and select "File" menu, "Open...:;
select "L9.2E Fault finding" and click "OK"
11.
Click on the icon (fig 5.7) to switch ON the
communication mode (the red LED on the Compair
interface wil light up)
12.
Switch on the television set with the mains switch
13.
When the set is in standby. Click on "Start-up in
ComPair mode from standby" in the ComPair L9.2E
fault finding tree, otherwise continue.
Figure 5-7
Figure 5-8
The set has now started up in ComPair mode. Follow the
instruction in the L9.2E fault finding tree to diagnose the set.
Note that the OSD works but that the actual user control is
disabled
5.7.4 Preset installation
Presets can be installed in 2 ways with the L9.2E.
• Via infra red
– only sending TO the television
– the rearcover does NOT have to be removed
Click on "File" "Open" and select "TV - use ComPair as DST"
to use infra red
• Via cable
– sending TO the television and reading FROM the
television
– the rearcover has to be removed
Click on "File" "Open" and select "L9.2E fault finding" to use the
cable
Presets can be installed via menu "Tools", "Installation",
"Presets".
5.8 Ordering ComPair
Compair order codes:
• Starterkit ComPair+SearchMan software + ComPair
interface (excluding transformer): 4822 727 21629
• ComPair interface (excluding transformer): 4822 727
21631
• ComPair transformer (continental) Europe: 4822 727
21632
• ComPair transformer United Kingdom: 4822 727 21633
• Starterkit ComPair software: 4822 727 21634
• Starterkit SearchMan software: 4822 727 21635
• Starterkit ComPair+SearchMan software: 4822 727 21636
• Compair CD (update): 4822 727 21637
• SearchMan CD (update): 4822 727 21638
• ComPair interface cable (for L9): 4822 727 21641
Figure 5-9
86532027_003.EPS
050898
PC VCR I
2
CPower
9V DC
CL 96532028_013a.eps
220499
1000
TUNER
HOT GROUND
BORDER
0231
MAIN PANEL COMPONENT VIEW
13
0267
COMPAIR