57
2.
ACCESS
WARNING;
The
opening of covers or removal
of parts,
except those to
which access
can be gained by
hand
is likely
to expose live parts,
and
accessible terminals may
also be live.
The
instrument shall be
disconnected from all
voltage sources
before any
replacement or
maintenance
and repair during which
the instrument
will be
opened.
If
afterwards, any adjustment,
maintenance
or repair of
the opened
instrument under voltage
conditions
is inevitable, it shall
be carried out
only by a skilled
person who is aware
of the hazard
involved.
Bear in mind
that capacitors inside the
instrument may
still be charged
even if the
instrument is
separated
from all voltage sources.
2.1.
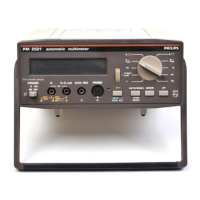
DISMANTLING THE
PM2521
2.1.1.
Removing the top
cover,
(fig.
41)
—
Place the
handle
in
its bottom position.
—
Remove
the two fixing
screws at the rear which
attach the top
cover
to
the
bottom cover.
—
Lever the top
cover
and
pull it backwards.
—
Disconnect the
tranformer plug
which
is
connected to X802.
2.1.2.
Removing the
bottom cover,
(fig.
42)
—
Remove the top
cover.
—
Remove the
handle.
—
Remove the two
fixing screws
which attach the printed-circuit
board to the bottom
cover, (fig. 42 item
1
).
—
Bend out
the two hooks
of the front plate,
(fig.
42 item
2).
—
Remove the bottom
cover.
2.1.3.
Removing the front
assembly
—
Remove top and
bottom cover.
—
Disconnect the
flexible print from the
connector XI
901.
(fig. 42 item
3).
—
Bend
out
the
two
hooks
of the front plate
at
the bottom of
the printed-circuit board,
(fig.
43
item
1
).
—
Disconnect
the front
from the printed-circuit board.
NOTE: The
potentiometer R502 is still
connected with the printed circuit
board.