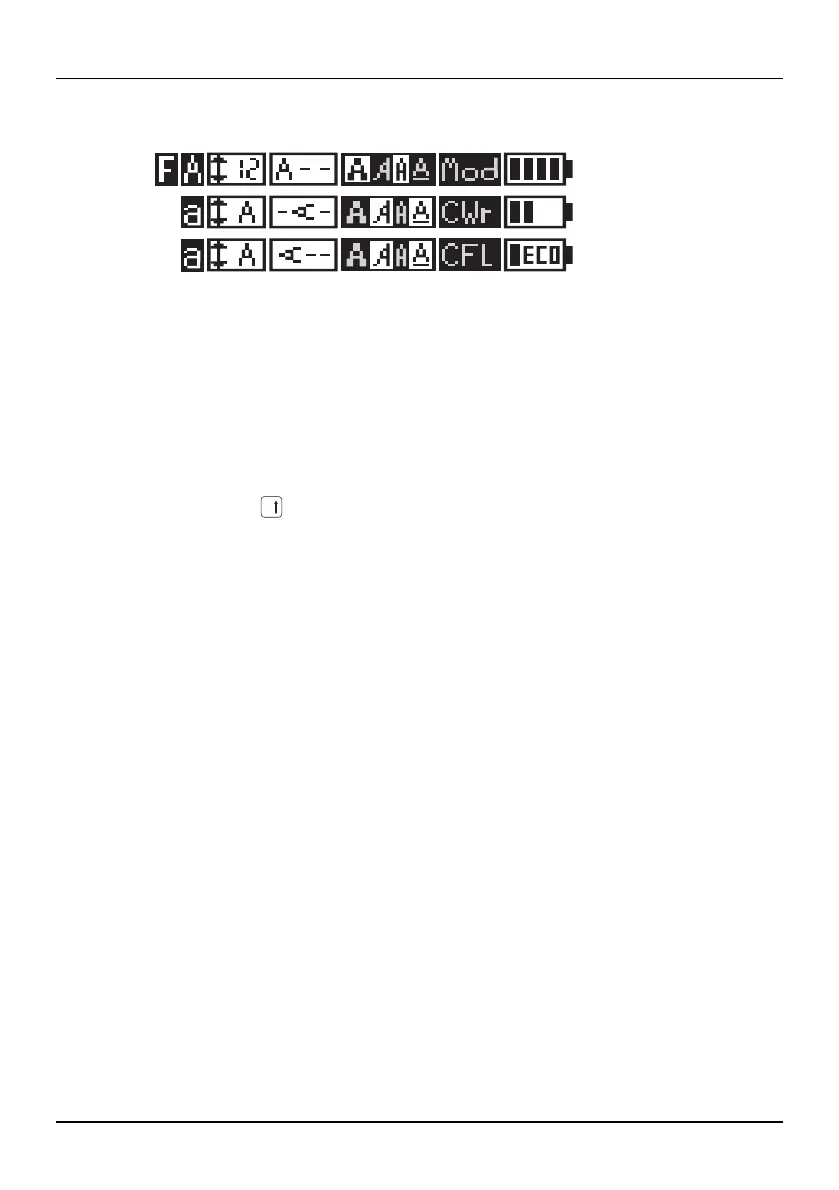
Operating elements
106986_en_01 PHOENIX CONTACT 15
Indicates the selected line height in mm. The “A” stands for “auto”. The line height
is adjusted according to the space available.
Can be switched using number key “2” if the function key has been activated si-
multaneously. To set the desired height in mm, press number key “2” several
times (Auto Size, 2 mm ... 22 mm).
Text alignment in both directions (horizontal or vertical as well as right-aligned,
left-aligned or centered)
The turquoise button can be used to switch between text alignments. The text
alignment switches in the following order:
1. horizontal – centered
2. vertical – centered
3. horizontal – right-aligned
4. vertical – right-aligned
5. horizontal – left-aligned
6. vertical – left-aligned
1. ...
Text format (bold, italic, narrow, underline). Can be switched using the number
keys if the function key has been activated simultaneously.
3 = narrow, 4 = bold, 5 = italic, 6 = underline
Print layouts for specific requirements (e.g., for terminal blocks or cables)
– Rows of labels with a fixed width (“Mod”, see Section 4.1.5)
– Cable marking (“CWr”, see Section 4.1.6)
– Cable flags (“CFL”, see Section 4.1.7)
State of power supply
Examples of the first line in the display
A
B
 Loading...