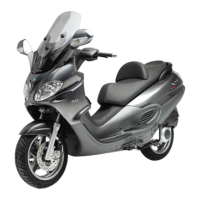
Removal
- Bleed the circuit and drain the brake fluid through
the bleeding screw located on the calliper and ac-
tuate the brake lever until no more fluid flows out.
-Remove the oil pump from the handlebar; remove
the brake lever and then remove the wheel cylin-
der.
1 - Tank cap screw.
2. Tank cover.
3. Diaphragm.
4. Bellows.
5. Sealing ring.
6. Piston.
7. Gasket.
8 - Spring
CAUTION
- THE PRESENCE OF BRAKE FLUID ON THE DISC OR
BRAKE PADS REDUCES THE BRAKING EFFICIENCY.
IN THIS CASE, REPLACE THE PADS AND CLEAN THE
DISC WITH A HIGH-QUALITY SOLVENT.
CONTACT WITH BRAKE FLUID WILL DAMAGE PAINTED
SURFACES.
RUBBER PARTS SHOULD NEVER BE LEFT IN ALCOHOL
FOR LONGER THAN 20 SECONDS.
AFTER WASHING, THE PIECES MUST BE DRIED WITH A
BLAST OF COMPRESSED AIR AND A CLEAN CLOTH.
THE SEALING RINGS MUST BE IMMERSED IN THE OPER-
ATING LIQUID.
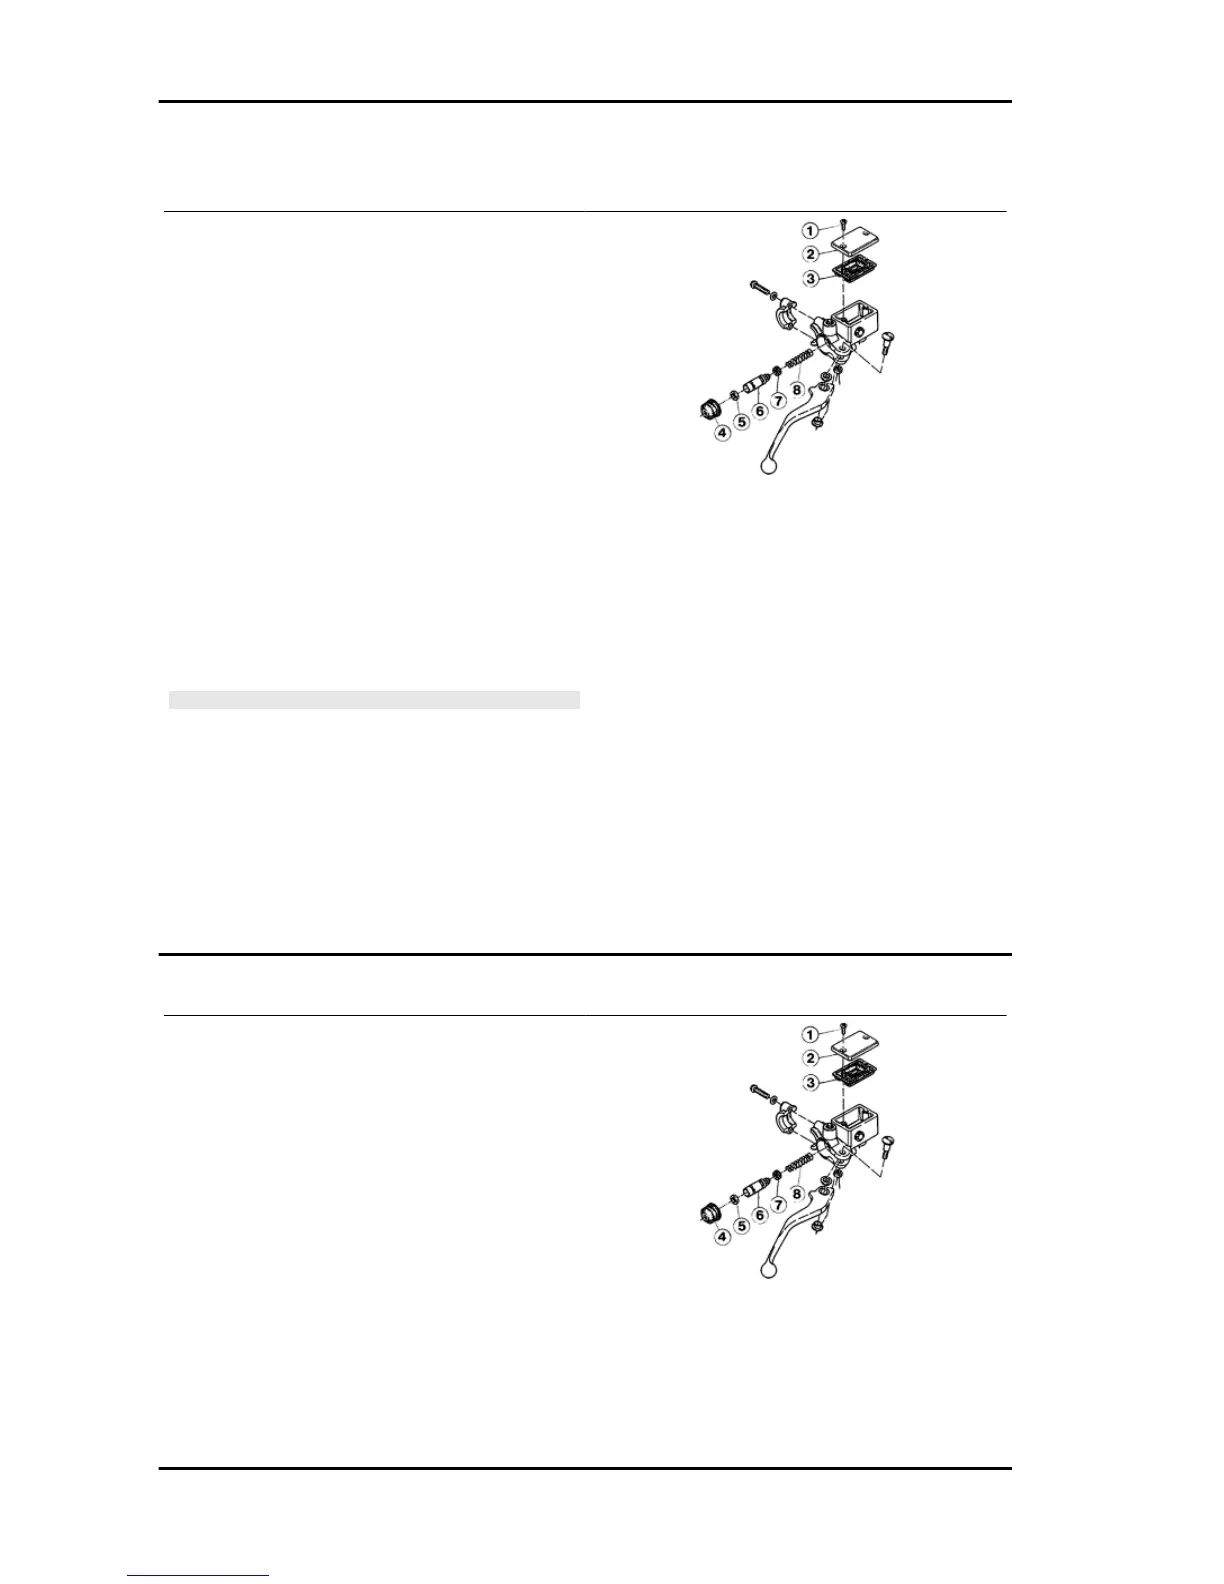
Refitting
Before fitting, the parts must be perfectly clean and
free of traces of oil, diesel fuel, grease, etc.. They
should be washed thoroughly in denatured alcohol
before proceeding.
- Reinstall the individual parts in the reverse order
to the removal, paying attention to the correct po-
sitioning of the rubber parts in order to ensure leak
tightness.
1 - Tank cap screw.
2. Tank cover.
3. Diaphragm.
4. Bellows.
Braking system Fly
BRAK SYS - 104