167
Integrator Mode
7 Use the [2/3] buttons to change the settings.
[Setting the POSITION]
•When the screen is divided, the Video Wall option is
unavailable.
•ID positions for 4 panels
•ID positions for 9 panels
•ID positions for 16 panels
•ID positions for 25 panels
7 Setting the display mode
8 Place the cursor on ‘TYPE’ then press the [2/3] buttons
to change the settings.
Each time a [2/3] button is pressed, the setting changes
as shown below.
NORMAL ..... It expands the video image without
correcting the displacement of the part
where the displays are combined.
ADJUSTED ... It expands the video image by correcting
the displacement of the part where the
displays are combined.
7 Setting AUTO ID
When ‘ON‘ is set, the ID for each of the multiple displays
linked by the remote control cable is set automatically.
9 Place the cursor on ‘AUTO ID’ then press the [SET] button.
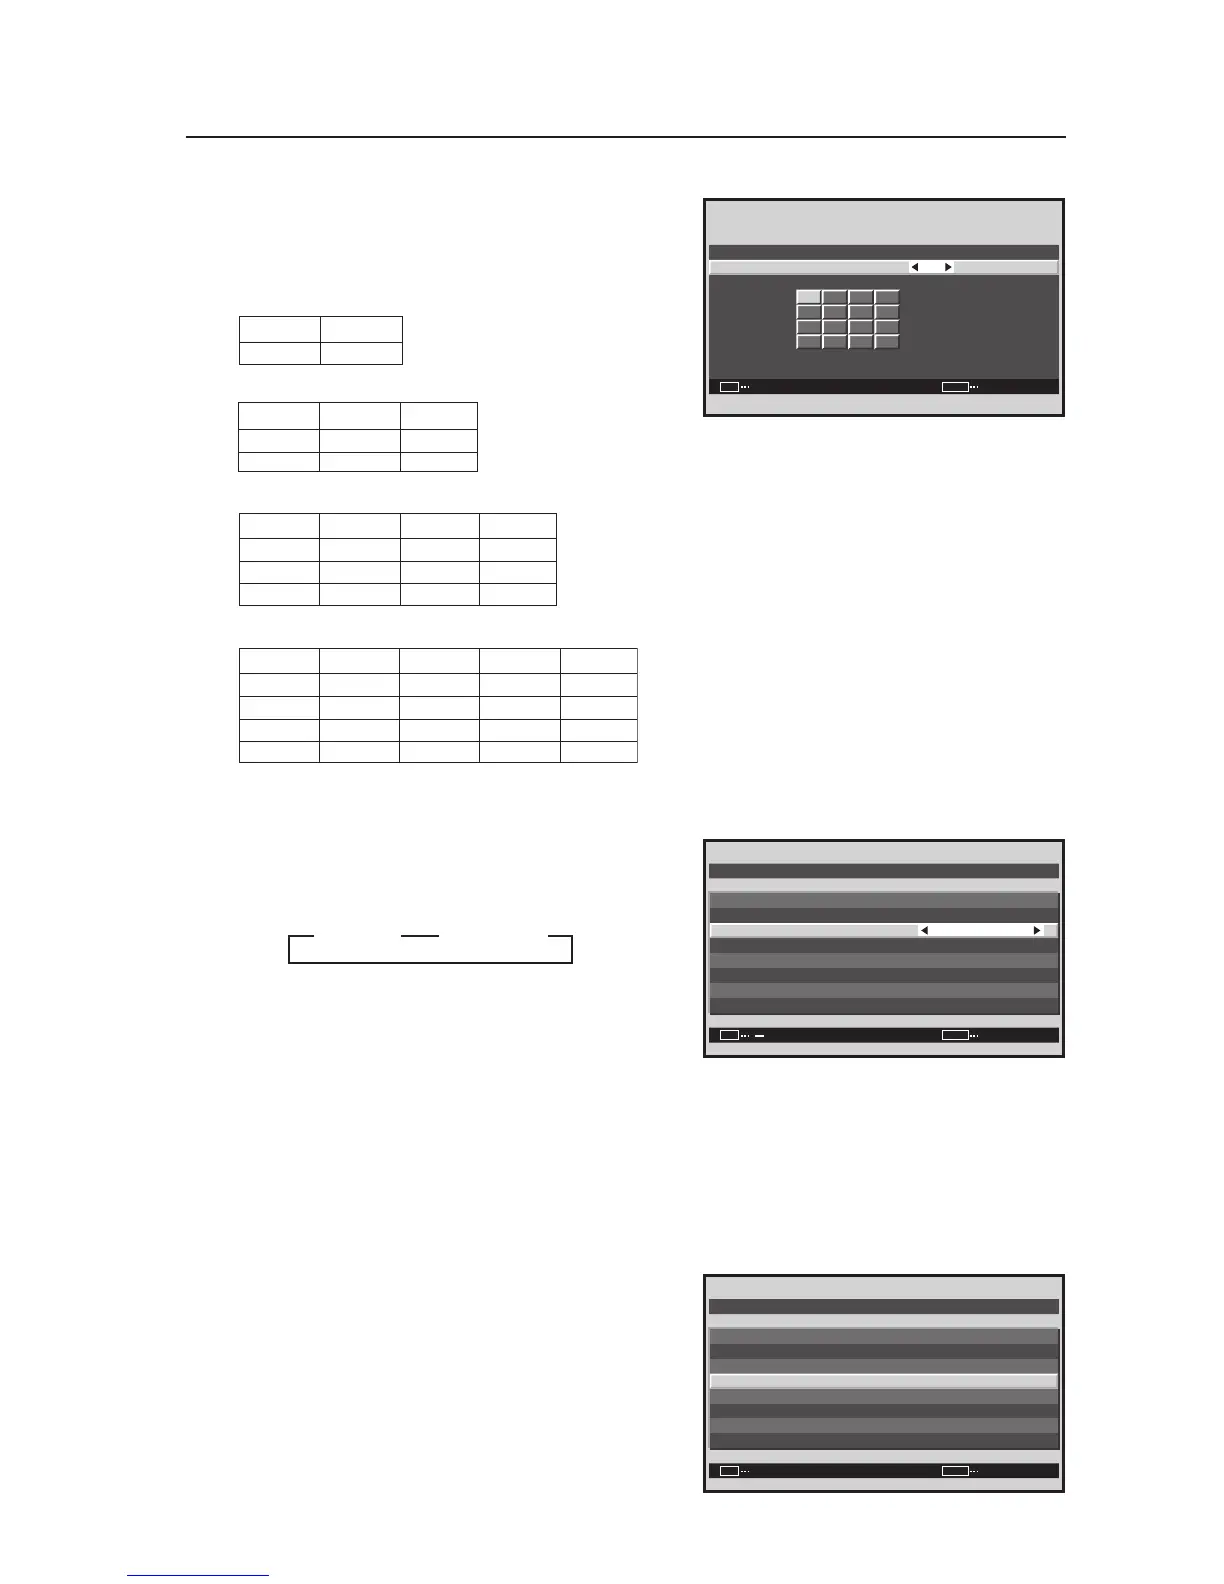
Screen 7
VIDEO WALL POSIT ION
16
POSITION NO.
:
SET
EXITSET
MENU
NO.1 NO.2
NO.3 NO.4
NO.1 NO.2 NO.
NO.4 NO.5
NO.2
NO.6
NO.6
NO.7
NO.1
NO.5
NO.9
NO.8 NO.9
NO.3
NO.7
NO.4
NO.8
NO.2
NO.7
NO.1
NO.6
NO.3
NO.8
NO.4
NO.9
NO.5
NO.10
3
NO.10 NO.11 NO.12
NO.13 NO.14 NO.15 NO.16
NO.11 NO.12 NO.13 NO.14 NO.15
NO.16 NO.17 NO.18 NO.19 NO.20
NO.21 NO.22 NO.23 NO.24 NO.25
Screen 8
VIDEO WALL
NORMAL
OFF
OFF
:
:
:
OFF
:
SET
EXIT
MENU
DIVIDER
T YPE
AUTO I D
P. ON DELAY
ABL L I NK
REPEAT TIMER
RETURN
POS I T I ON
3 NORMAL 3
33
ADJUSTED
Screen 9
VIDEO WALL
NORMAL
25
:
:
OFF
:
SET
EXITENTER
MENU
DIVIDER
POS I T I ON
T YPE
AUTO I D
P. ON DELAY
RETURN
 Loading...