84
4.9.3 Disassembling the display stand
1 Remove the screws (four locations on the left and right
sides) then take off the bracket. For packing reasons,
the bracket is mounted at a different location then the
final installation location.
2 Remove the rear cover.
Mobile Cart: PDK-5014
Screws
Screws
Bracket
Rear cover
Loosen the
finger screws.
Do not take out the screws.
Back casters
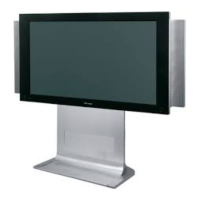
Display stand
Leg base
Hexagonal bored bolts
(M8 × 60)
Washer
Plate spring washer
Support caster
Label
4.9.4 How to install
In order to ensure safety during installation, always be sure to work with more than two people.
1 Assemble the unit
Attach the leg base to the display stand using the hexagonal bored bolts (M8 × 60) so that the rear label faces
towards the back casters (shown in the figure below).
Note
For safety, alternately tighten each bolt two times or more until they are firmly fixed in place.
 Loading...