7
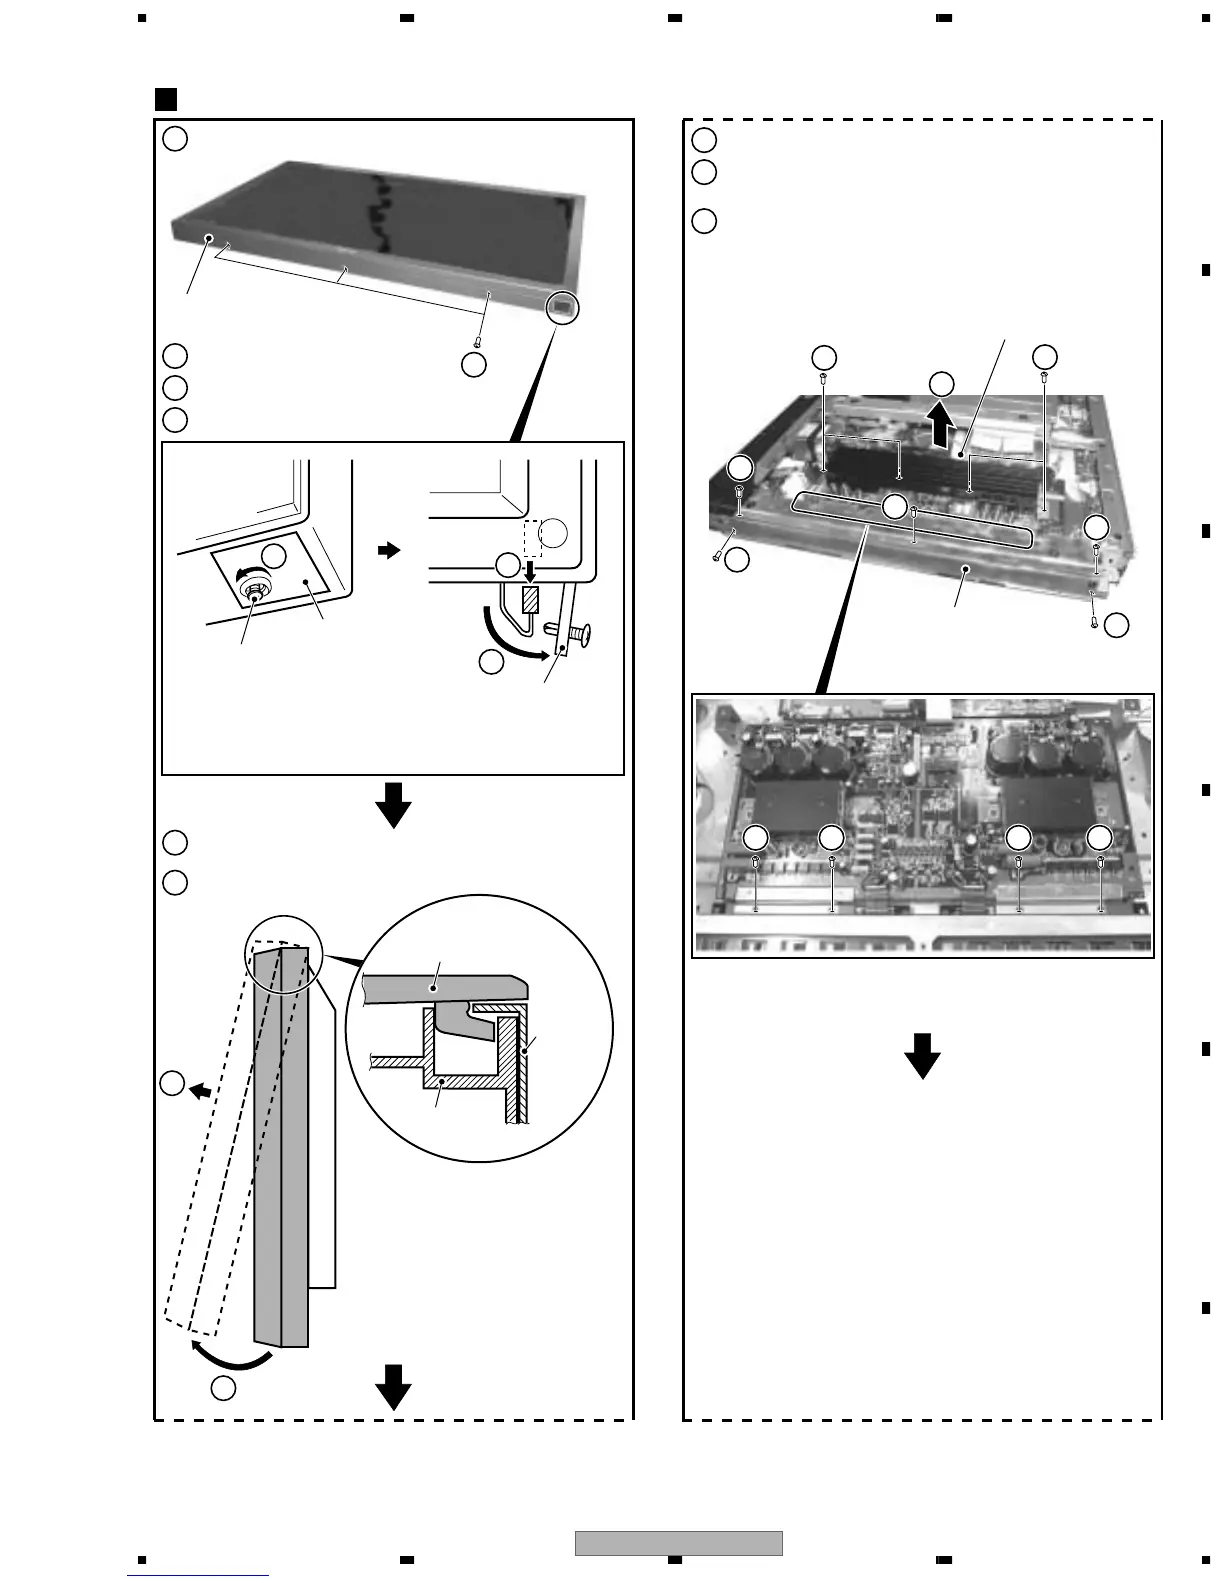
Remove the Rear Case 43P. (Screws × 19)
9
Remove the Front Chassis V. (Screws × 5)
8
Remove the Y DRIVE Assy.
(Connector, PCB Spacer × 3, Screws × 8)
1
Remove the three screws.
2
2
Loosen a rivet.
3
3
Remove the Lead Cover (P).
Rivet
4
Pull out a Flexible Cable.
5
5
6
6
Remove the Front Case 43 (P).
×3
Y DRIVE, SCAN (A), (B) Assy
1
Front Case Assy 43 (P)
Front Case Assy 43 (P)
Aluminum
Materials
Rear Case
Lead Cover (P)
Lead Cover (P)
44
Turn the rivet, taking care not to push
on it, because pushing on it may set
the rivet to its original position.
Remove the lead cover (P) together
with the rivet when the rivet is fully
loosened.
Detach the lower part of the Front Case 43 (P) so that it can
swing open hinged at the top.
The hook of the Front Case 43 (P) is
fixed with the Rear Case and the
aluminum material, as shown in the
illustration.
×2
8
×2
8
Y DRIVE Assy
Front Chassis V
8
9
9
9
9
9
8 8 8 8
 Loading...