87
PDP-503PE, PDP-503PU
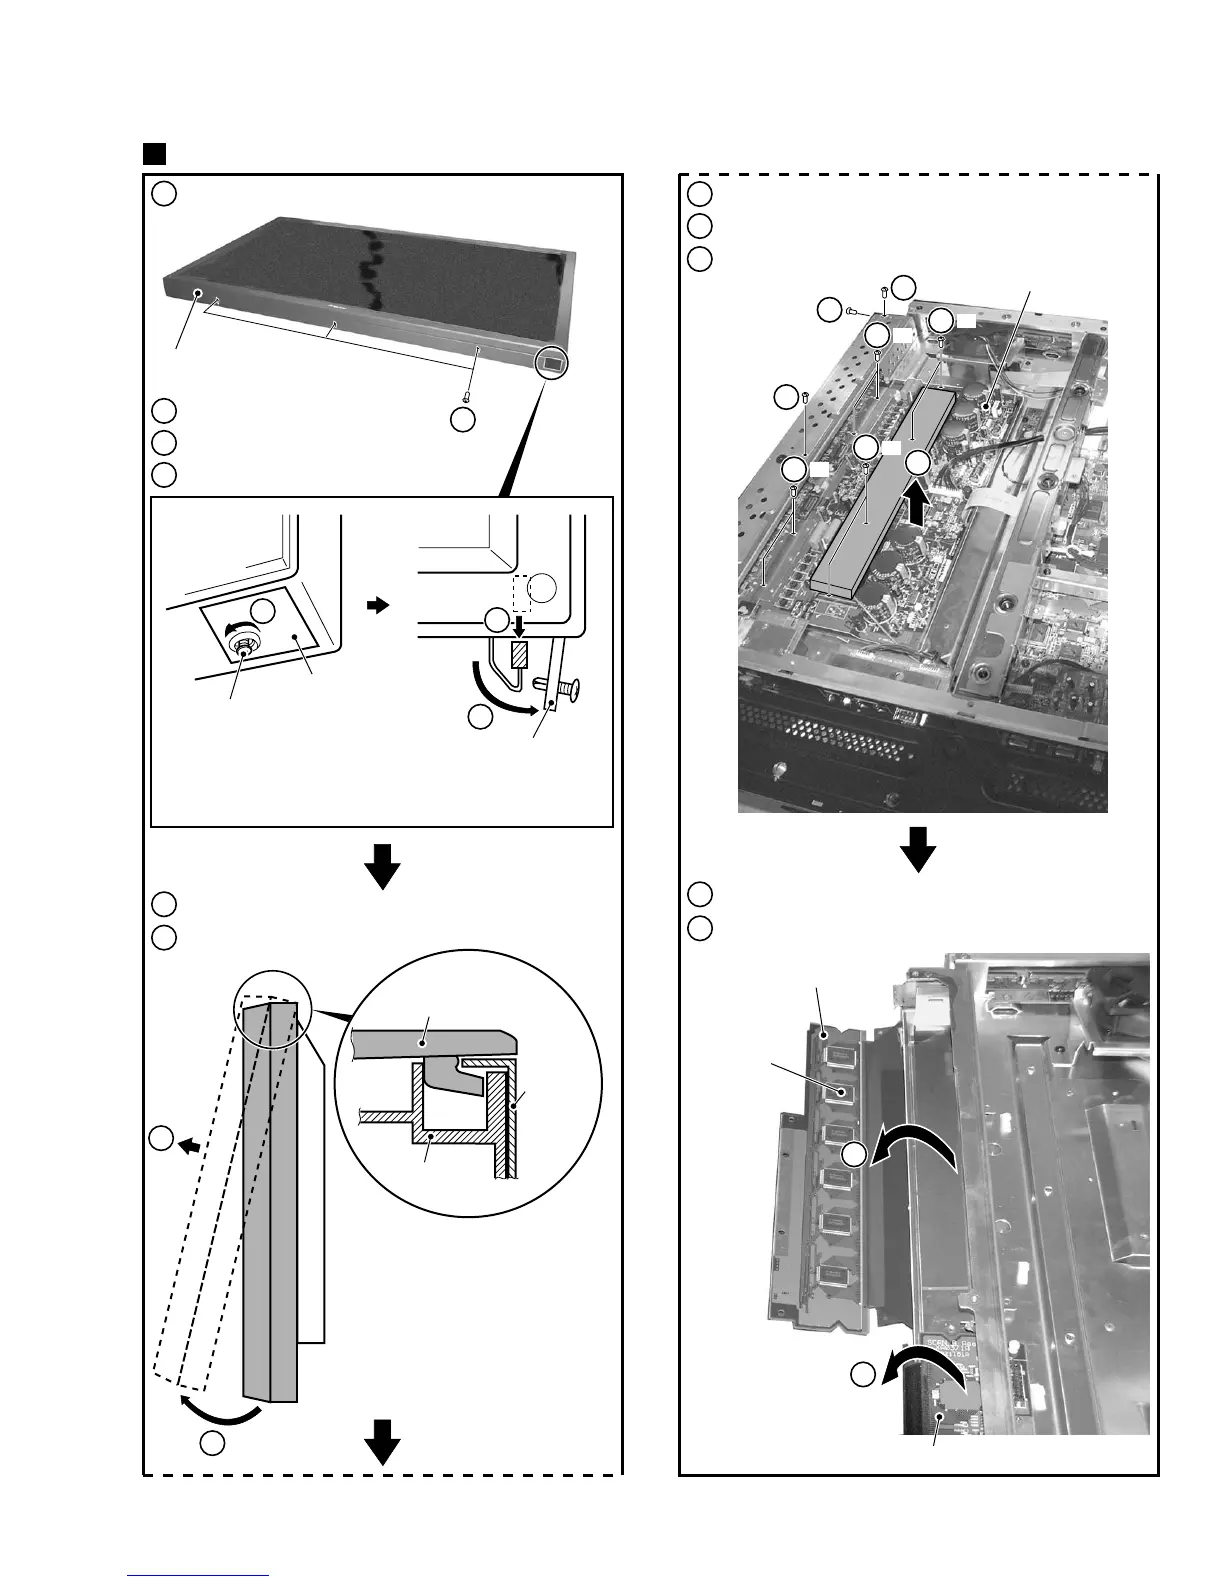
1
Remove the three screws.
2
2
Loosen a rivet.
3
3
Remove the Lead Cover (P).
Turn it not to press the rivet.
(Because when the rivet presses,
fit in once again.)
It is easy to remove when pull out
the Lead Cover (P) with the rivet
before completely removing the rivet.
Rivet
4
Pull out a Flexible Cable.
5
5
Remove bottom by the fulcrum at the top of Front Case 50 (P).
6
6
Remove the Front Case 50 (P).
×3
10
10
7
Remove the Rear Case (50P). (Screws × 19)
8
Remove the Y DRIVE Assy. (Connector, Screws × 8)
9
Remove the Front Chassis V. (Screws × 5)
10
Reverse the SCAN (A) and SCAN (B) Assemblies.
11
When it is necessary, exchange the ROM.
Y DRIVE, SCAN (A), (B) Assy
1
Front Case 50 (P)
Front Case 50 (P)
Aluminum
Materials
It is the structure that a hook of
Front Case 50 (P) was put between
with Rear Case and aluminum materials.
Rear Case
Lead Cover (P)
Lead Cover (P)
SCAN (A) Assy
ROM
×6
SCAN (B) Assy
44
×2
8
×2
8
×2
8
Y DRIVE Assy
×2
8
8
9
9
9
 Loading...