ENGLISH
9
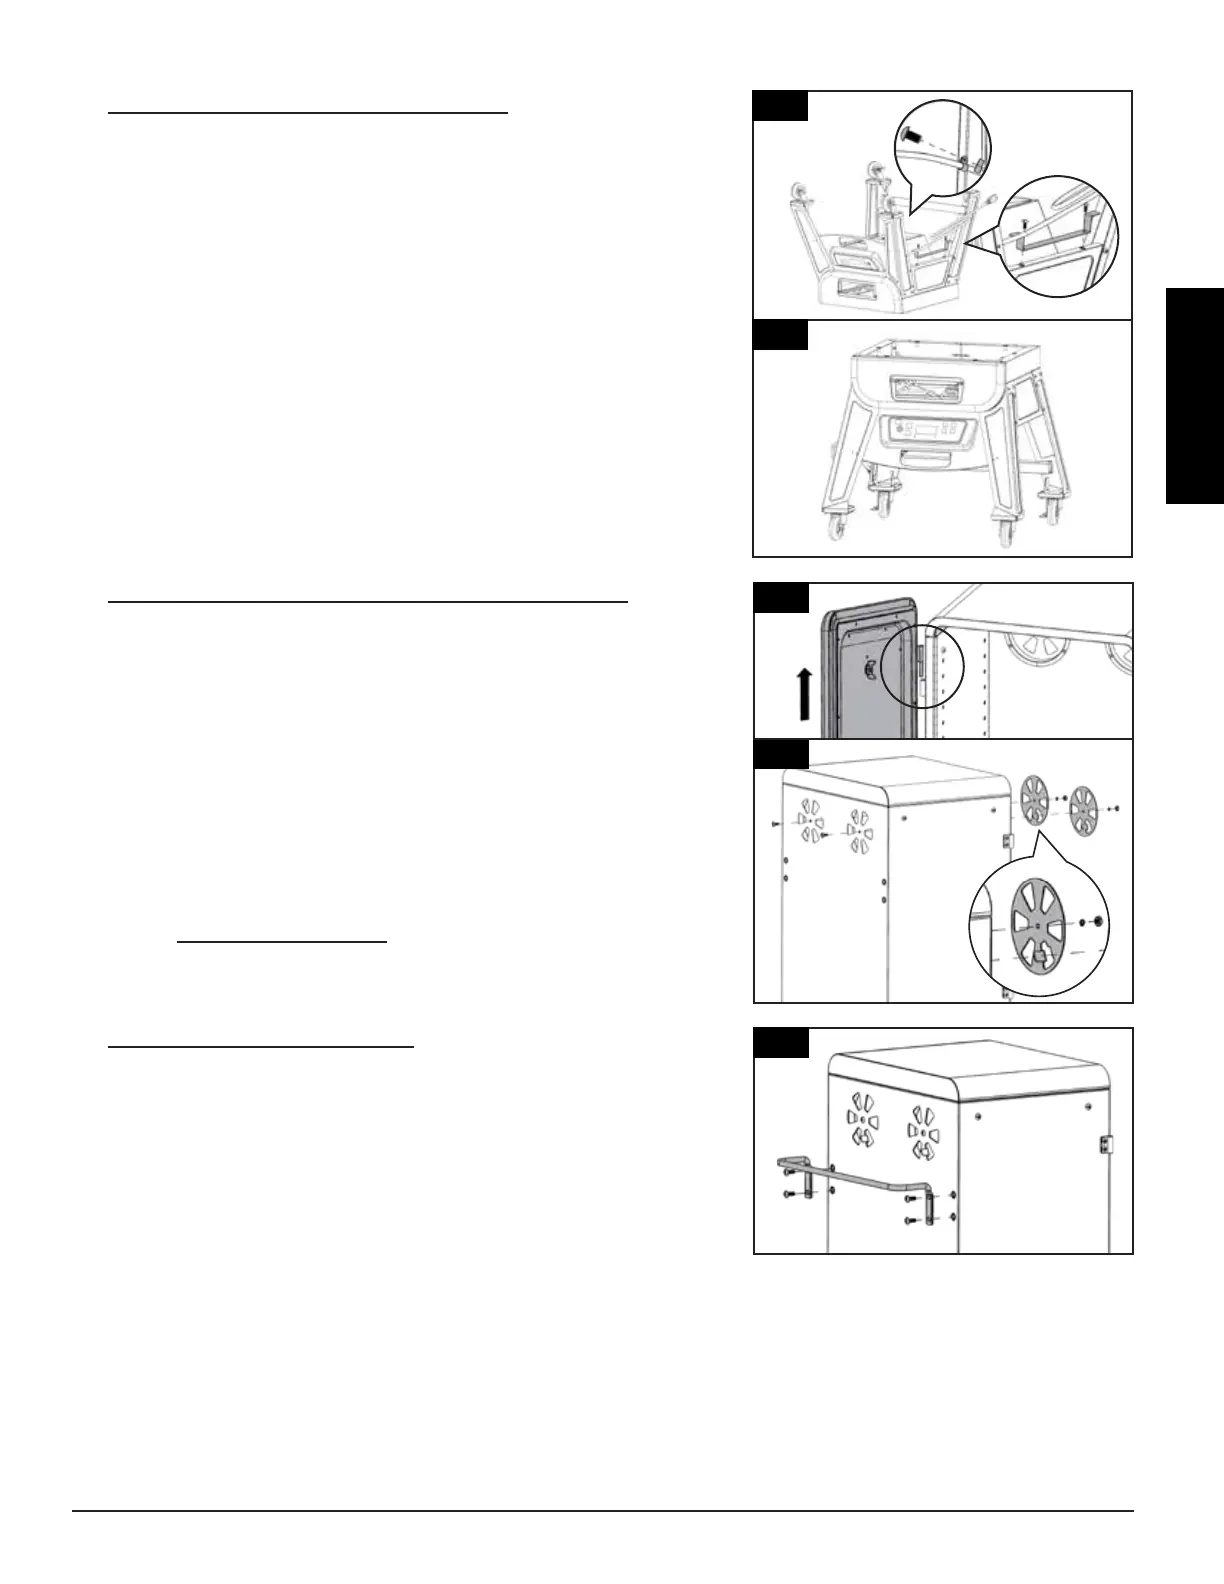
7.
Parts Required:
1 x Power Cord Bracket
(#19)
2 x #10–24x½" Screw
(#C)
Installation:
• Loosen the screw of the power cord clip on the support leg, and guide
the power cord through the power cord clip to secure.
• Locate the two holes on the bottom of the (left side) support bracket.
Mount the power cord bracket to the support panel using two screws
as shown in illustration 7. Once secure, wrap the power cord on the
bracket until unit is in use.
• Proceed to fully-tighten all screws on the cabinet base, then carefully
turn the cart upright with the wheels on the bottom. Note 7.
IMPORTANT: Ensure that all screws on the cabinet base are fully-
tighten to avoid screws falling out when the unit is moved.
8.
Parts Required:
1 x Main Cabinet
(#9)
2 x Damper Vent
(#3)
2 x #10–24x½" Screw
(#C)
2 x #10-24 Lock Nut
(#D)
2 x M5 Locking Washer
(#E)
Installation:
• First, lift the main cabinet door off the hinges, and place aside. Note 8.
• Place one screw from the outside of the main cabinet into the center
of each damper. Next, insert a damper inside the main cabinet with
the raised tab facing the rear, and secure the screw from the exterior
using a locking washer and lock nut. Repeat same installation for
second damper, as shown in illustration 8.
9.
Parts Required:
1 x Back Handle
(#4)
4 x ¼–20x⅝" Screw
(#A)
Installation:
• Mount the handle onto the back side of the main cabinet using four
screws. Note correct position as shown, with handle on top.
7
7
8
9
8
19
8
9
3
3
4
 Loading...