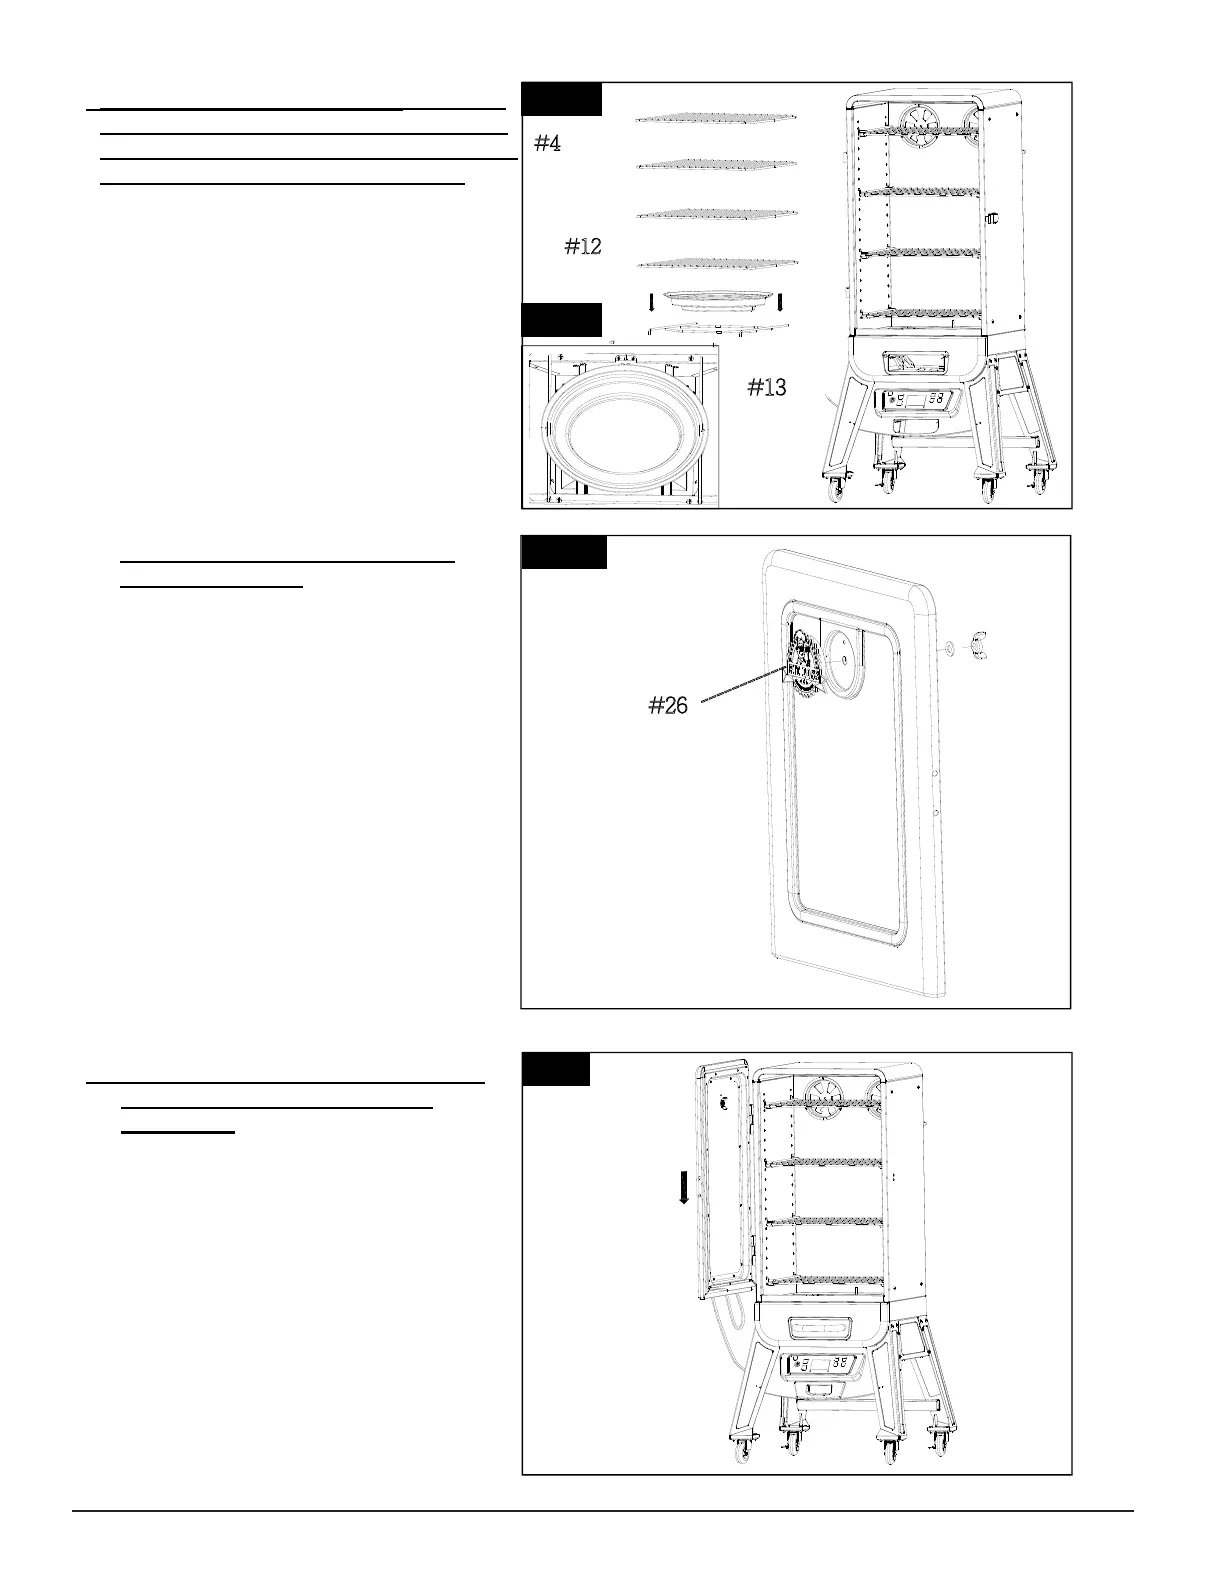
13
13.
PLACING WATER PAN AND WATER PAN
SUPPORT ONTO THE BOTTOM AREA OF
CABINET AND PLACING COOKING GRIDS
INTO THE COOKING GRID SUPPORT
Parts Required:
4 x Cooking Grid (#4)
1 X Water pan Support (#13)
1 x Water Pan (#12)
Installation:
•Place Water Pan Support (#13) and Water
Pan (#12)onto the bottom area of Cabinet
and place four Cooking Grids(#4)into the
Cooking Grid Support as Fig.13.1 &
Fig.13.2 shown.
14.
MOUNTING LOGO PLATE TO THE
DOOR ASSEMBLY
Parts Required:
1 x Door Assembly (#8)
1 X Logo Plate (#26)
Installation:
Note: The Logo Plate is supplied with
one fiber washer and one wing nut.
Installation:
•Insert Logo Plate (#26) mounting thread
pole through the mounting hole in the
front of the Door Assembly(#8). From the
inside of the door, place fiber washer and
wing nut onto the mounting thread pole
and tighten by hand as Fig.14 shown.
15. ATTACHING DOOR ASSEMBLY INTO
THE UPPER SMOKER CABINET
ASSEMBLY
Fig.15
Fig.14
#26
-
-
-
--
--
--
--
Parts Required:
1 x Door Assembly (#8)
1 x Upper Smoker Cabinet
Assembly (#2)
Installation:
•Attach Door Assembly (#8) into the
Upper Smoker Cabinet Assembly(#2)
as Fig.15 shown.
Fig.13.1
Fig.13.2
#4
--------
#12
--------
-------