1-14
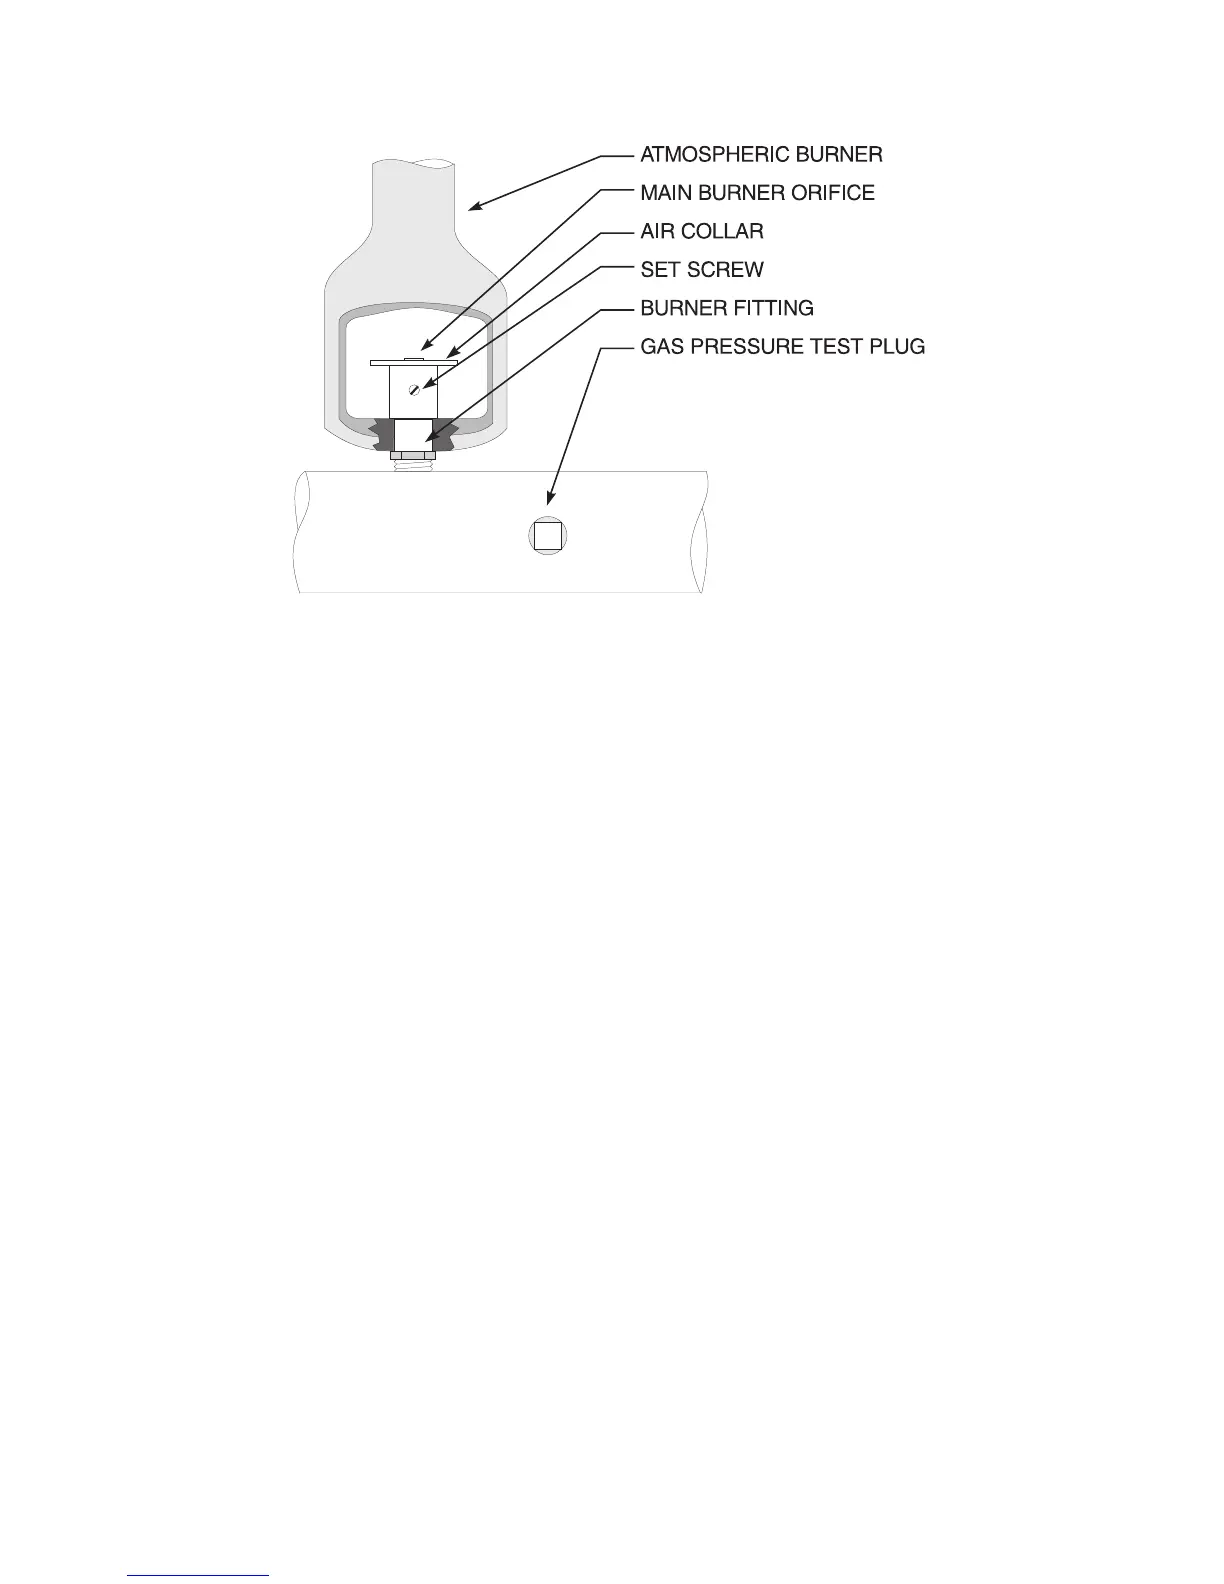
Figure 1-4 Air Collar
g. Now that the pressure is set for proper operation, set the main burner flame. Unlock the
air collars by loosening the set screw for the collars. Open the main gas valve, (light the
pilot if fryer has manual pilot), and turn thermostat to light the main burners.
h. Adjust the shape and size by raising or lowering the air collars to achieve a soft blue flame
with well defined inner cones.
i. When the flames have been properly adjusted, lock the collars in place with the set screw.
1.5.4 INITIAL CLEANING
When the fryer is shipped, many of its parts are covered with a thin coat of oil for protection. Before
the fryer is ready for cooking it must be cleaned. This will remove the oil coating and any foreign
matter that may have accumulated during storage and shipment. Perform the cleaning as described
below.
a. Fill the fryer with water. Turn the fryer on and set the thermostat to 200°F.
b. Allow the fryer to heat for 15 minutes. Add Pitco cleaner, stirring with the fryer cleaning
brush to ensure cleaner has dissolved thoroughly.
NOTICE
Do not leave the fryer unattended during cleaning. Never let the water level
go below the "Min Level" mark on the back of the tank.