142
Mini100/Mini2
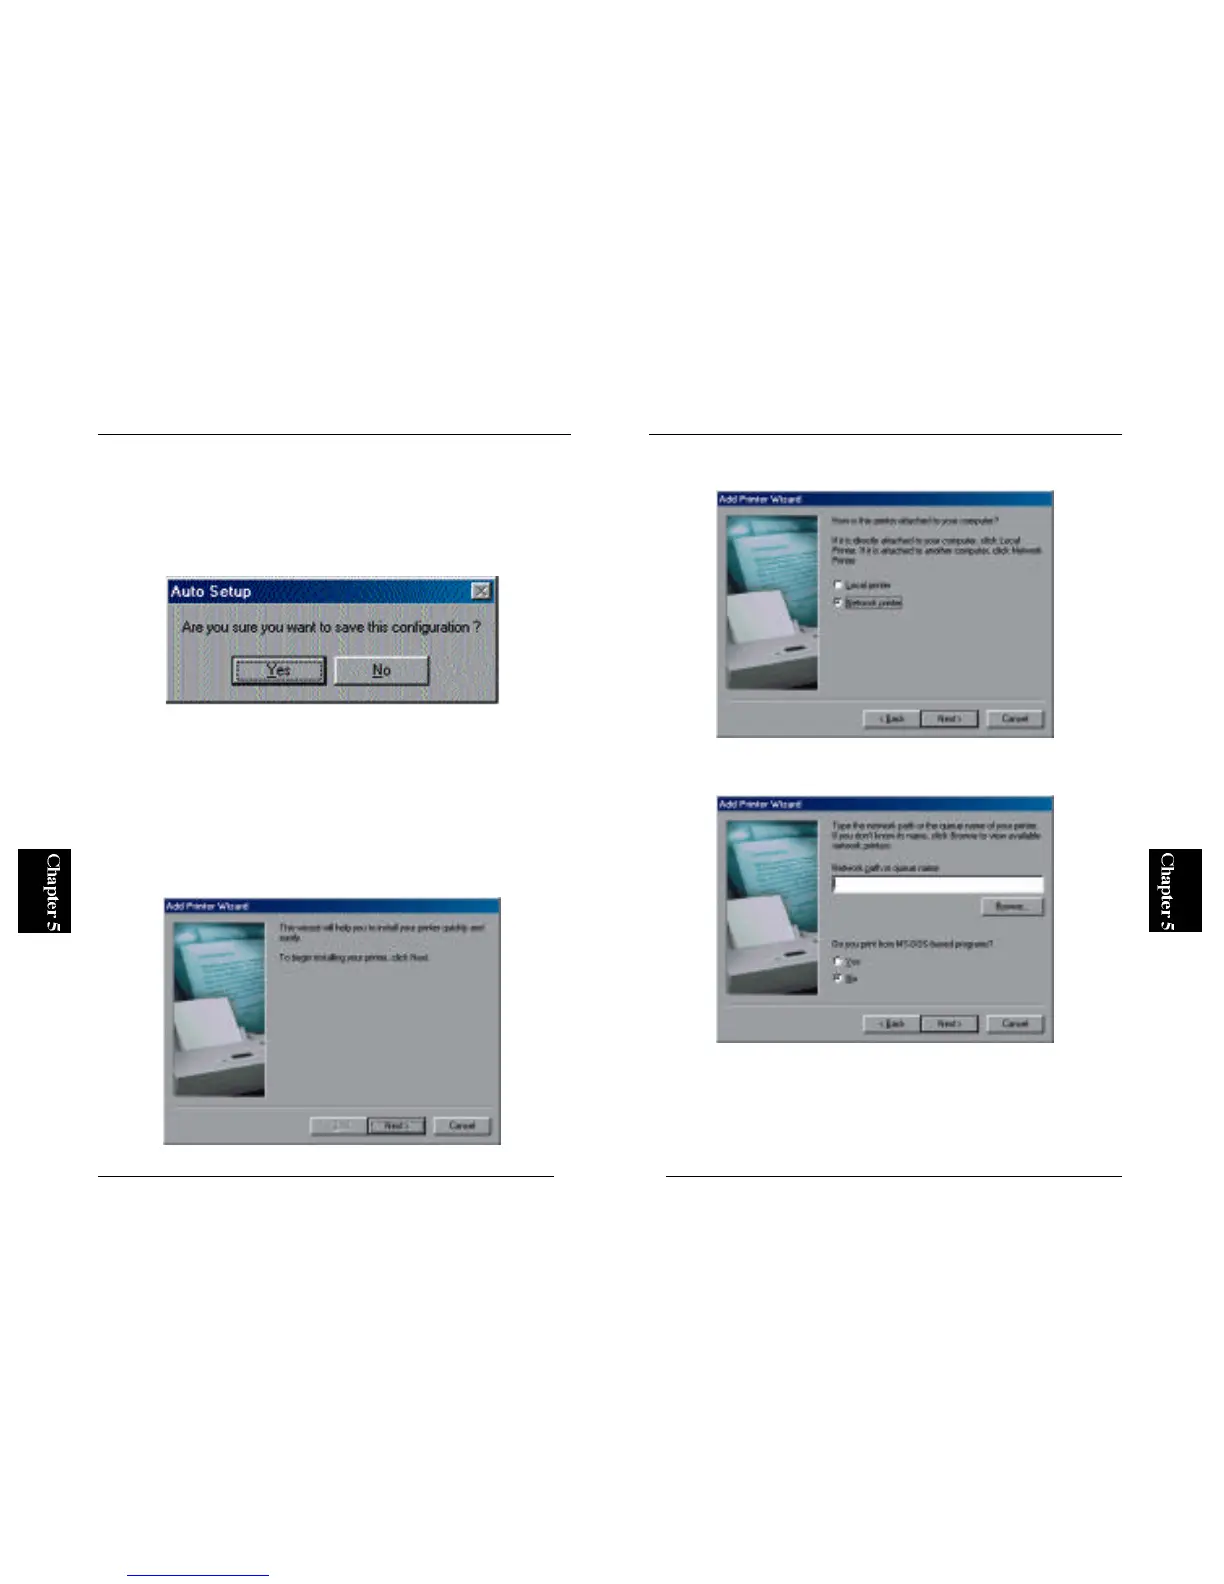
2. In the next screen, select Network Printer and click on the Next button.
3. Select the Browse button.
4. In the next screen, double-click on the name (icon) of your NetWa r e
s e r v e r. A previously created print queue will be displayed. Select this
queue and click on the OK button.
141
Mini100/Mini2
5. The wizard will ask you whether you wish to save the new configuration.
Select “Yes” to save the new settings.
6. After a while, the Smart Print Manager 2 screen will be displayed again.
Now a print queue for the print server has been created on your NetWare
server.
※ To enable the print server on client PCs, please refer to Section 5-4-c.
● 5-4-b Configuring a Client PC
When printing via a server, each client will issue a print request to the server
rather than to the print server itself.
1. From the Start button, select Settings and then Printers. Double-click the
Add Printer icon, and click on the Next button.