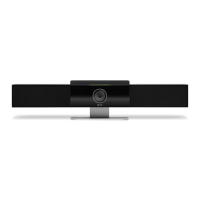
Using Poly Studio
Once you plug in the power cable, you can start using the Poly Studio device.
Connect the Poly Studio device to your laptop or computer with the USB cable. Additionally, you can also connect it to
your Bluetooth host devices.
Set Poly Studio as the Default Audio and Video Device
If you use the Poly Studio device with a supported application for video calls, you may need to set Poly Studio as the default
audio and video device for your application.
For a better experience, Poly recommends that you use your Poly device as both the audio and video device for your
meetings. Mixed video and audio sources may impact the performance of certain features. Possible scenarios include:
• If you don’t use the device’s speaker, Audio Echo Cancellation (AEC) may not work and the camera may have issues
tracking the speaker in the room.
• If you don’t use the device’s microphone, the LED indicator can’t show the audio mute status of your meeting.
The following is a general procedure that you can refer to. Your application may use different terms or categories.
You can configure the device to use the external expansion microphone or automatically adjust the input source via
provisioning. For more information, see the Poly Studio Parameters Reference Guide.
Task
1 Go to your conferencing application’s Settings.
2 Find Audio Device and Video Device.
3 Choose Poly Studio as the device for each category, then select Save.
Important: Make sure you use the same Poly Studio audio source. For better audio quality, if you connect the Poly
Studio device to a computer over USB and Bluetooth at the same time, make sure you use the USB option for both
audio input and output of your meeting.
Using Camera Presets
Save two settings for pan, tilt, zoom, and focus for the Poly Studio camera.
Use the presets to adjust the camera to your saved angle directly when group framing and speaker tracking mode is off.
Save a Camera Preset
The two numbered buttons on the Poly Studio remote control serve as preset shortcuts.
Turn off the tracking mode before you use camera presets.
Task
1 Adjust the camera to the desired position.
2 Long press the 1 or 2 button on the remote control.
The middle LED lights glow white for 3 seconds with a notification sound.
Important: If the button already has a saved setting, your new setting overwrites it.
Load a Camera Preset
If your camera doesn’t track the speaker, use the preset buttons on the remote control to adjust the camera angle.
Turn off the tracking mode before you use camera presets.
Task
» Press the 1 or 2 button on the remote control to load the camera preset for the corresponding button.
11

 Loading...