Configure a Provisioning Server for Poly Studio USB Device
You can configure a provisioning server for the Poly Studio USB video bar USB device through Polycom
Companion.
Make sure that the Poly Studio USB video bar USB device connects to a Wi-Fi network before connecting
it to a provisioning server.
Ask your network administrator for the provisioning server used in your deployment before you choose
the Server Type.
Note: If you select Auto provisioning mode, make sure that you already have the provisioning server
address, user name, and password in your DHCP option 66 or 150. For example, https://
username:password@company.com.
Procedure
1. Connect the Poly Studio USB video bar USB device to your computer, then select the Poly Studio
USB video bar tile from your Polycom Companion.
2. Go to Admin Settings > Provisioning Server.
3. Select Provisioning Mode and choose one of the following options:
▪ Disable: Disables the provisioning mode.
▪ Auto: Gets the provisioning server URL from your DHCP option 66 or 150.
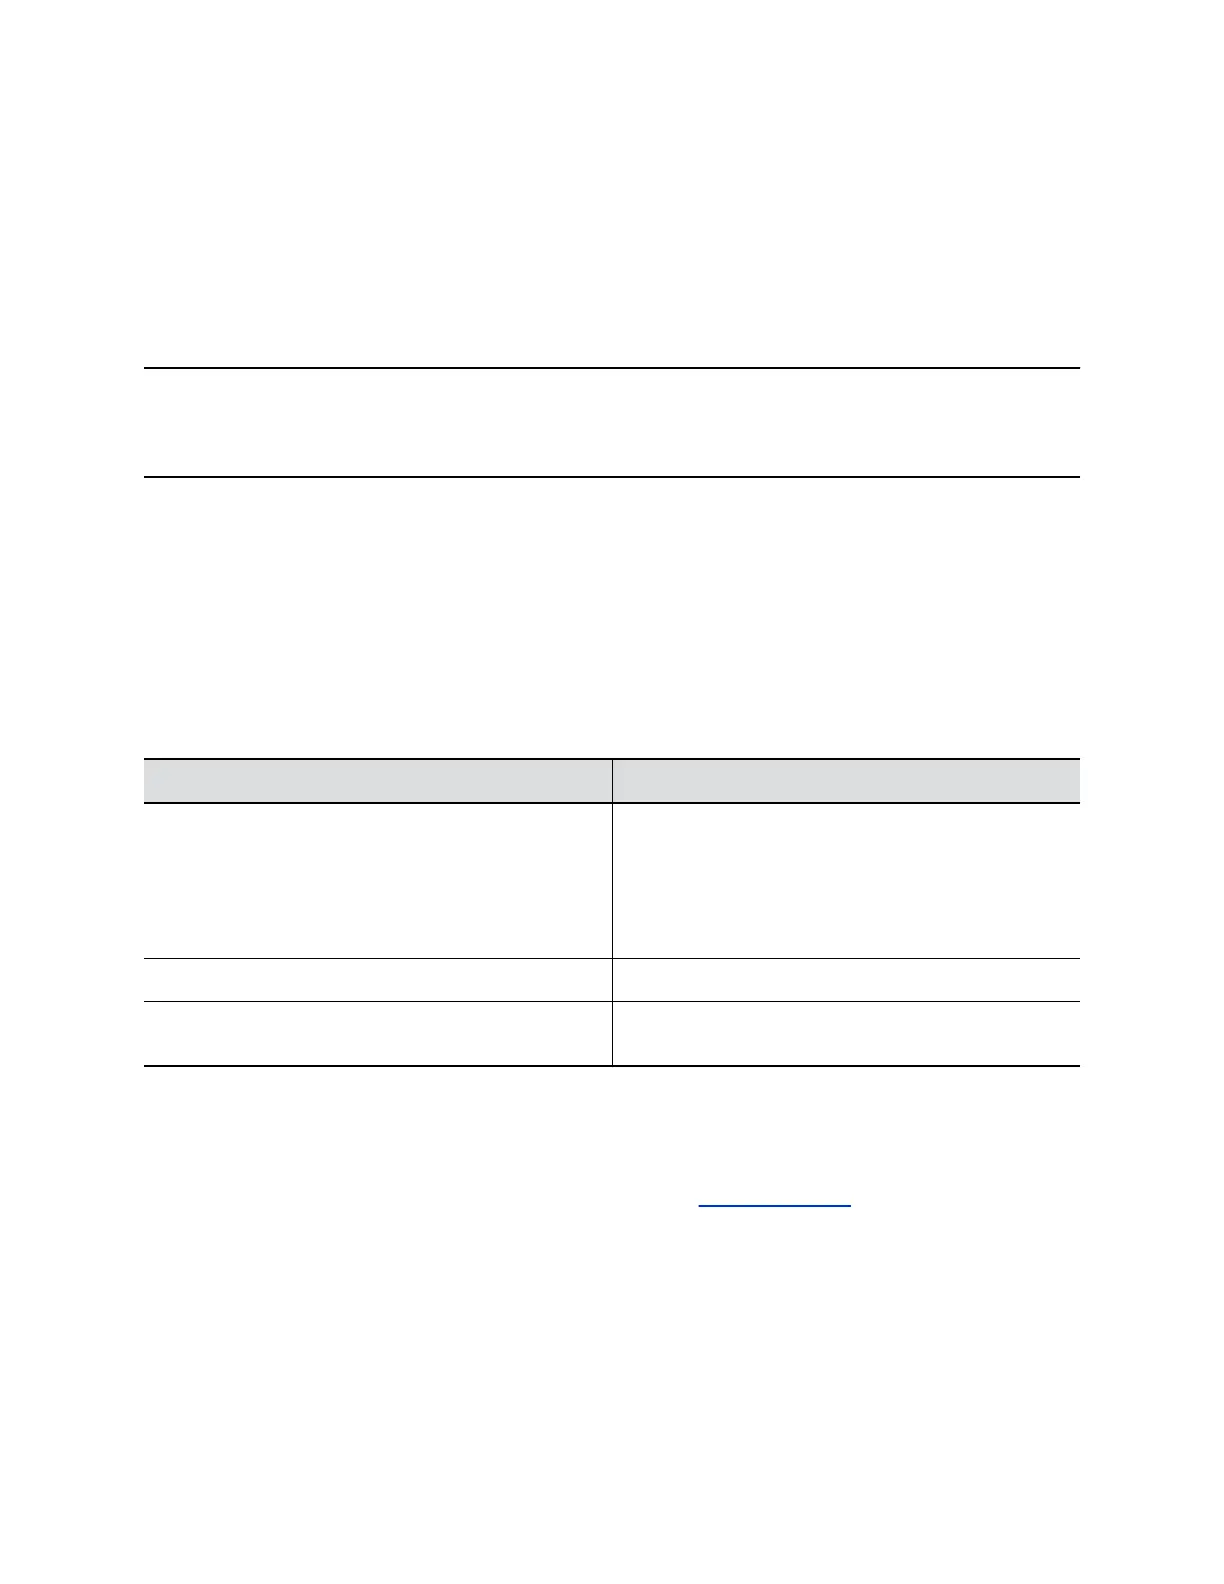
▪ Manual: Configure the following parameters:
Parameter Description
Server Type Selects one server type from the drop-down list.
Selects Polycom Provisioning Services for PDMS-E
or Polycom RealPresence Resource Manager.
Use HTTPS Server and FTPS Server for your own
provisioning server.
Server Address Specifies the server address.
User name and Password Specifies the user name and password to log in to the
provisioning server.
4. Select Save.
You can check the provisioning status in Status > Provisioning Server.
For information about the parameters that Polycom RealPresence Resource Manager system or
the PDMS-E service uses to manage your Poly Studio USB video bar USB device, refer to the
Poly Studio Provisioning Reference Guide available on Polycom Support.
Configuring Poly Studio Using Polycom Companion
24