28 EGW06-PCPEG-20140813
TM
TM
Section IV: Installation
CURB MOUNTING
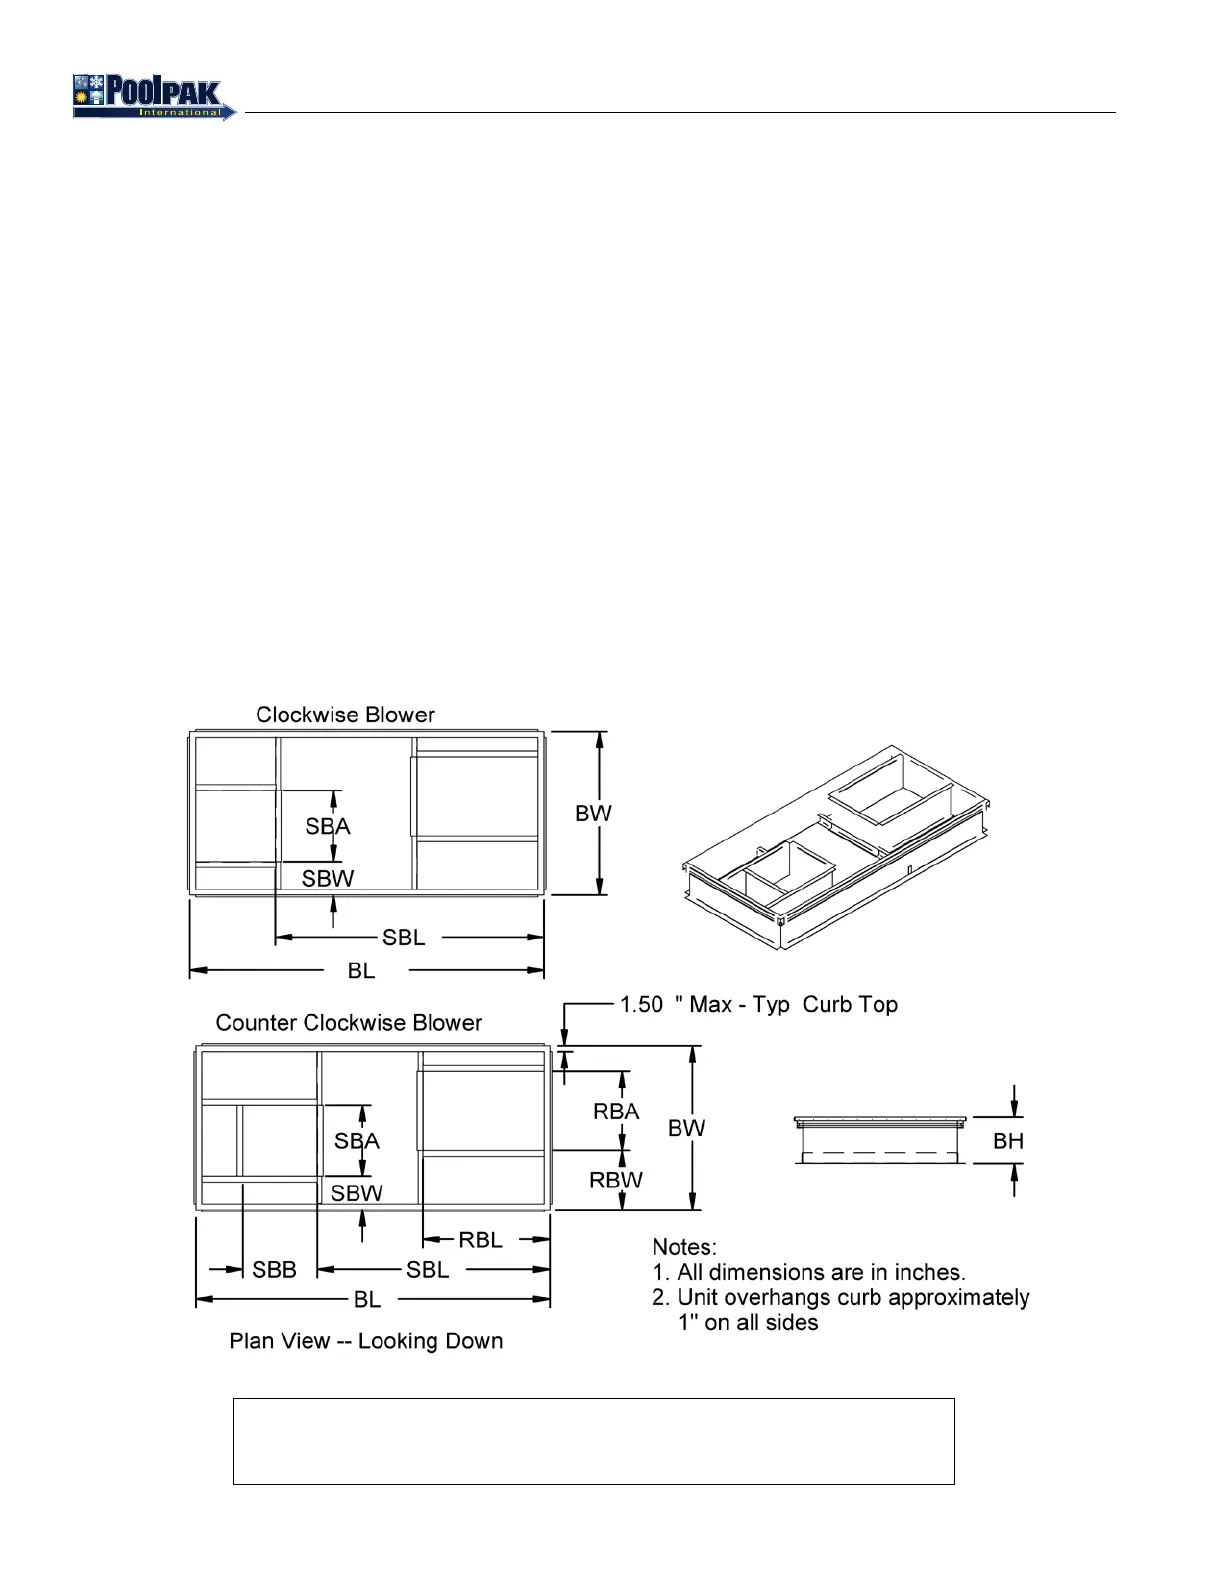
Illustrated in gure 4-2 is a curb that has been designed specically for the PoolComPak™ product line. The outside
dimensions of the curb are such that the base of PoolComPak™ extends over the edge of the curb all the way around.
This aids in preventing rainwater from getting between the base of the PoolComPak™ and the curb.
It is the installing contractor’s responsibility to complete the following:
• Flash the curb into the roof
• Insulate the curb
• Connect the supply and return duct to the curb’s duct support rails.
• Connect condensate drain line with appropriate trap
• Seal the curb to the bottom of the PoolComPak™ using the gasket supplied with the curb
• Provide counter ashing between curb and PoolComPak™ unit.
• Seal the pool water pipes where they go through the curb
If specied when ordering, all water piping connections can be made through the curb. These water connections include:
pool water, condensate, auxiliary hot water coil (optional).
If the PoolComPak™ is to be mounted on a curb, the unit must be ordered with the “outdoor” option. PoolComPak™
Units produced for curb mounting receive special weatherizing and insulation that non-curb mounted PoolComPak™
Units do not receive.
Figure 4-2. PoolComPak™ Curb Assembly
PCP_EG_CurbDimensionsIdentication_20121204.tif
NOTE
If the factory is not notied that a PoolComPak™ is to mounted outdoors, the unit
will not be weather tight, it will leak and it will not be properly insulated.