Installation
6
Powerware
®
5105 User’s Guide S 05146193 A Uncontrolled Copy
NOTE Low voltage models may not recognize 50-Hz outlets. If the UPS does not start
when connected to a 50-Hz outlet, unplug the UPS. Press and hold the On
button for
3 seconds to start the UPS on battery and reconfigure the nominal input voltage to
110V (see ”Configuration Mode” on page 13). Turn the UPS off. Wait for 30 seconds.
Then plug the UPS into the outlet.
4. Plug the equipment to be protected into the UPS output
receptacles.
DO NOT protect laser printers with the UPS because of the
exceptionally high power requirements of the heating elements.
5. Start the UPS by pressing the On
button as shown in Figure 2.
The Power On indicator illuminates indicating that power is
available from the UPS output receptacles.
The installation is complete. To learn how to operate the UPS,
see “Operation” on page 9. To change the factory-set defaults,
see “Configuration” on page 13.
NOTE The batteries charge to 90% capacity in approximately 4 hours. However, it is
recommended that the batteries charge for 24 hours after installation or long-term
storage.
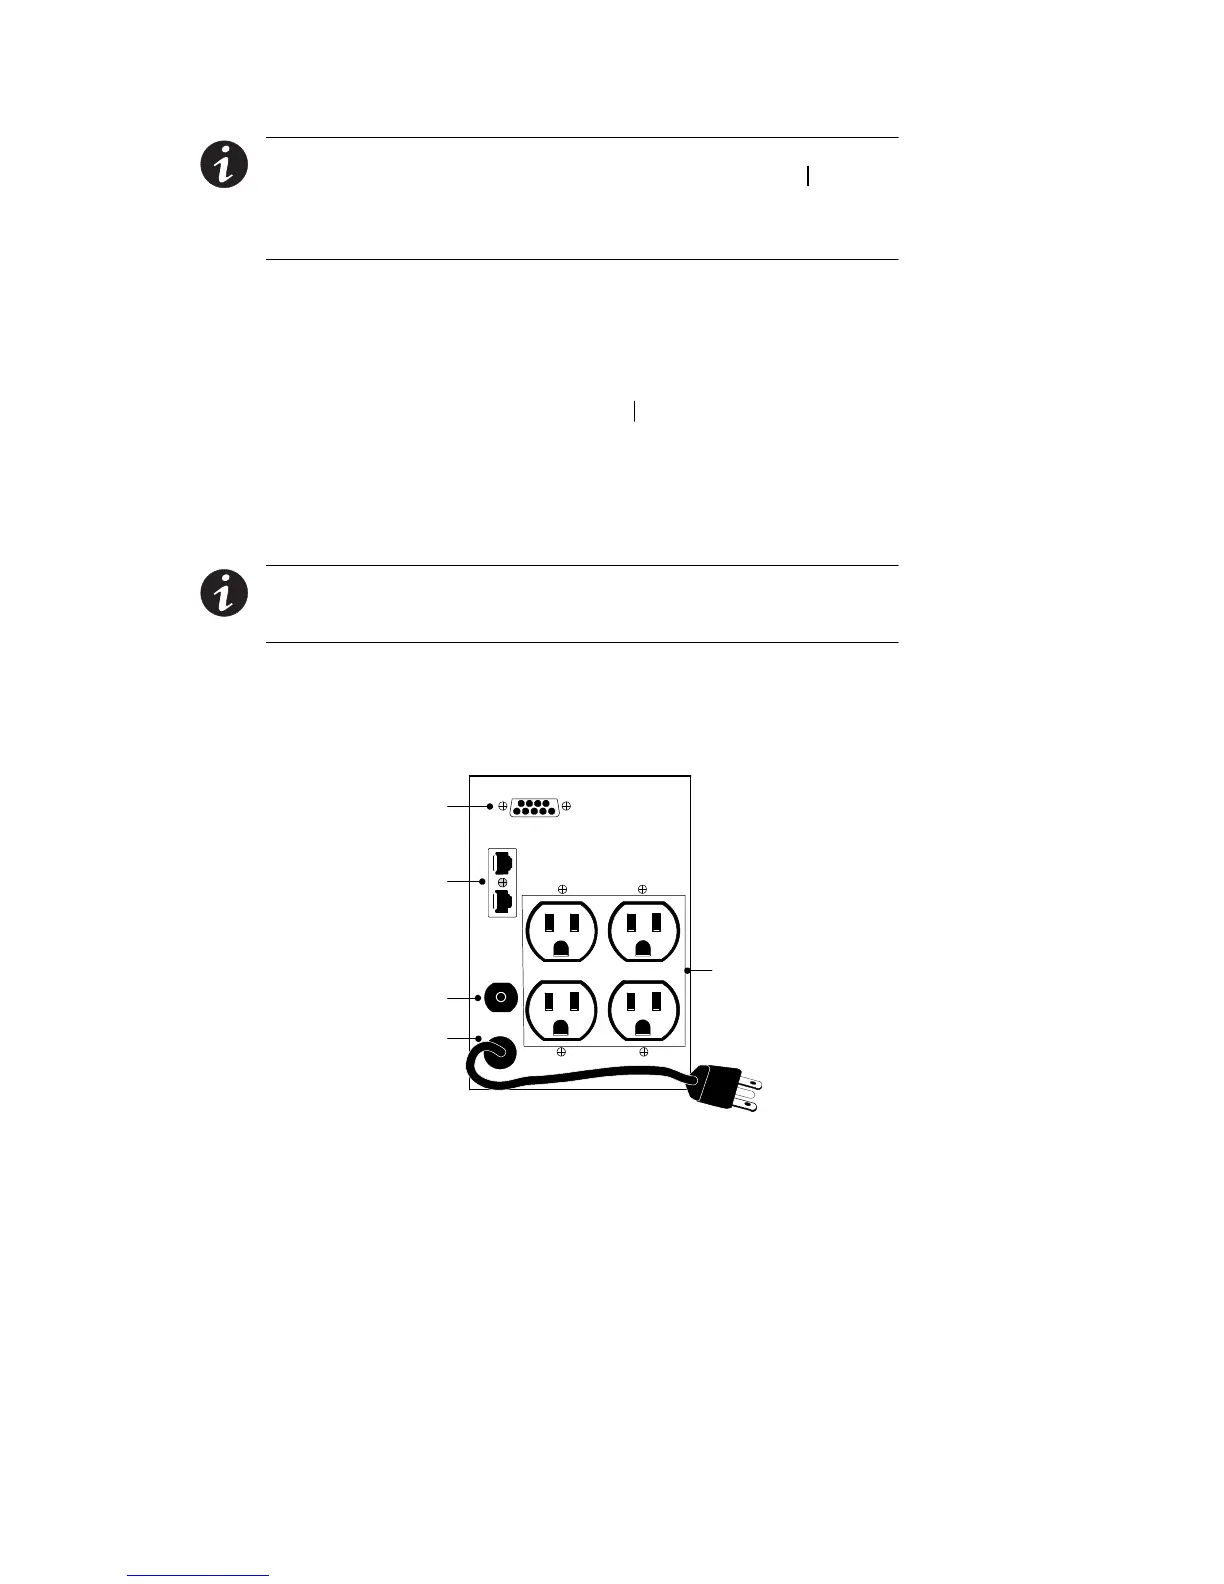
UPS Rear Panels
This section shows the rear panels of the Powerware 5105 models.
Communication Port
Four 5-15 Receptacles
Network Transient
Protector
6-ft Power Cord
with 5-15 Plug
Reset Button
Figure 4. 450–700 VA, 120V Rear Panel