Creating Discs on a PC 23
2. Click on the Center the Print Image and then the
Properties button. The printer will begin printing the
calibration test print.
3. When the print is complete, rotate disc 180º
and put the disc back in the input bin and
repeat step 2 using the same disc.
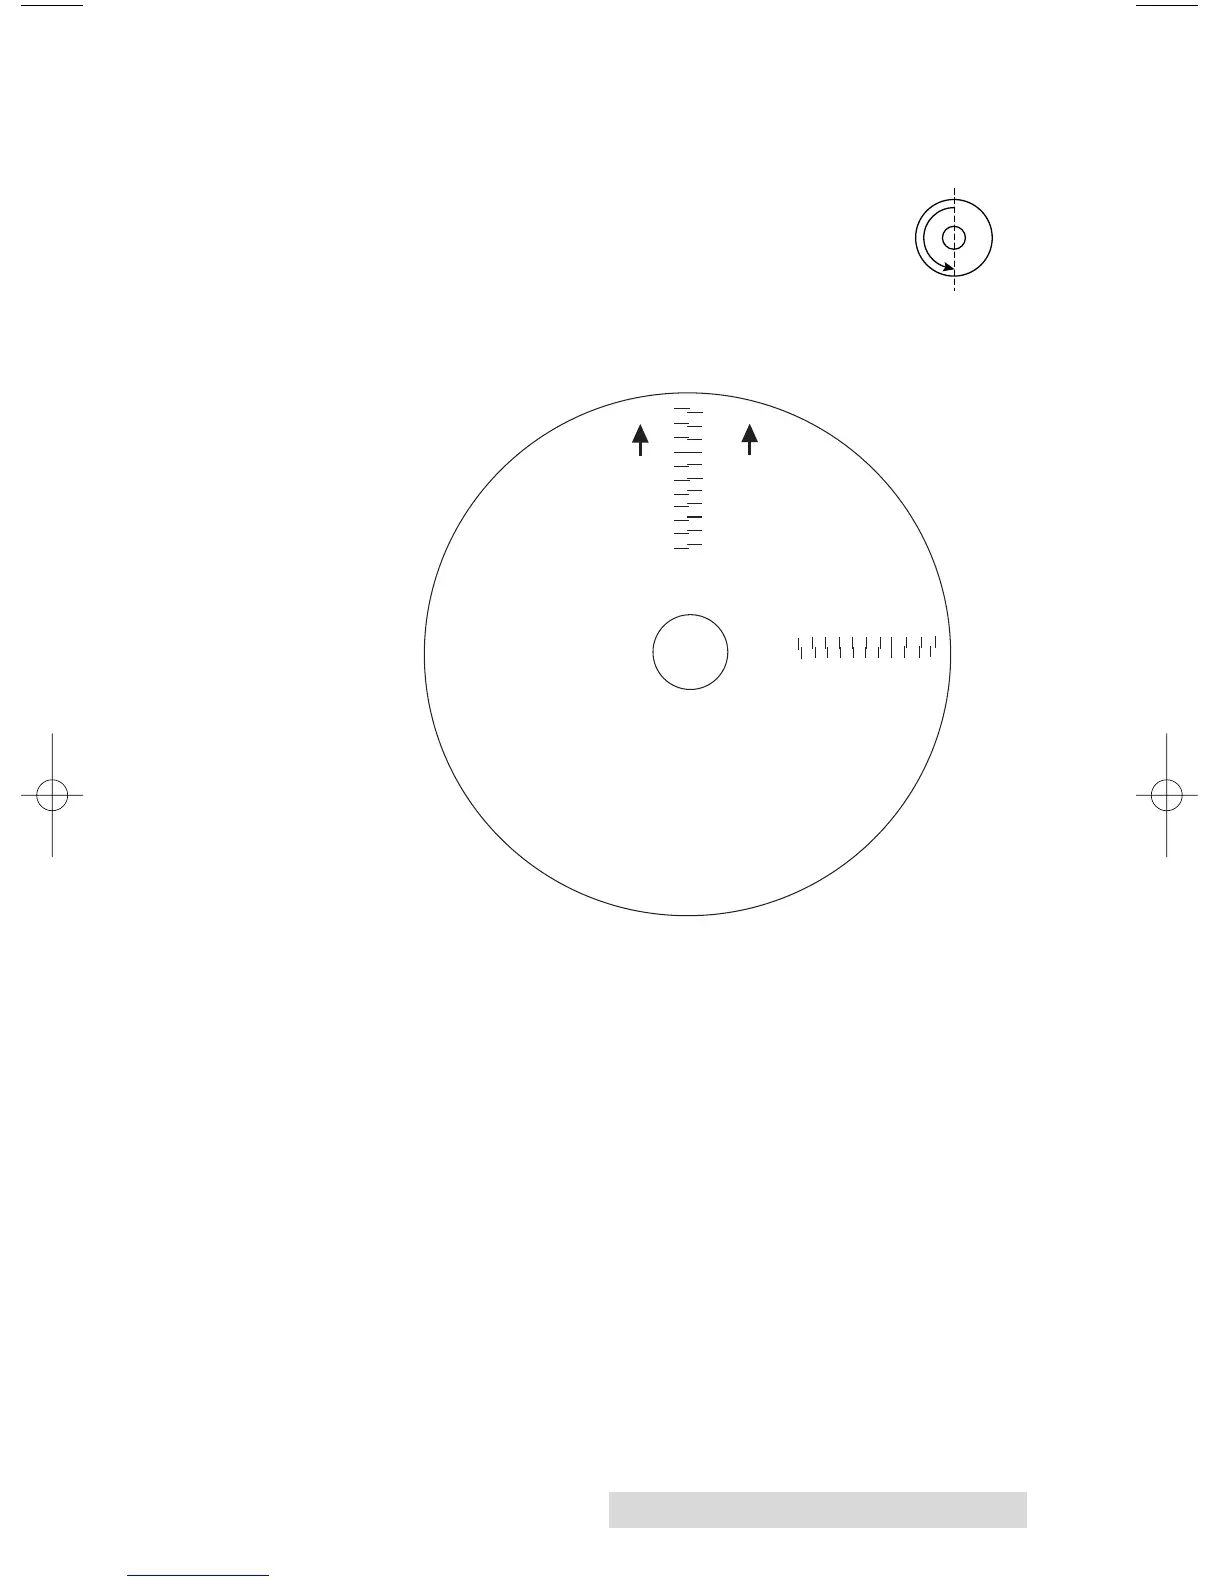
4. When the second run of the print is complete, you should
have a test print that looks similar to the following:
5. Along the Vertical axis of the printed disc, find the number
whose lines touch. For example, in the above illustration,
Enter the number 2 into the Vertical box of the Calibration
window and 0 for the Horizontal axis.
6. Select the OK button. Your images should now be centered
when printed on a disc.
After your selections have been made, close out of the
printer setup window. You are now ready to go to an
application program and print. All printer driver selections
will stay the same until you change them.
and print again.
 Loading...