12
64
27
36
1
1
1
10
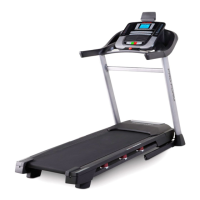
10. Identify the Right and Left Trays (27, 36).
Attach the Trays (27, 36) to the Console Base
(64) with eight #8 x 1/2" Screws (1); do not
overtighten the Screws.
Reattach the Console Frame (18) with the six #8
x 3/4" Screws (2) and the two Console Clamps
(41) that you removed in step 9; do not over-
tighten the Screws.
1
18
41
41
2
2
2
2
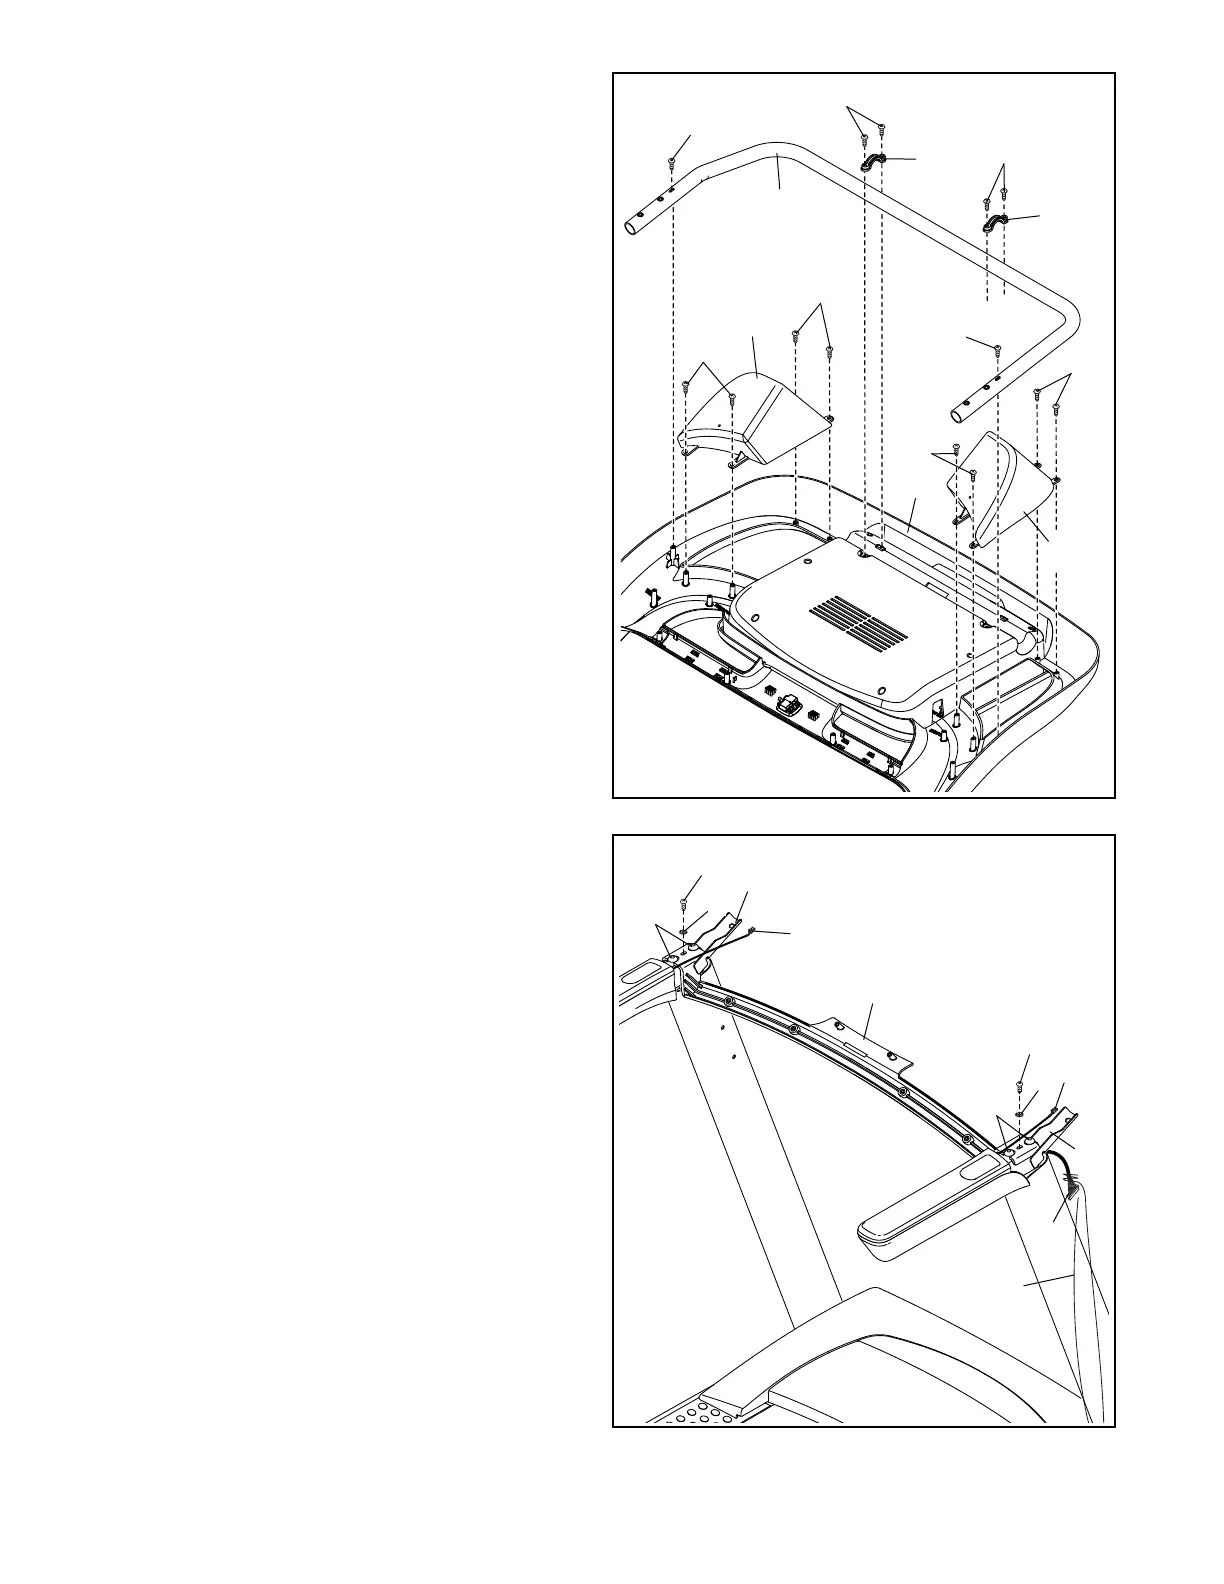
11. IMPORTANT: To avoid damaging the Pulse
Crossbar (93), do not use power tools and do
not overtighten the #10 x 3/4" Screws (9).
Orient the Pulse Crossbar (93) as shown. Attach
the Pulse Crossbar to the Handrails (86) with two
#10 x 3/4" Screws (9) and two #10 Star Washers
(5); start both Screws, and then tighten them.
Make sure not to pinch the Upright Wire (81)
or the handrail wires (F).
Next, firmly tighten the four 5/16" x 2 1/2"
Screws (28).
Then, remove the wire tie from the Upright Wire
(81).
11
9
9
5
5
28
28
86
93
86
F
F
81
Wire
Tie