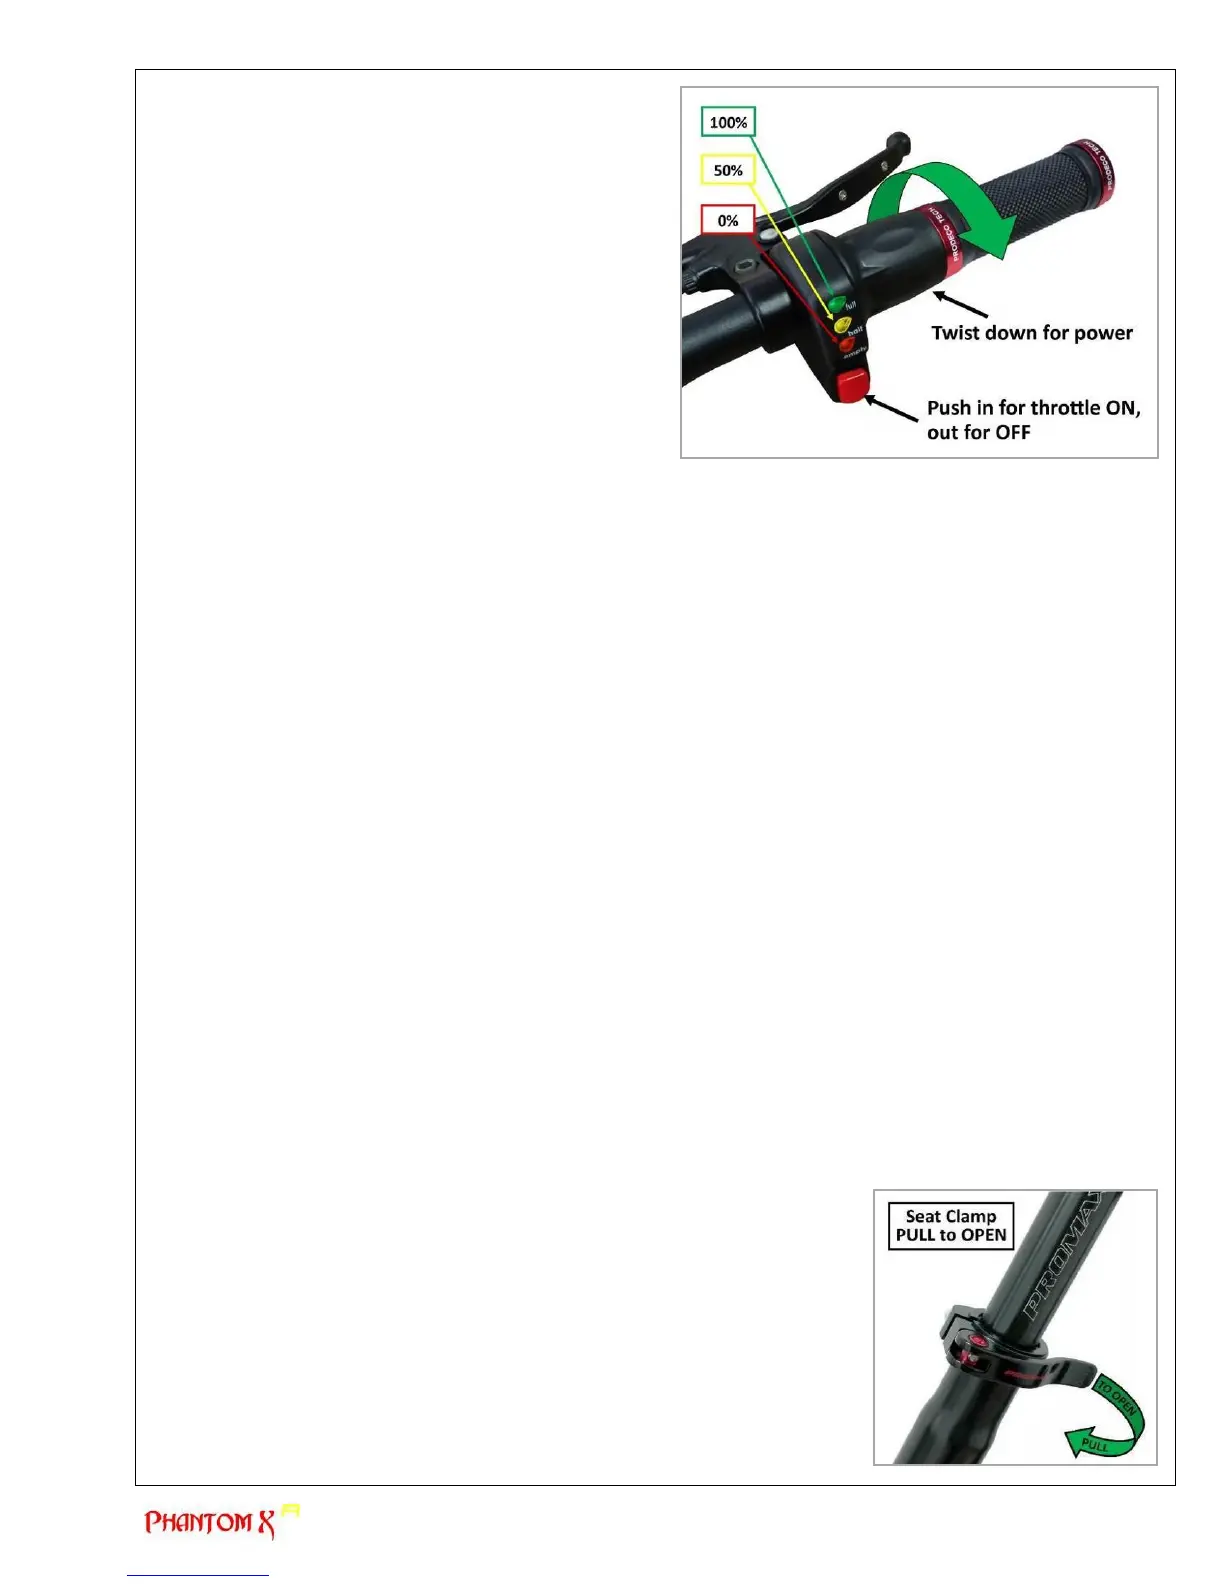
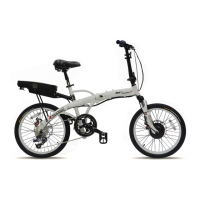
c) Throttle (SEE PHOTO)
The variable throttle included with all ProdecoTech
bicycles has an On/Off button. The red button below the
battery indicator on the throttle engages the power to the
motor. The twist throttle was designed to allow you the
ability to choose the riding speed and determine the
amount of torque off the line. Similar to an automobile, the
throttle mimics the depressing of the accelerator. The
higher the speed, the less distance per charge (less
distance per gas tank), the faster you accelerate off the
line, the less distance per charge. If there are multiple stop
and starts, this will also affect the range of distance per
charge. It is recommended you become accustomed to
your riding style and adjust the style depending on
distance needed per charge. For example: if you are
planning a short local trip, full throttle at takeoff and top
speed will not be an issue due to your ability to be able to
recharge the battery prior to the next trip. If you are
planning a longer trip, 30-35 miles or more, it is suggested
you add pedaling, hold throttle back 10% and whenever
possible allow the bicycle to coast under no throttle power. Coasting under no power is similar to riding a traditional
pedal powered bicycle. When riding, a rider will pedal for a few seconds and then stop pedaling, allowing the bike
to coast with no power being used. This will greatly enhance your distance between charging.
The throttle incorporates an LED battery indicator to assist the rider with determining the amount of charge left in
the battery. You should also understand the LED indicators react according to load. There is 1 Green LED, 1
Yellow and 1 Red LED. If the Green LED no longer lights while the bike is not being powered, it is time to
recharge the battery. The Green LED does not always represent a fully charged battery though. For example, the
Green LED may be lit until a steep incline. As you ride up the incline, you may notice the Green LED will dim as
the motor increases the pulling of Amps from the battery. Depending on the load being placed on the motor and/or
grades of incline, the green LED dimming represents the accurate battery capacity. Upon the Green LED no
longer being lit during riding, particularly under no load, the battery should be charged prior to the next ride. If the
Green LED is dimming under light loads, the battery could be under 50% capacity and should be charged. After
multiple rides and charges, you will become familiar with the distance per charge available based on your riding
style and terrain. For rides close to home with nominal pedaling needed, you should attempt to fully discharge
your battery to enhance your understanding on distances per charge.
Chapter 5: Basic Instructions
a) Bicycle fit
It is very important your Phantom X R is properly adjusted for comfort and to avoid the possibility of losing control while riding.
The saddle and handlebar have adjustments available to accommodate riders from 5’ 6” to 6’ 6”. There are saddle height,
saddle angle, saddle distance to steering tube, handlebar height and angle adjustment. If you plan to use your electric bicycle
also as a traditional pedal bicycle, it is recommended you adjust the saddle height to allow for a full leg extension when
pedaling. The ball of your foot when resting on the pedal should only allow for a slight bend at the knee when seated. Please
review the following points and subsequent sections in determining how to make the correct adjustments.
1) Is your bike adjusted to your size?
2) To check, see Chapter 7 “Perfect Fit and Ride”. If your bicycle is not properly adjusted for you, you may lose control and fall.
3) Is the saddle at the right height? To check, see Chapter 7 “Perfect Fit and Ride” section a) “Stand over height”.
4) Are saddle and seat post securely clamped? A correctly tightened saddle will allow no saddle movement in any direction.
See Chapter 5 “Basic Instructions” section b) “Adjusting the saddle” for details.
5) Are the stem and handlebars at the right height for you? To check, see Chapter 7 “Perfect and Ride” section d)
“Handlebar height and angle”. If not, see Chapter 2 “Getting Started” section f) “Installing and adjusting the handlebar stem”.
6) Can you comfortably operate the brakes? If not, you have the ability to adjust their angle and reach. See Chapter 7 “Perfect
Fit and Ride” section e) “Brake lever height adjustments” for details.
7) Do you fully understand how to operate your new bicycle? If not, before your first ride, have your dealer or contact us to
explain any functions or features that you do not understand after fully reading this manual.
b) Adjusting the saddle
You have the ability to adjust the height of your saddle instantly via the quick
release clamp. There is also the ability to angle the nose of the saddle up or down
and adjust your riding position to be further or closer to the handlebar. The latter
two require the use of the hex key tools included with the purchase of your
Phantom X R. Please review the following details on adjusting your saddle.
To adjust the height of the saddle or remove the seat post, no tools are required. The
quick release lever is opened by pulling the lever away from the seat tube allowing for
the seat tube clamp to loosen the grip around the post. This will allow you to raise or
lower the saddle to the desired height. There is a minimum insertion line on the seat
post which must be followed and you must not extend the seat post past this mark. It
is also important the seat tube clamp is tightened sufficiently around the seat post for
it not to slide downwards after the quick release lever is closed. This can be
accomplished by tightening the quick release nut clock wise which is located on the
opposite end of the quick release lever. WARNING & CAUTION (next page)