Follow the instructions below on installing the rear motor wheel. Pay special
attention to the motor wire exiting the axle. The wire must face downwards
when installing.
ALWAYS remove the battery from the bicycle prior to service. See
Chapter 3: Battery Management, Section d) Removing the battery.
It is preferred to have the axle washers, torque washers and nuts loose on
the axle when installing. The nuts and washers need to be at the end of
the axles while the torque washers need to be inside the dropout towards
the motor. The torque washers for both sides and one flat washer on the
cassette side is the minimal required. The torque washers are required for
the proper spacing and anti-rotation of the axle. They are extremely
important and if not installed properly can damage the bike. (SEE
PHOTOS PRIOR PAGE)
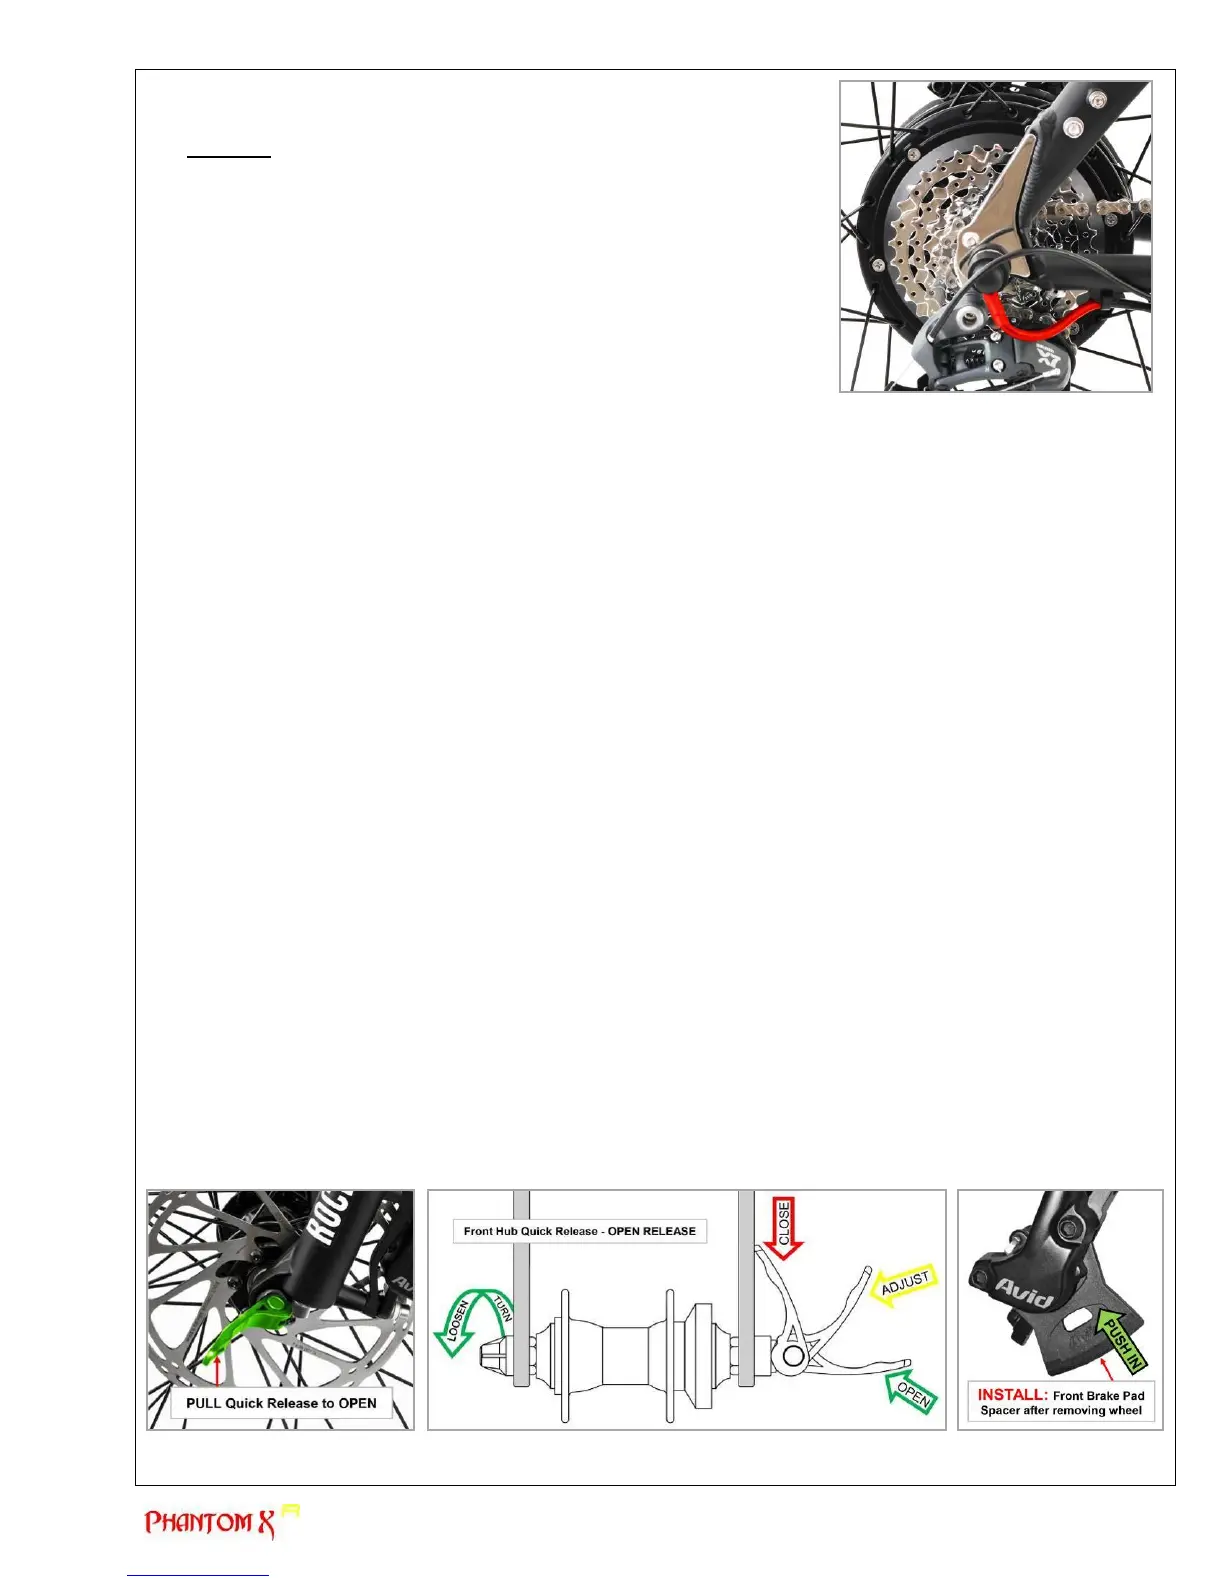
Holding the wheel in one hand, the other hand will be used to move the
spring loaded rear derailleur lower pulley and chain out of the way of the
dropouts.
With the chain not in the way, align the wheel to the dropouts while paying close attention to the lining up of the disk
brake rotor into the brake caliper (between the pads). Be careful not to bend the rotor.
Prior to inserting the wheel into the dropouts, pull the chain onto the cassette.
Slide the motor into the frame dropouts by aligning the axle into the dropouts. The axle has flat edges which require
the axle to enter the dropouts with the flat edges facing front and back. The axle side with the motor wire protruding
is to enter the right side dropout (the right side is when standing behind the handlebar) or left side if the bike is
upside down.
Each axle side has a stainless steel dropout torque plate, washers and a nut. Slide the washers over the axles and
tighten nuts by hand.
Using a wrench, fully tighten axle nuts. Axle nuts should be tightened to 250 lb*in.
Plug motor connection by aligning arrows on each end of the connector and slide together.
Once connectors are plugged, you must test the connection. Install the battery as described in Chapter 3 “Battery
Management” section c) “Installing the battery”. Press the “ON/OFF” switch at the top of the battery to power
the bike ON. The LED lights on throttle will light up displaying power to the motor. Pull the motor wheel off the
ground (if the bicycle is not upside down) and turn the throttle to test the motor. Confirm the red power button is
pushed in “ON” at the throttle. If the motor turns, the connection is solid. If motor does not turn, Press the “ON/OFF”
switch at the top of the battery to power the bike OFF. Check the motor connector to ensure a solid connection has
be made and arrows are lined up. Test again after checking.
After confirming a solid connection, use a new cable tie to connect the motor cable to the side of the frame and
once tightened, cut off any excess amount.
c) Removing and installing the front wheel
The front wheel on the Phantom X R can be removed or installed without tools. A quick release skewer through a hollow
axle is utilized for easy and quick wheel removal. A quick release skewer is a rod that has a threaded acorn nut on one
end and a cam lever assembly on the other end. The cam lever applies pressure and locks the axle in place.
When removing the wheel, it will be easier to turn the bike upside down and rest the bike on its saddle and handlebar.
Place a few blankets on the ground as not to scratch the bike. To remove the wheel, follow these steps:
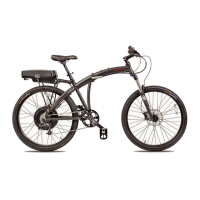
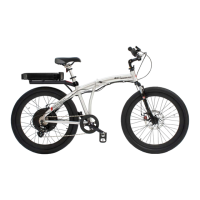
Locate the quick release lever at the end of the axle on the brake side. Pull the quick release away from the fork
dropout to OPEN and RELEASE the axle.
Opening the quick release lever will loosen the grip on the fork.
You may be need additional clear axle space to remove the wheel. Do so by loosening the acorn nut at the end of
the skewer. Turn the nut counter-clockwise while holding the quick release lever. This will allow for enough room to
clear the safety tabs at the dropouts. It is important when installing the wheel back, your rotate the acorn nut
clockwise to tighten.
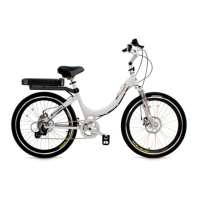
Once the wheel has been removed, it is IMPORTANT you insert the Brake Pad Spacer. The Brake Pad Spacer
prevents accidentally compressing the pistons in the hydraulic brakes. If the brake lever is squeezed or moved, the
pistons will close on the pads. It will be difficult to open the pads to reinsert the disc brake rotor when replacing the
wheel. If the pads are worn, damage to the pistons from over extending could become an issue.
When installing the wheel, it is the reverse process of “removing the wheel’. The process can also be found on page 6,
Chapter 2, Section e) installing the front wheel.