Chapter 3: Battery Management
a) About the battery
The Phantom X R’s battery cell system is composed of 50 x Samsung’s Highest Grade NCA 18650 Lithium Nickel
Cobalt Aluminum Oxide (LiNiCoAlO2) Cells. These are the same type of cells found in Tesla EV’s. They offer high
specific energy, good specific power and high number of charge cycles. To increase charge cycles to 1000 vs an
industry average of 600, ProdecoTech reduce the charge cut off from 42V to 41V. Lithium cell degradation
accelerates at the charging space of 95% to 100% and drastically reduced when lowered.
The battery is a removable device and can be charged on or off the bicycle. The battery is sealed and maintenance
free, you must never open the battery as this will void the warranty. Each battery has a specific serial number and
barcode which can be found on the underside of the battery. Please read the warning labels on your battery and
follow these instructions. If removing the battery to charge it, review section d) on how to remove your battery.
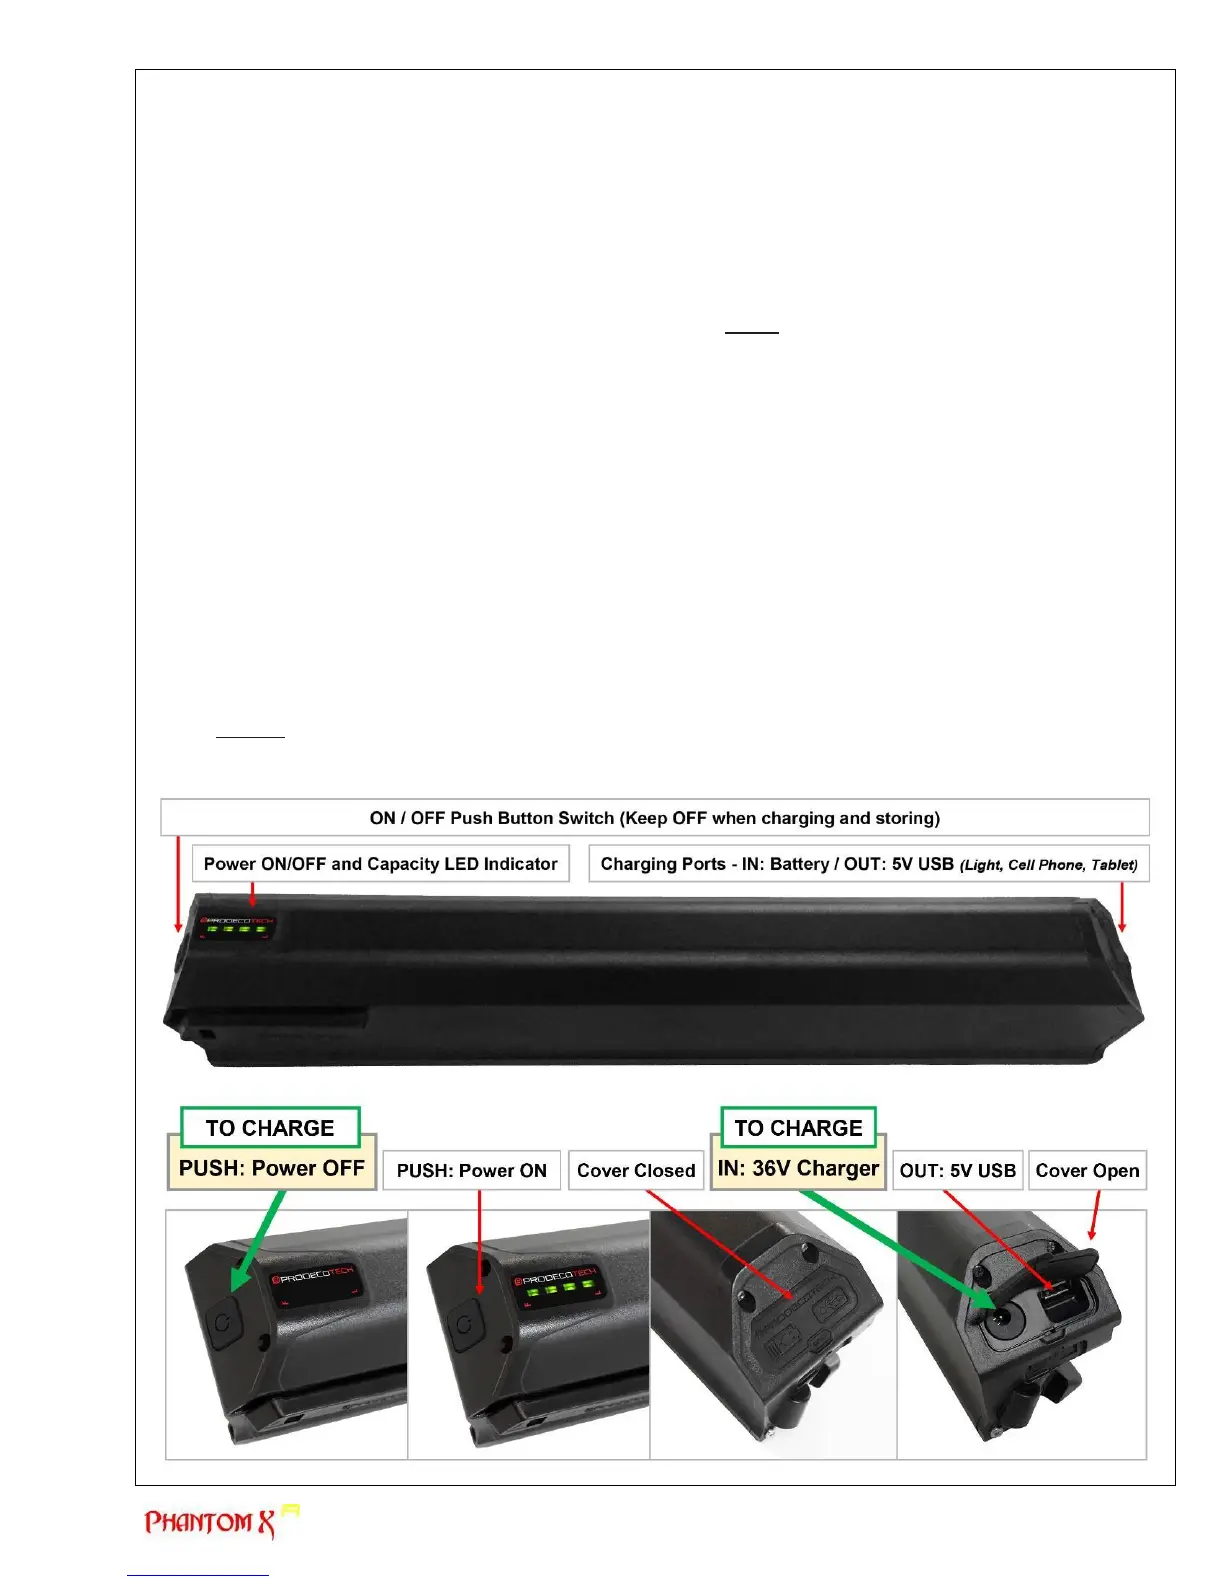
b) Charging the battery (SEE PHOTOS THIS AND NEXT PAGE)
You will need to charge your battery prior to powering the bike for the first time. The battery may be in hibernate
state which could take over 8 hours for the initial charge. The managed charge is designed to extend the life cycles
of the battery. The Battery Management System incorporates a Cell Balancing feature and the initial charge should
not be rushed.
Charge your battery as follows:
1. Confirm the battery is OFF (No LED Lights) by pressing the ON/OFF rubber panel switch at the top of the
battery. The LED indicator lights may or may not come on depending on the state of the battery.
2. Lift the charging port rubber cover open at the bottom of the battery, exposing the DC 2.5mm Power Jack
(charging port). There is also a 5v USB power source/communication port. Do not use the USB port other
than to power a light or charge a cell phone. The USB 5V is for convenience and not guaranteed to power.
3. Plug the charger into a wall outlet and confirm the charger is OFF. The LED light on the charger will display
as clear when OFF. When ON the light will display green and when charging, it will display red.
4. Plug the DC 2.5mm Jack into the battery charging port, confirming a tight connection.
5. Turn the charger ON via the ON/OFF switch located on the charger power cord. The charger light will
display red as it starts charging. Upon being fully charged (up to 8 hours initially), the charger will light
green.
6. Upon the battery being fully charged, turn the charger OFF via the ON/OFF switch located on the charger
power cord. Disconnect the charger from the battery.
7. NEVER leave the charger connected to the battery upon the battery being fully charged. As the battery
drains via the BMS (Battery Management System), the charger will continuously charge the battery. This is
not good for lithium batteries and will decrease the life of the battery.