OB7 Collaborative Robot User Manual Version 0.6
OB7 Control Functions / 77
Grid
When GRID is selected it tells OB7 that there is a group of objects to be placed and that they are
arranged in a grid pattern. In the case of a grid pattern, it is necessary to show OB7 three corners of
the grid, and to enter the number of objects in each dimension of the grid. OB7 will automatically
place each object in succession according the the grid spacing. Note that it is also possible to have
a GRID of STACKS. In this case OB7 will Work in layers, placing all items in the grid from one layer,
before continuing up to subsequent layers in the stack.
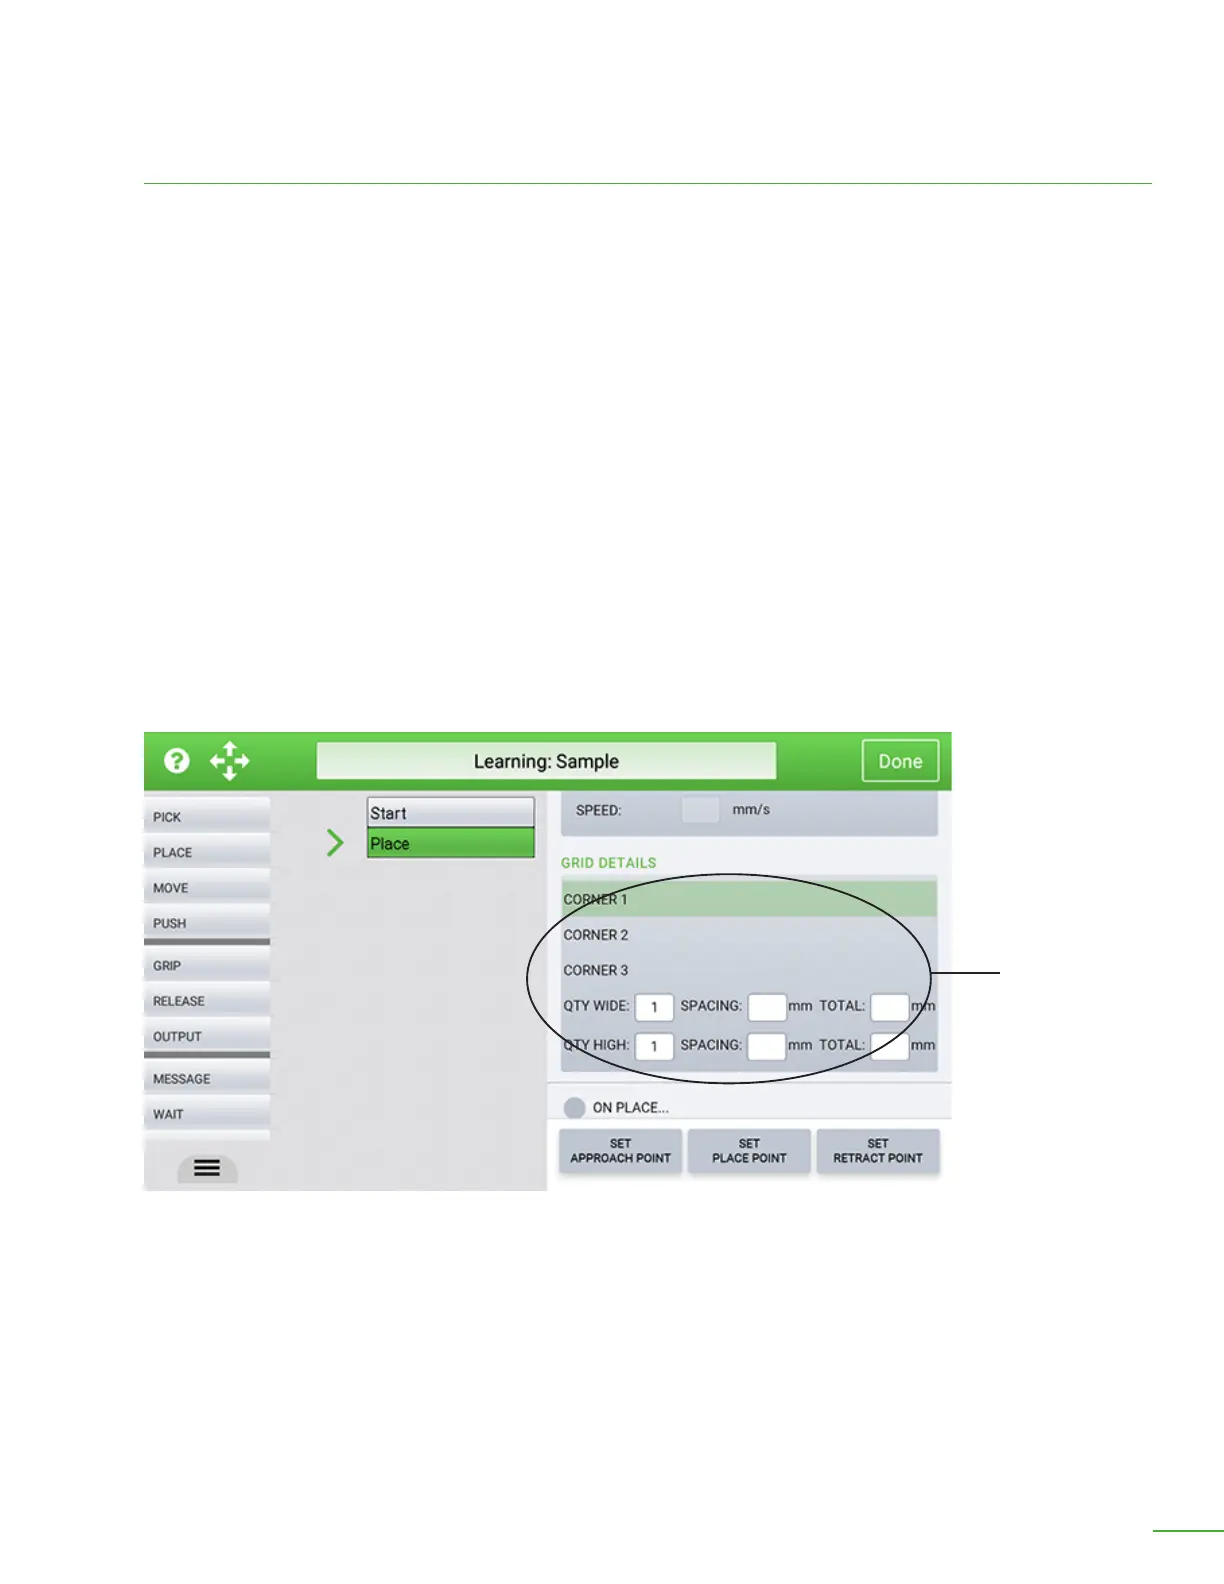
Use these buttons to set the corners of the grid:
Select the corner of the grid to be learned by pressing the corner 1, 2 or 3. button. Position OB7 in the
corner position of the grid and press the “Set Position” button on the handle. Repeat this for each of
the 3 corners. Corner 1 is the upper le, Corner 2 is the upper right, Corner 3 is the lower right. When
OB7 runs the job, it will place starting in corner 1, then Work toward corner 2. Aer reaching corner 2,
OB7 will move to the next row.
Select “Grid” to tell OB7 to place a group of objects and specify the corners in the grid pattern.
Grid Details
 Loading...