Page 32
➤ Release the circular plug on the lamp cover by turning the knurled nut and disconnect
➤ Use the supplied Allen key to undo the mounting screws holding the lamp cover, lift lamp
cover and pull out the lamp by approx. 100 mm
➤ Disconnect connection plug with lamp cover from the lamp
➤ Completely pull out the lamp and place to one side
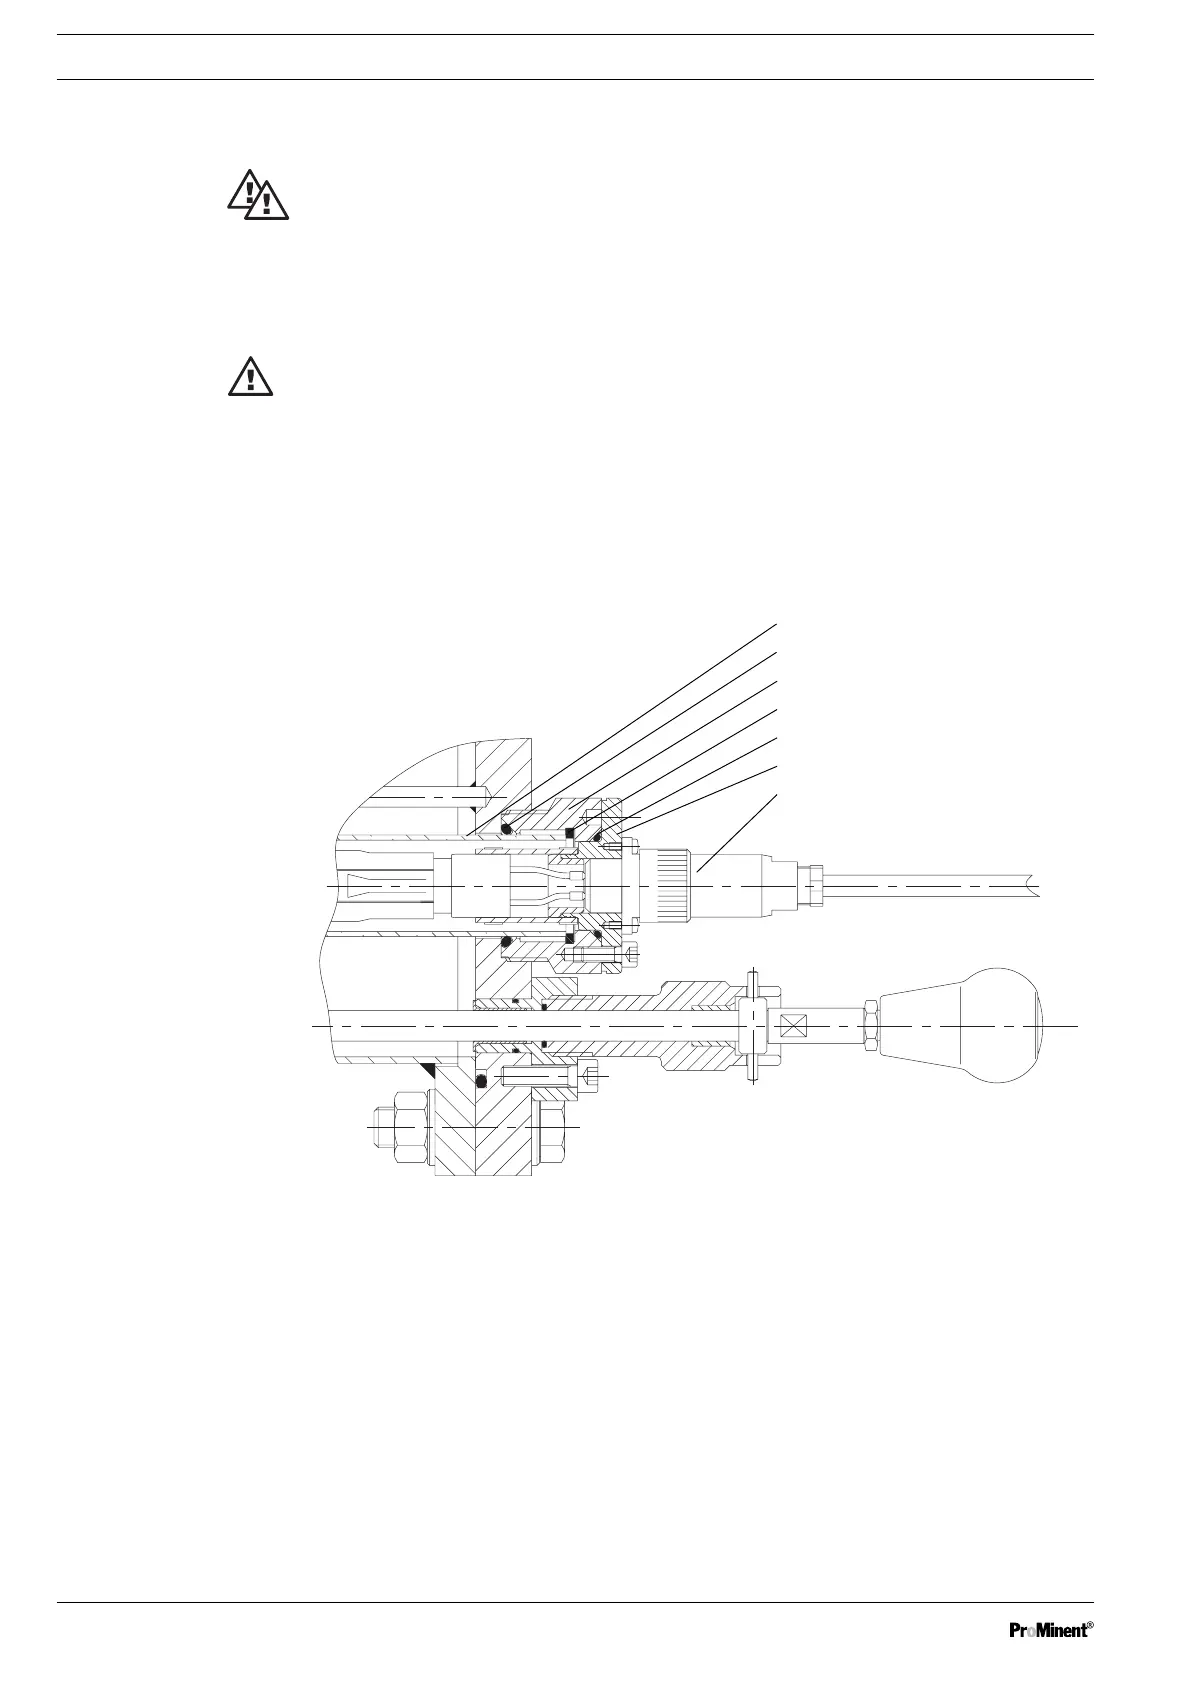
7
1
2
3
4
5
6
1 Lamp protective tube
2 O-ring
3Protective tube retaining fixture
4Teflon ring
5 O-ring
6 Lamp cover
7 Circular plug
Fig. 9: Sectional view of lamp connection
7.2 Replacing Wiper Elements
WARNING!
• Switch off the master switch or disconnect the power plug before installation and
connecting the UV lamps!
• Place the UV lamps into operation only in their installed state!
UV-C radiation is harmful to the eyes and skin!
Install the UV system in accordance with regulations and instructions before starting up
the UV lamps!
ATTENTION!
•Take particular care during this work to ensure that the extended wiper rod is not bent!
•Touch the glass of the UV lamps only wearing clean cotton gloves!
Fingerprints burn into the glass and can cause premature failure.
Before fitting the lamps, remove fingerprints with a cloth moistened with alcohol!
➤ Close the shut-off valves upstream and downstream of the radiation chamber
➤ Switch off the UV system with the START/STOP key;
➤ Switch off the master switch or disconnect the power plug
➤ Discharge the radiation chamber
Maintenance