23
1. Connect your PRS-801B to your PC using the USB cable (supplied), as shown in Figure 2.
2. Press and hold for 2 seconds to turn the meter ON.
3. From the Connect 2.0 Utility, click Setup and select Set PRS-801B Clock.
4. You will be asked to confirm to reset the clock of your PRS-801B. Click Yes.
5. Your PRS-801B is now set with your PC’s Date and Time.
Download data from your PRS-801B
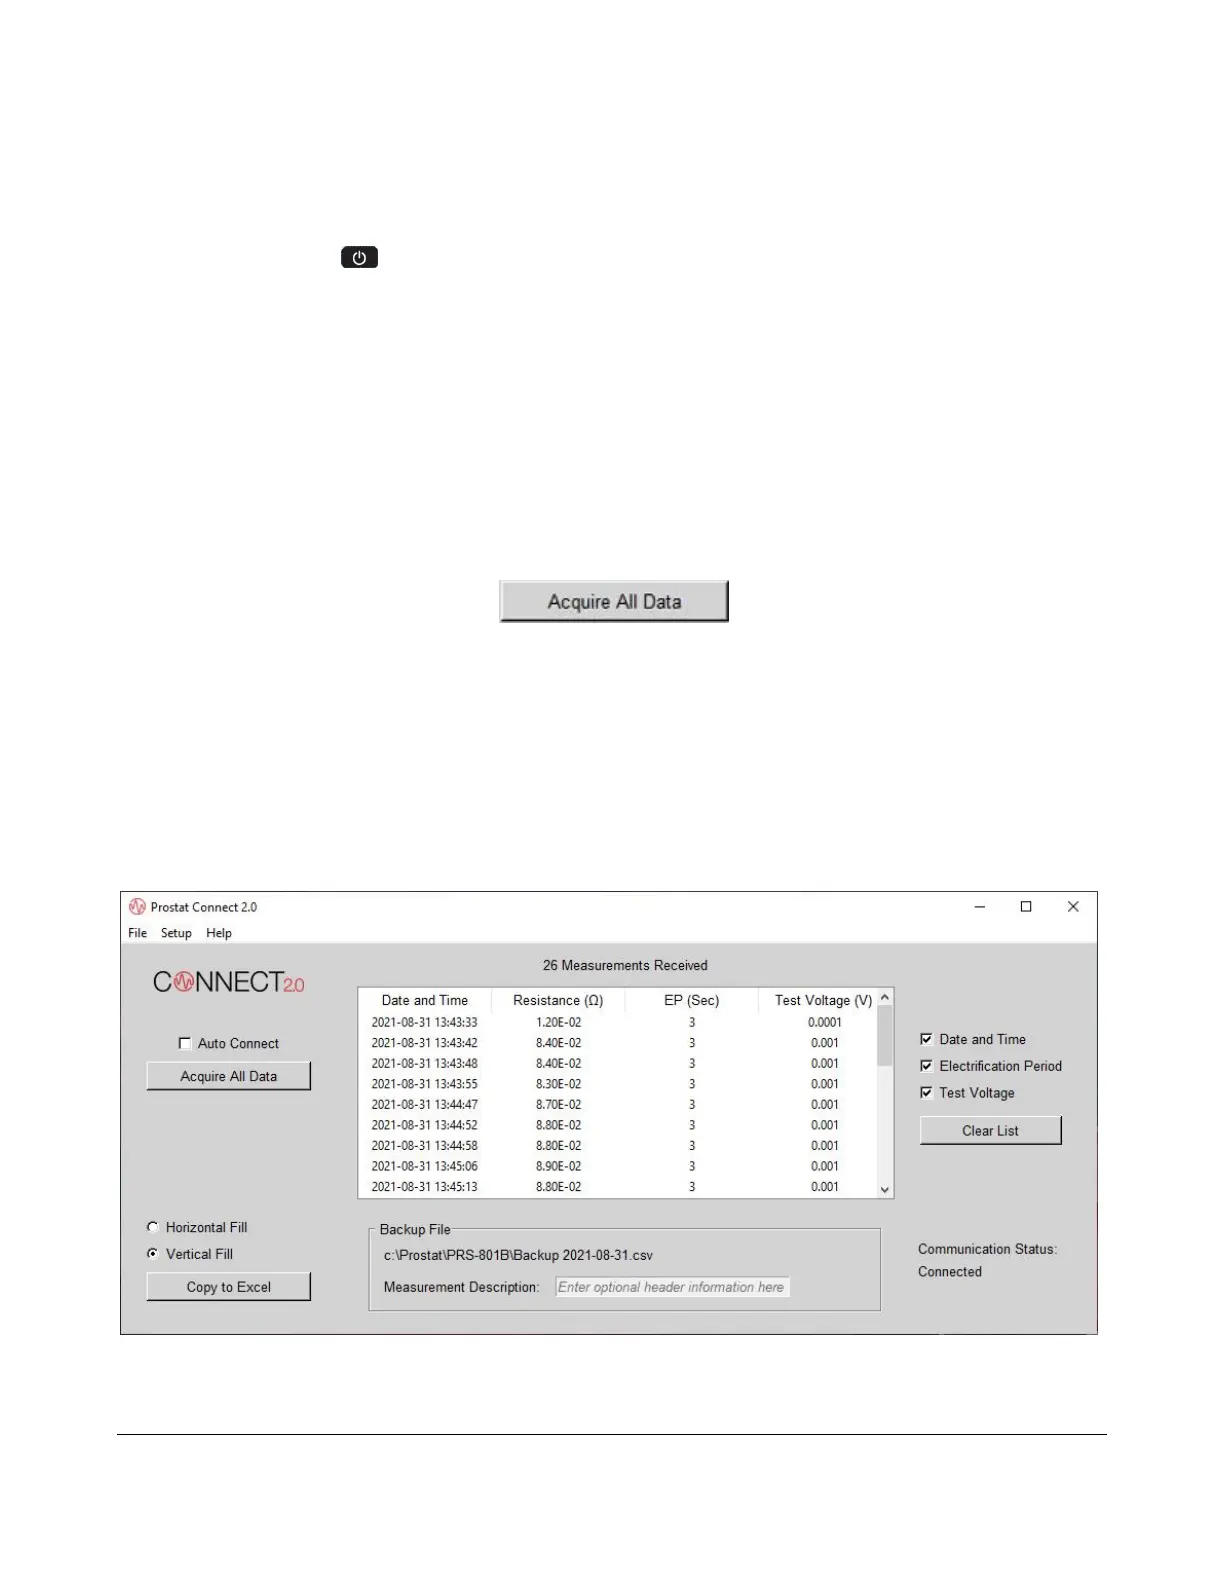
This will allow users to download the data saved into the meter’s memory:
1. Make sure the PRS-801B is connected to the PC and powered ON.
2. From the Connect 2.0 Utility Software, click Acquire All Data.
The data set that was saved into the meter’s memory has now been downloaded into Connect 2.0.
The data includes the following:
Date and Time of the measurement
Resistance Measurement in ohms
Electrification Period (EP) in seconds
Test Voltage output
Figure 7. Download Data from the PRS-801B in Connect 2.0