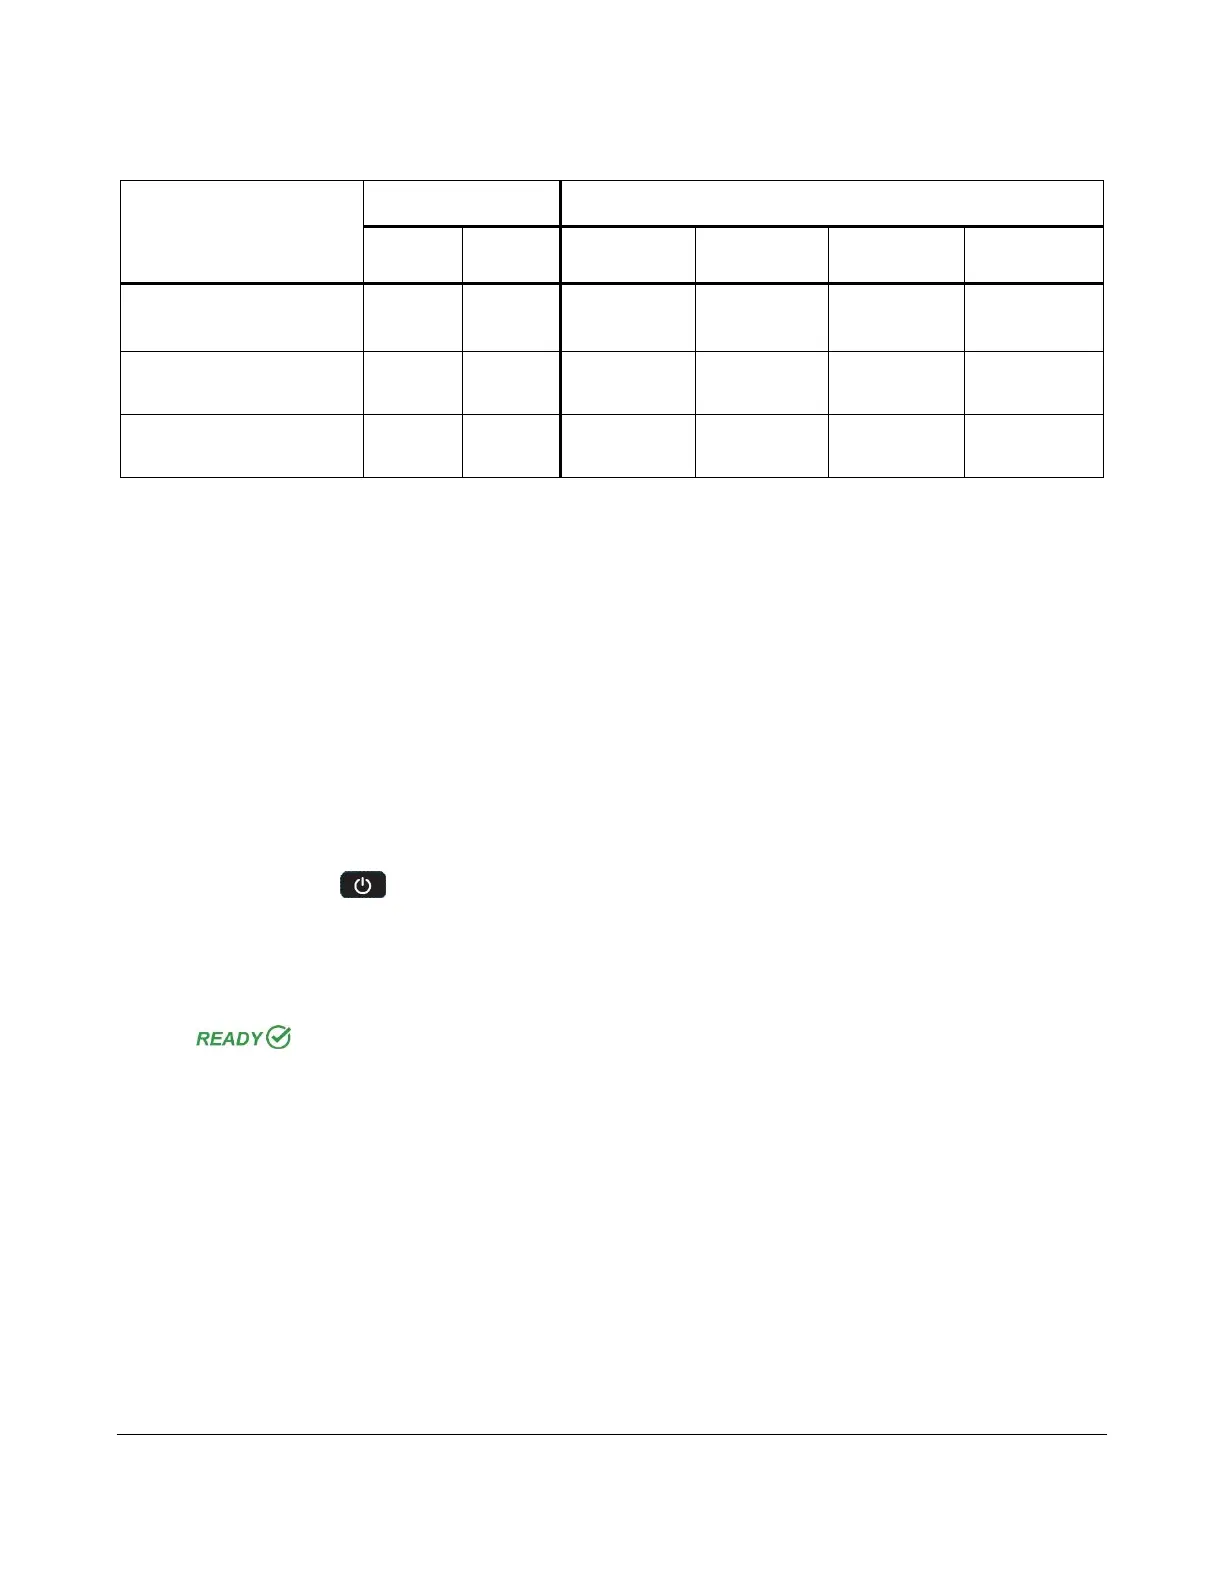
12
1.00E-02 to 9.99E-02
0.01 to 0.09 Ω
1.00E-1 to 9.99E+11
0.10 to 999 GΩ
1.00E+12 to 2.00E+14
1 TΩ to 200 TΩ
Table 4. Recommended Mode and Test Leads for each resistance range
04 OPERATION
This meter is battery operated, do not connect with any other utility line. The lithium-ion battery pack
is usually already installed when shipped. If you received it separately, you can easily install it inside
the battery compartment.
Main Power
To turn the resistance meter on:
1. Press and hold for 2 seconds to turn the meter ON.
Note: If the battery level is less than 8%, the meter will not turn on. Charge the battery until
the level reaches at least 8%.
2. The LCD displays the current firmware version number.
3. The LED’s will illuminate incrementally from left to right.
4. will display for 2 seconds, then enter AUTO mode.
The resistance meter turns on within 7 seconds in its last setup configuration.
Measurement Modes
The PRS-801B uses 4 basic measurements modes, where the PRS-812B uses 3, as described in Table 5.
The Mode currently selected is displayed next to the battery status icon.