Version 1.0
25
Operation
25
10. Once the desired position is reached, slowly stop the trolley. Position the load completely vertical to the desired spot
where load will be lowered.
11. Gradually lower load until it is secured on resting surface. Avoid hitting surface at high speed. If necessary, stop
movement before reaching surface and gradually lower to land load.
NEVER leave load suspended without attention of the hoist operator!
Disconnect unit from power before installation.
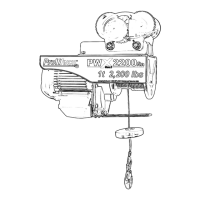
1.4 Hoist Setup
1. This Hoist is designed to be attached to a beam or steel pipe and be securely held in place by both of the Hangers (#23).
Note: The beam or steel pipe must be capable of carrying several times the weight of the Hoist and its designated maximum
capacity. If in doubt, consult a registered engineer and building code.
Note: Make sure the area underneath or around the Hoist is clear of obstructions. Do not Hoist loads over people or animals.
2. After determining the location of the Hoist, make sure the beam or pipe is the proper size to t inside of the Hangers (#23).
Have a second person hold the top of the hoist ush against the beam or pipe. Line up the holes on each Hanger (#23) with
the holes on the top of the Hoist. Thread in the two Screws (#21) and Washers (#20) per Hanger (#23) to secure the Hoist to the
Beam or Steel Pipe. Check that it is secure. Before each use, check that the Hangers (#23) are securely fastened to the Hoist.
3. Ideally, the Hoist needs to be set-up within a reachable distance to a 3- prong power outlet without the need of an extension
cord. However, extension cords are safe and acceptable when properly used.
The Wire Rope (#56) must ow through the Wire Rope Guard (#29), and
the Stopper (#31) must be securely attached to the end of the Cable (#56).
 Loading...