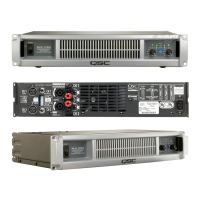
16 QSC Audio Products, LLC
frequency-sensitive limiting will prevent full power operation
above about 15 kHz. A backup system mutes the amplifier
quickly in the event of runaway oscillations.
• Clip Limiting. While clipping is not harmful to the amplifier, the
clip limiter will minimize distortion when it occurs. A user-
selectable switch engages the clip limiter on each channel.
2.2 PL380 Major Circuit Blocks
The following notes cover the same areas noted before in further
detail, with references to voltages, part numbers, and PCB locations.
All locations and directions are described though the amplifier is
placed upside down with the cover removed, with the front panel
facing the observer. This section should be read with the PL380
schematic at hand for reference.
Power Supply
Unless otherwise noted, this section refers to the schematic sheet
SUPPLY, PL380.
AC Entry
AC power enters the amplifier through an chassis-mounted cordset
or AC inlet, circuit breaker, and line filter located on an auxiliary PCB
in the right rear corner (L15 and L16; Y-caps C234 and C235; and X-
caps C294, C295, and C293, which are discharged by R348, R349,
and R350 within 2 seconds after power is disconnected). Sleeved
wires couple the two sides of the AC voltage to selected terminals
on the main PCB: J19 to J20 (all voltages), and J15 to J21 (230 V) or
J15 to J22 (120 V). These lines lead to power control relays
discussed below (schematic zone D-8).
Housekeeping Supply
A smaller fuse, F1, protects the inrush limiting resistors in the event
of a downstream load fault. A small amount of AC power is taken
after this fuse to the power switch via W17 and W18, returning to a
housekeeping reservoir C190 and C191 (zone C-8), charged by D64
through a current-limiting resistor bank that comprises R261, R263,
R264, and R267. This reservoir supplies U41, an integrated
TOP244VN flyback switcher that produces auxiliary supply voltages
through transformer T1. The components immediately surrounding
U41 provide feedback, over- and undervoltage sensing, and flyback
clamping.
The circuitry on the secondaries of T1 (zone B-6) provide a +10 V DC
supply (for future low-power accessory circuits), and unregulated
±25 V voltages. The 25-volt rails are reduced by regulators U42,
U44, U45, and U50 to produce clean ±15 V and ±5 V bipolar supply
rails. These regulated rails are labeled +15_TOP, +5_TOP, , and
-15_TOP, -5_TOP. Providing power for the clock and audio switching
circuitry is another set of ±5 V rails, labeled +5:SW and -5:SW,
which are decoupled through L5, L6, C226, and C227 to filter out
switching noise. All circuitry connected to these rails will be
powered as soon as U41 starts operating, which normally occurs
any time the amplifier is turned on.
The +5:SW rail powers the crystal-controlled clock and divider
circuitry (schematic: see sheet
AMP CH-A, PL380,
zone C-7 and D-7),
which is centered around U1 and U4–U7. The divider sends a sync
pulse train to U49 (schematic: see sheet
Power Supply, PL380,
zone
D-2), a PWM switch-mode supply controller that delivers switching
pulses with controlled dead time to U46. A specialized gate drive IC,
U46 in turn provides a gate drive signal through transformer T4, to
the pair of isolated-case switching transistors Q68 and Q69. T4’s
two secondary windings have opposing polarities so that the gate
drive pulses will alternately switch the transistors on and off.
The result of the switching is a 125 kHz alternating current through
the primary of the power transformer, T2. The transformer has a
turns ratio of 10:11, so the secondary voltage is about 10% higher
than the primary voltage. Thus, the energy from the primary
reservoir capacitors—C209, C210, C213, C214, C216, and C217
(zone D-5)—couples through to the transformer secondary, where it
is rectified and stored in the secondary reservoirs comprising C247–
C250 and C253, C254, C259, and C260 (zone C-3). These are the
±185-volt rails for the two channels’ output sections.
Ordinarily, at startup there is little or no voltage on the primary
reservoir, and therefore, little current flows through the switches.
The aux supply powers a sequence of delays that causes the inrush
and main relays to close progressively, ramping the entire main
supply up to full voltage in a controlled manner.
Power Supply On-Off Sequencing
The relay control circuitry is shown in zone C-5 of the schematic sheet
PROT/CNTRL, PL380
. When the amplifier is turned on, the following
sequence must occur to make the main power supply turn on:
1. The AC voltage detector (schematic: see sheet
“Power Supply,
PL380”
zone B-7 and B-8) connects to the incoming AC line
through resistors R258 and R259. It must sense that the amplifier
has AC mains voltage coming in to the power supply.
If it does, the AC voltage signal will turn transistor Q66 on, which
turns Q67 off. This allows current to flow through the LED side of
the optocoupler, U40, and pulls the AC-ON bus high to +5 V.
Resistor R265 adds a small amount of hysteresis, so that the
turn-off threshold is slightly lower than the one for turn-on.
2. In the relay control circuitry, the AC-ON bus turns transistor Q34
off. The IGBTs in the power supply should be receiving gate drive
pulses, which would cause bus IGBT-SW (a safety interlock to
prevent the relays from closing if the main power switches are
inactive) to charge capacitor C104. The bus AC-OFF-LO is a
remote control line that permits C104 to be remotely discharged
to shut down the main supply.
3. When the capacitor charges to greater than 3.3 V, the compara-
2.2 PL380 Major Circuit Blocks (continued)
 Loading...