PL3 Series Service Manual 31
TD-000274-00 Rev. A
Prerequisites to troubleshooting
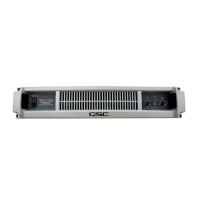
Safely turning on an unknown PL380 amplifier
Using the service fixture
Before connecting it to AC power, always first check the amplifier
using the PL380 service fixture. This allows you to check the timing
and control circuits safely before applying power. See Section 1.5,
PL380 Service Fixture,
for details and procedures.
Using a variable autoformer
When first checking the operation with AC power of an amplifier on
the bench, always turn your variable autoformer down to zero
before plugging the amplifier into it.
After you turn the amplifier on, gradually turn up the transformer to
65% of full operating voltage (78 V for a 120 V unit, or 150 V for a
230 V unit), then pause for about six seconds as you observe the
turn-on sequence of the amplifier; during this time the power supply
will begin switching, the relays will energize, idle current will reach
about 2 A (120 V unit) or 1 A (230 V), the power indicator LED will
light, and finally the clip LEDs will light for about 2 seconds and then
extinguish. Observing the amp through this sequence will help you
determine what, if anything, is wrong with it.
If you see or smell smoke, flames, or any other signs of short circuits
or excessive current draw, quickly turn the transformer back down to
zero. If no such problems occur, it is usually safe to turn it up to the
amplifier’s full operating voltage for further testing or troubleshoot-
ing. Idle current at this point should not exceed 2.5 A (120 V unit) or
1.3 A (230 V).
AC current draw
At idle, the current draw should be approximately 2 to 2.5 A (120 V)
or 1 to 1.3 A (230 V).
• The main heat sink will get noticeably warm but not hot,
eventually causing the fan speed to increase slightly.
• Power supply heat sinks should be cool at idle.
On/off muting
• During the normal startup sequence, use loudspeakers con-
nected to the amp’s outputs to confirm silent on-off muting.
There should be at most only a small click audible in the
loudspeaker during on-off muting.
Relay Circuit, Inrush System.
• To prevent high surge currents that would otherwise flow into
the large primary- and secondary-side capacitors, the power
supply IGBTs start switching
before
voltage is applied to the
main reservoir capacitors. The TOP switch “keep-alive” power
supply based around U41 starts up first, providing power for the
crystal divider clock circuit and IGBT drivers.
• Then the primary reservoir is charged up through the inrush
limiting relay, K2, and large NTC resistors R262 and R266
(schematic: see sheet
“Power Supply, PL380,”
zone D-6).
Because the IGBTs are switching, the secondary reservoirs
charges along with the primary reservoir. After a short delay, the
main relay, K1, closes to bypass the inrush resistors.
• After shut-off, the IGBTs continue switching until the keep-alive
supply discharges the primary reservoir to less than 25% of its
normal full voltage. Thus, the voltages of the secondary reservoir
capacitors track those of the primary reservoir, both up and
down.
•
Never
attempt to start up the amp with fully charged primary
capacitors and discharged secondary capacitors; high peak
currents will damage the IGBTs if the primary reservoir has a
voltage more than 70% higher than the secondary one. Normal
“hot restarts” are allowable because the IGBT switching will
keep the secondary linked to the primary voltage.
• NOTE: an interlock feature (schematic: see sheet
“Protect/
Control, PL380”
zone D-5 and D-6) halts the relay sequence if the
IGBTs fail to switch. This prevents the primary capacitors’ being
charged without also charging the secondary capacitors. If there
is no IGBT drive voltage on signal bus
IGBT-SW,
R133 remains at
zero and does not provide voltage to ramp up C104.
• If the IGBTs have been removed,
always
discharge the primary
capacitors
before
re-installing or replacing the IGBTs or turning
the amplifier on.
120V/240V wiring (schematic: see sheet
“Power Supply, PL380,”
zones C-6, C-7, D-6, and D-7)
• For 120V operation, wire jumper W1 (zone D-6) must be in place,
and terminal J22 would connect to J15 from the line filter.
• For 220–240V operation, W1 is not installed and terminal J21
connects to J15.
WARNING: Never connect J21 to J15 with W1 in place, because if
power is applied it will short-circuit the AC from the line filter and
cause damage to inrush components, the line filter, etc.
3. Troubleshooting
3.1 PL380: Symptoms, causes, and remedies
 Loading...