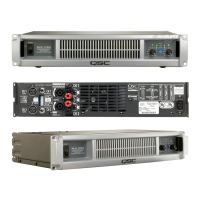
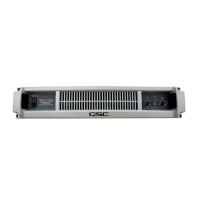
PL3 Series Service Manual 27
TD-000274-00 Rev. A
Test Equipment required:
• Distortion analyzer with built-in signal generator
The generator must have total harmonic distortion plus noise
(THD+N) of no higher than 0.01%, and the analyzer must be
capable of resolving to that level as well. We suggest either the
HP-Agilent 339A
or the
Audio Precision System One, System
Two, ATS-1,
or
ATS-2
. The PL325 test procedures written for
Audio Precision System One can be obtained by sending an e-
mail request to tech_support@qscaudio.com.
• High power load resistor bank (8, 4, and 2 ohms)
• 20 MHz oscilloscope and digital multimeter
• Variable autoformer (Variac, Powerstat, etc.), 0–140 V AC, 30–
50 A for 100 V/120 V models or 0–260 V AC, 20–35 A for 230 V
model
Setup
1. Set switches and controls as follows:
• AC switch (front panel)
off
.
• Gain controls (front panel) to minimum, or fully counter
clockwise.
• Mode switch (rear panel) on
stereo
.
• Sensitivity switch (rear panel) on
32 dB
.
• Clip limiter switches (rear panel)
off
.
• High-pass filter switches (rear panel)
off
.
2. Connect a test load(s) to the output terminals of the amplifier.
3. Set up and connect a dual-channel oscilloscope to the following
test points:
• Channel 1—Set vertical sensitivity to 2 V/div; connect a
10× probe to the channel speaker output.
• Channel 2—Set vertical sensitivity to 0.1 V/div; connect a
1× scope probe to the distortion analyzer output.
4. Connect the analyzer’s test signal output to the amplifier’s
channel 1 XLR input.
5. Set the analyzer signal to a 1.0 V rms 1 kHz sine wave.
6. Turn on the analyzer’s 80 kHz filter.
7. Plug the amplifier’s power cord into a variable autoformer (set to
0 V) and set up an ammeter to monitor AC line current.
Power On and Mute Delay Test
1. Turn the amplifier on and slowly increase the AC voltage to 50 V
(120 V model) or 100 V (230 V model) while monitoring the AC
line current. The power indicator LED should be at half-bright-
ness, and the current draw should not exceed 0.3 A (120 V
model) or 0.15 A (230 V model).
Continue increasing the voltage to 100 V (120 V model) or 200 V
(230 V model), and pause for about three seconds until the mute/
protect circuit disengages.
Continue to 120 V (120 V model) or 240 V (230 V model). At full
voltage, the idle AC current should be about 1.0 A (120 V model)
or 0.5 A (230V model).
2. Verify that the fan is operating at low speed.
3. Turn the power switch off and on a few times to verify the 6-
second power-on muting delay and the instant power-off mute.
The power-on delay should proceed like this:
• The blue Power LED at half brightness for three seconds
• Power and Clip LEDs at full brightness for another three
seconds
• Amplifier unmutes; Power LED remains bright while Clip
LEDs turn off
All LEDs should turn off immediately when the amplifier is turned
off.
Channel Output Test
1. Look for amplified signal on scope channel 1. Check for a noisy
or contaminated gain potentiometer by looking for general
instability on the distortion waveform (scope channel 2) while
you rotate the gain control.
2. Set the amp gain control to maximum (fully clockwise) and verify
the output level of 32 dBV (40 V rms), with a 1 V input.
3. Select 8-ohm load and set the analyzer signal output at
1.6 V rms, 1 kHz. Confirm that this amplifier is producing 500
watts (63 V rms), with less than 1% THD. Repeat steps 1 through
3 with the other channel.
2.5 PL325 Test and Calibration Procedure
 Loading...