Getting ‘on air’ with your Radioddity GD-73 v1.0
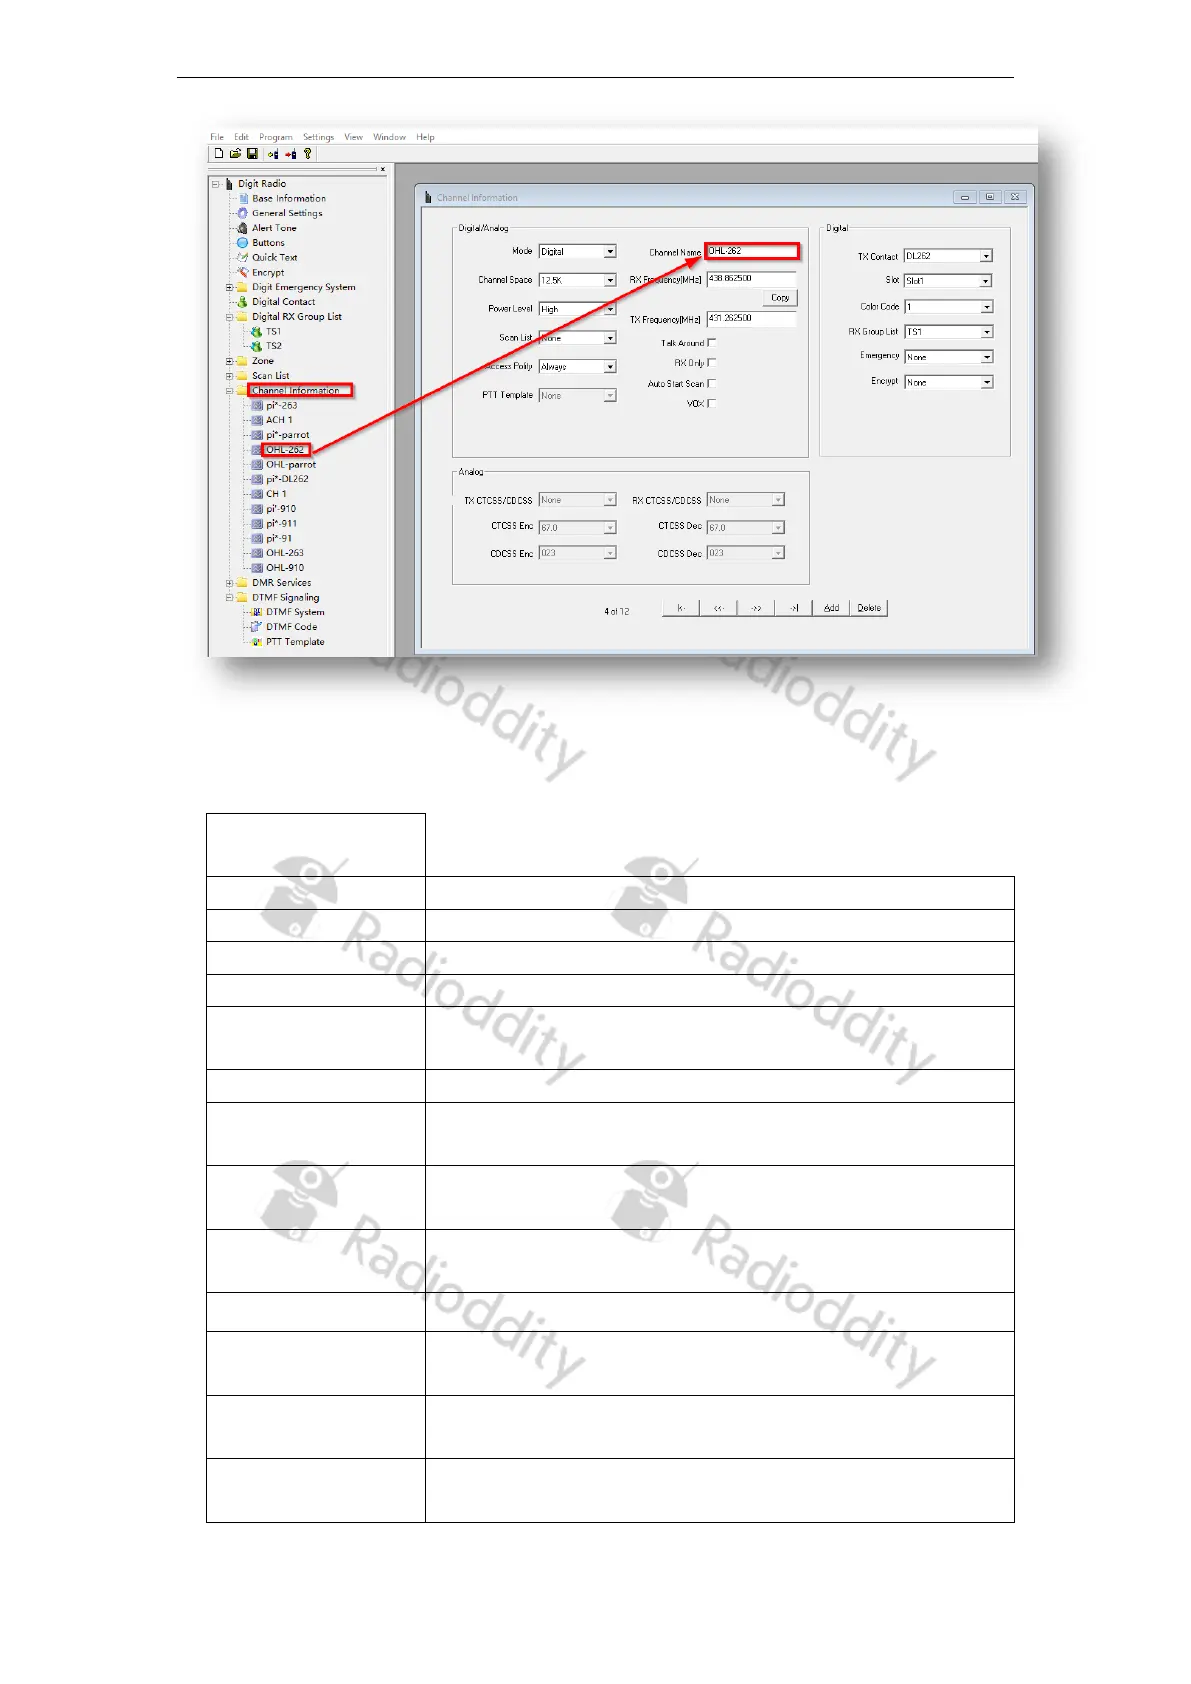
By clicking on the ‘Add’ button, you can add another channel.
Here is a brief explanation of the different fields you can customize for each channel:
Digital+Analog
Choose between ‘analogue’ and ‘digital’
Name of the channel – this needs to be unique.
The receive frequency in MHz
The transmit frequency in MHz
Select the transmit / receive bandwidth here. In digital
mode this is fixed at 12.5 kHz
Selection of RF output power (cannot be changed for PMR)
Select what scan list to scan when a scan is initiated on this
channel.
Enables the ability to swap transmit and receive
frequencies
Access Policy
Also known as ‘admit criteria’ this selects how a
transmission is allowed to be sent
Sets the channel to receive only, transmit is disabled.
As soon as this channel is selected, scanning automatically
starts with the scan list specified under ‘Scan List’
For an analogue channel, the PTT template to be used can
be specified here.
Selects if VOX (voice activated transmit) is active for this
channel
Page 17 of 23