RadioLink Electronic Ltd
www.radiolink.com
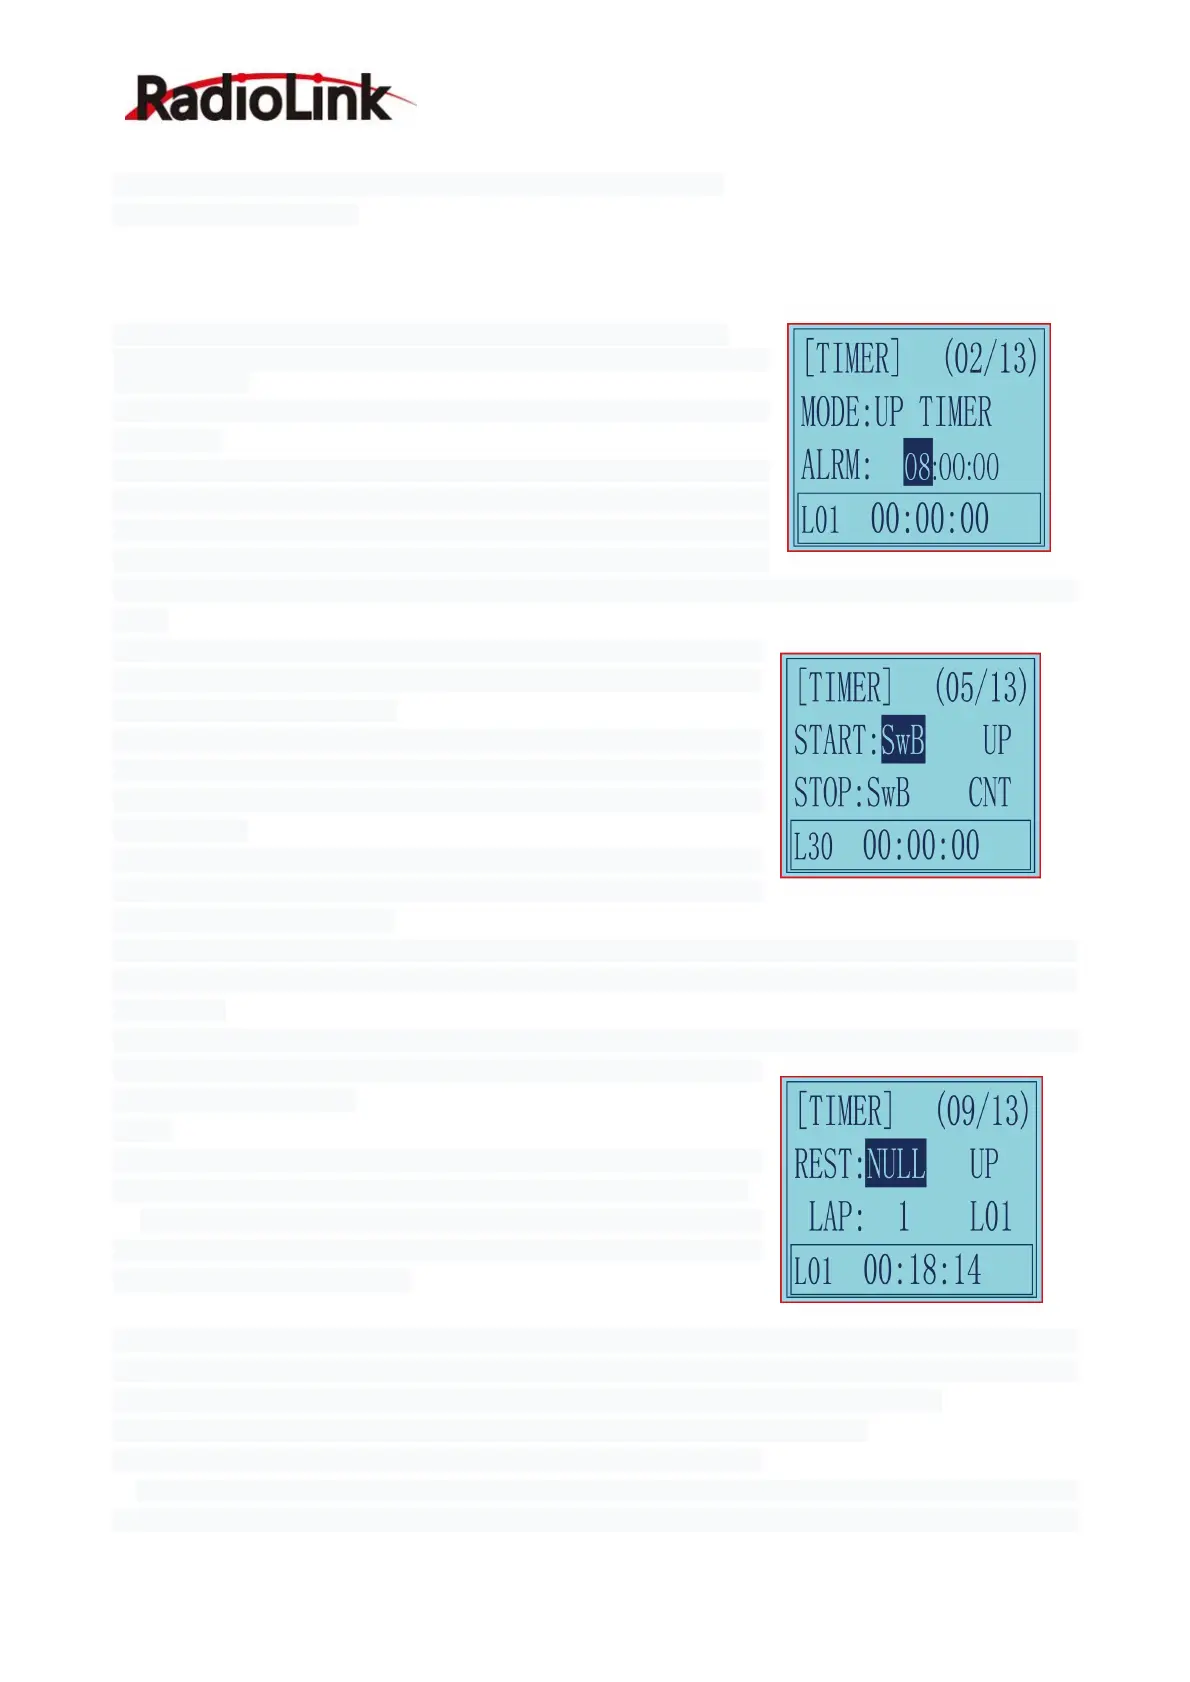
2.24 Timer Setting “TIMER”
TIMER function is mainly used for game timing, and for daily training.
Enter the setting interface: Long press "Exit" and "Enter" button simultaneously for one second to enter the
function menu of RC6GS V3. Press "Inc(+)" button at the bottom of the screen to move the cursor to "24.
TIMER", and then press " Enter” button to enter the function setting interface.
Mode: Timer mode, you can choose "UP TIMER" or "DOWN TIMER".
UP TIMER: After triggering the timing function, the timing number will
count upwards.
DOWN TIMER: After triggering the timing function, the timing numbers will
count down.
Alarm: The timer starts. When it reaches the set time, the transmitter starts
to alarm. In the countdown 20S, it starts to alarm every 1S. In the
countdown 10S, it starts to alarm twice every 1S. When the alarm time is
reached, the transmitter will give a alarm. If the switch is not toggled now,
the timing will continue. The default alarm time is 8 minutes. The alarm time can be set according to actual
needs
START: Select a switch or button used to trigger the timing function. You
can choose SWA, SWB, SWC, SWD, TH (throttle trigger), and the lock
mode of the four switch buttons.
NULL means that the timing function is not enabled. If the switch is set to
SWA, SWB, SWC, SWD or their lock modes, you can select UP (up),
CNT (central), or DOWN (down) for the position of the switch to trigger the
timing function.
If the start switch is TH (throttle trigger), you can set the throttle rate to
0%-100%, and the timing function will be triggered when the throttle
trigger is pushed to the set rate.
STOP: It is used to stop the timing function. The setting method is the same as the above "START" setting.
When the number of laps set is greater than 1, the number of laps will automatically increase by 1 lap each
time it stops.
RESET: By toggling the switch set here, all the previously generated timing values will be cleared.Alarm
values and laps are retained. The switch setting method is the same as
the above "START" setting.
Note:
1. When triggering the timing function, please do not put the switch in the
stop or reset position, otherwise the timing function cannot be activated.
1. When the switch is not enough, there are 2 ways to reset all timings: a.
By setting the "alarm" value, all timings can be reset. b. All timings can be
reset by setting the "mode" value.
Recommendation: Choose one 3-way switch such as SWB or SWC for START,STOP and RESET. Set
the same switch with three different positions to control START, STOP and RESET. For example, set
(SWB, UP) to start timing, (SWB, CNT) to stop timing, and(SWB, DOWN) to reset timing.
LAP: used to set the number of laps required for timing, 1-30 lap numbers can be set;
Display laps: used to display the lap corresponding to the current timing.
L01-L30 can be selected. For example, when it is L02, the timing below correspond to Lap 2. When the
number of laps set is greater than 1, the number of laps will automatically increase by 1 lap each time it stops.

 Loading...