CHAPTER
4
Nozzle Body and Nozzle Control Valve Installation: Hawkeye® 2 Nozzle Body Installation 23
CHAPTER 4
NOZZLE BODY AND NOZZLE
CONTROL VALVE
INSTALLATION
HAWKEYE® 2 NOZZLE BODY INSTALLATION
After completing the steps in Chapter 3, Installation Preparation, install the provided nozzle bodies and nozzle
control valves.
BEST PRACTICES AND RECOMMENDATIONS
• Do not connect battery leads until all cables are installed and connected.
• If a dual outlet nozzle body is installed on the boom, always mount the Hawkeye® 2 nozzle control valve to the
closest port to the boom tube to avoid higher stress on the nozzle body.
HYPRO NOZZLE BODY INSTALLATION
NOTE: For some Hypro kits, the standard Hypro nozzle bodies will need to be replaced with left-handed
versions of the 5-way nozzle body in order to prevent interferences with the NCV2.
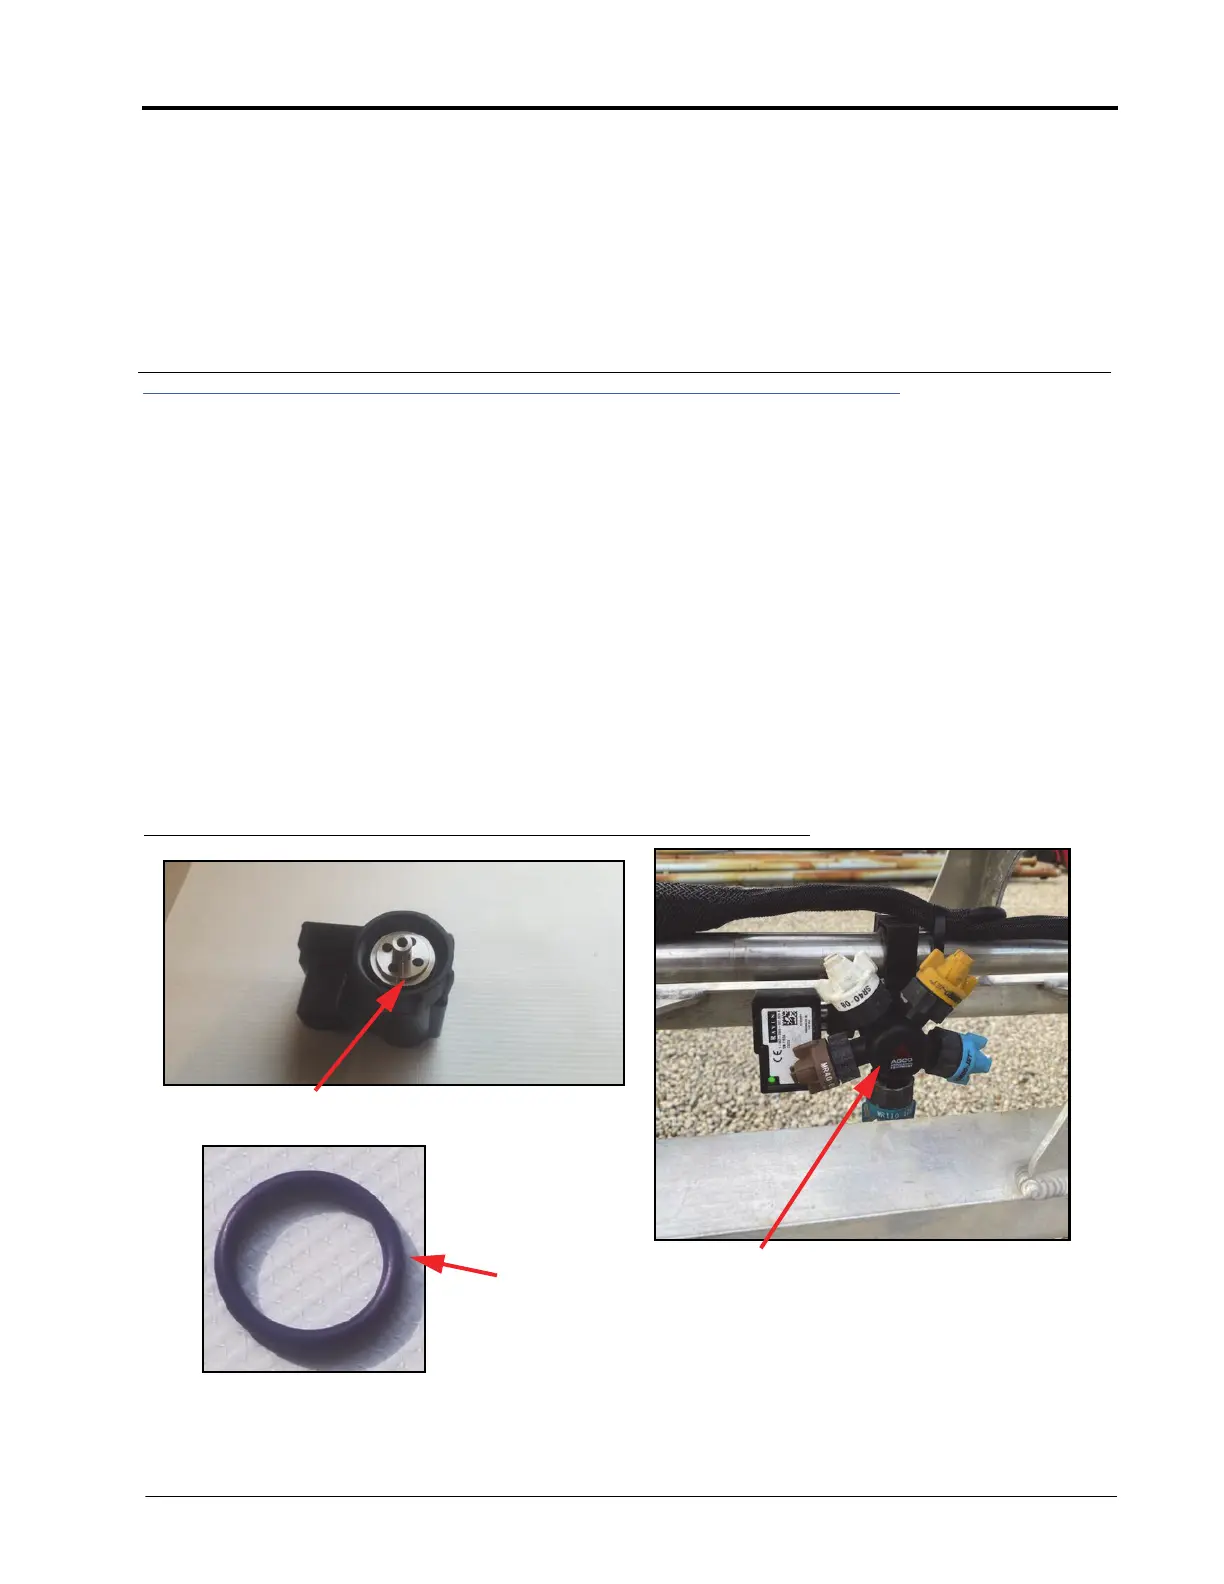
FIGURE 1. Valve Face O-Ring and Nozzle Control Valve Installed
1. Locate included Hypro 5-way, left-handed nozzle bodies in the kit.
Valve Body Face O-Ring
(Place O-Ring Here)
Nozzle Body
Purple O-Ring
 Loading...