Sidekick Pro™ ICD Installation: Sidekick Pro ICD Power Supply 51
SIDEKICK PRO™ ICD INSTALLATION
SIDEKICK PRO ICD POWER SUPPLY
When adding Sidekick Pro™ ICD injection to the machine with Hawkeye® 2, a second fuse panel must be installed
to accommodate the power needs.
1. Install a four way fuse pane (P/N 510-2001-068) towards the rear of the machine near the injection pumps.
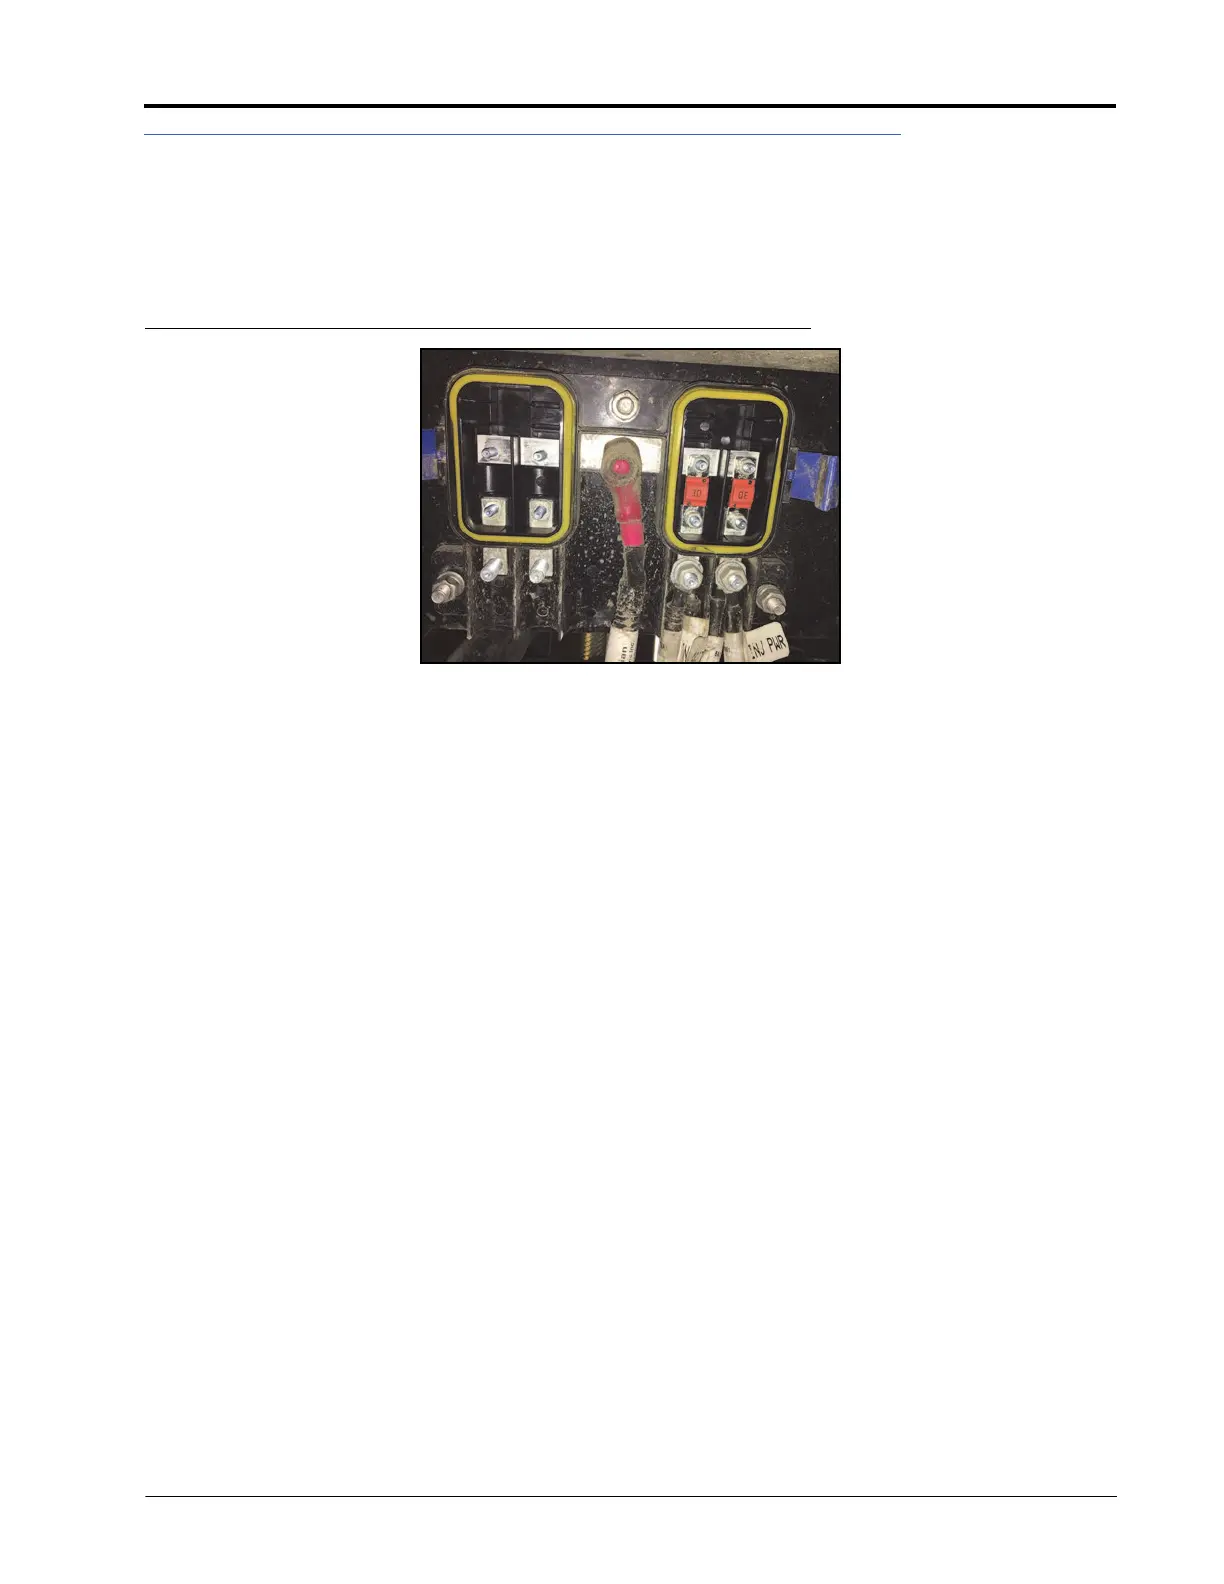
FIGURE 3. Four-Way Panel
2. Connect one end of cable P/N 115-0172-446 to the open stud on the front fuse panel located rearward of the
main electrical enclosure and route to the four-way fuse panel.
3. Use extra hardware from the four-way panel to install the 125 Amp fuse (P/N 510-1003-049) to the same port
on the three-way fuse panel.
4. Connect the other end of cable P/N 115-0172-446 to the center stud of the four-way panel.
5. Connect the positive ring terminal of the Hawkeye® 2 chassis cable (P/N 115-7303-310) to the port with the 70
Amp fuse on the four way panel.
6. Connect the positive ring terminal of the Sidekick Pro™ ICD cable (P/N 115-0172-444) to the port with the 30
Amp fuse on the four-way panel.
7. Repeat step 5 for additional pumps.
8. Connect the negative ring terminal from all cables to the ground stud located under the rear catwalk.
9. Secure all ring terminals with a retaining nut.
 Loading...