22
2) Enter TIME
A) Select TIME
B) Enter TIME when RATE display shows "TInE".
3) Enter MONTH
A) Select MONTH
B) Enter MONTH when RATE display shows "OnTH".
4) Enter DAY
A) Select DAY
B) Enter DAY when RATE display shows "dAY"
5) Enter YEAR
A) Select YEAR
B) Enter YEAR when RATE display shows "YEAr"
6)
POWER DOWN FEATURE
If the Console is not used for 10 days, it will go into a power down (low power) mode of operation.
In this mode, all data will be retained, but the time of day clock will reset to 0:00. The delay time is
initially set at 10 days, but can be changed by the user.
A) Enter POWER DOWN
1) Select POWER DOWN
2) Enter POWER DOWN when RATE display shows "Pdn".
NOTE: This is a 24 hour clock. Therefore, all time after 12:59 p.m., add 12 hours. Thus,
8:30 a.m. is entered as 8:30, but 1:30 p.m. is entered as 13:30 in the keyboard.
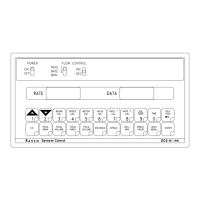
2) ENTERING TIME, DATE, AND POWER DOWN:
Definition of Time, Date, and Power Down Key:
Depressing this key displays selected Time features in DATA display.
EXAMPLE: RATE display will display "TInE" and DATA will display 0:00.
Depressing this key after selecting TIME toggles up through desired features.
EXAMPLE: TIME, MONTH, DAY, YEAR, and POWER DOWN.
Depressing this key after selecting TIME toggles down through desired features.
EXAMPLE: POWER DOWN, YEAR, DAY, MONTH and TIME.
 Loading...