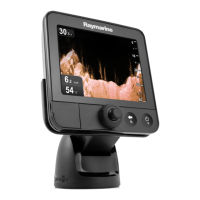
6.Thesecondpersonshouldsecurethedisplaytothetrunnionbrack
etby
insertingandtighteningthetrunnionknobs,ensuringthattheratchet
teetharecorrectlyengaged.
Theknobsshouldbetightenedbyhand,sufficientlytopreventthe
displayfrommovingwhilstyourvesselisunderway.
7.Routeandconnectnecessarycables.
8.5Flushmounting
Toolsrequired(flushmountinstallations)
Thefollowingtoolsarerecommendedforflushmountinstallations:
1.P owerdrill.
2.Holecutter(appropriatesizeforcornerdiametersoftheCutoutline
identifiedonthesuppliedmountingtemplate):
•33.00mm(1.30in)—Axiom®2Pro9.
•37.00mm(1.47in)—Axiom®2Pro12.
•38.00mm(1.5in)—Axiom®2Pro16.
3.Jigsaw.
4.Halfroundfile(orsandpaper).
5.Masking/selfadhesivetape.
6.Handrouterwitharouterbitanappropriatesizeforthe11.50mm(0.52in)
cornerdiameterrequiredfortheflushmountrebate.
7.Marinegradesealant.
8.Drillbit3.7mm(
5
/
32
”)forfixingholes.
9.Pozi-drivescrewdriver.
10.7mmwrenchorsmalladjustablewrench.
Rearaccessrequirements
Accesstotherearofthedisplayandmountingsurfaceisrequiredtosurface
andflushmountthedisplay.
Ensurethereissufficientaccessandspacebehindthemountingsurfaceto
attachandtightenthefixingsandalsotoconnectthecables.
Preparingthemountingsurface—flushmounting
Flushmountingrequiresthesamecutoutholeassurfacemountingandan
additionalrebatearoundtheedgeofthecutout.Whenthedisplayisflush
mountedtheglass/bezelwillbeflushwiththemountingsurface.
Note:
Thefollowingprocedureisforpreparingthemountingsurfacefor
flushmountinstallations.Forsurfacemountingdetailsreferto:
p.47—Preparingthemountingsurface—surfacemounting
Note:
Beforepreparingthemountingsurfaceensurethat:
•yourselectedlocationmeetsthelocationrequirements.Fordetailsrefer
to:p.33—Locationrequirements
•youhaveidentifiedcableconnectionsandtheroutethatthecables
willtake.
44

 Loading...
