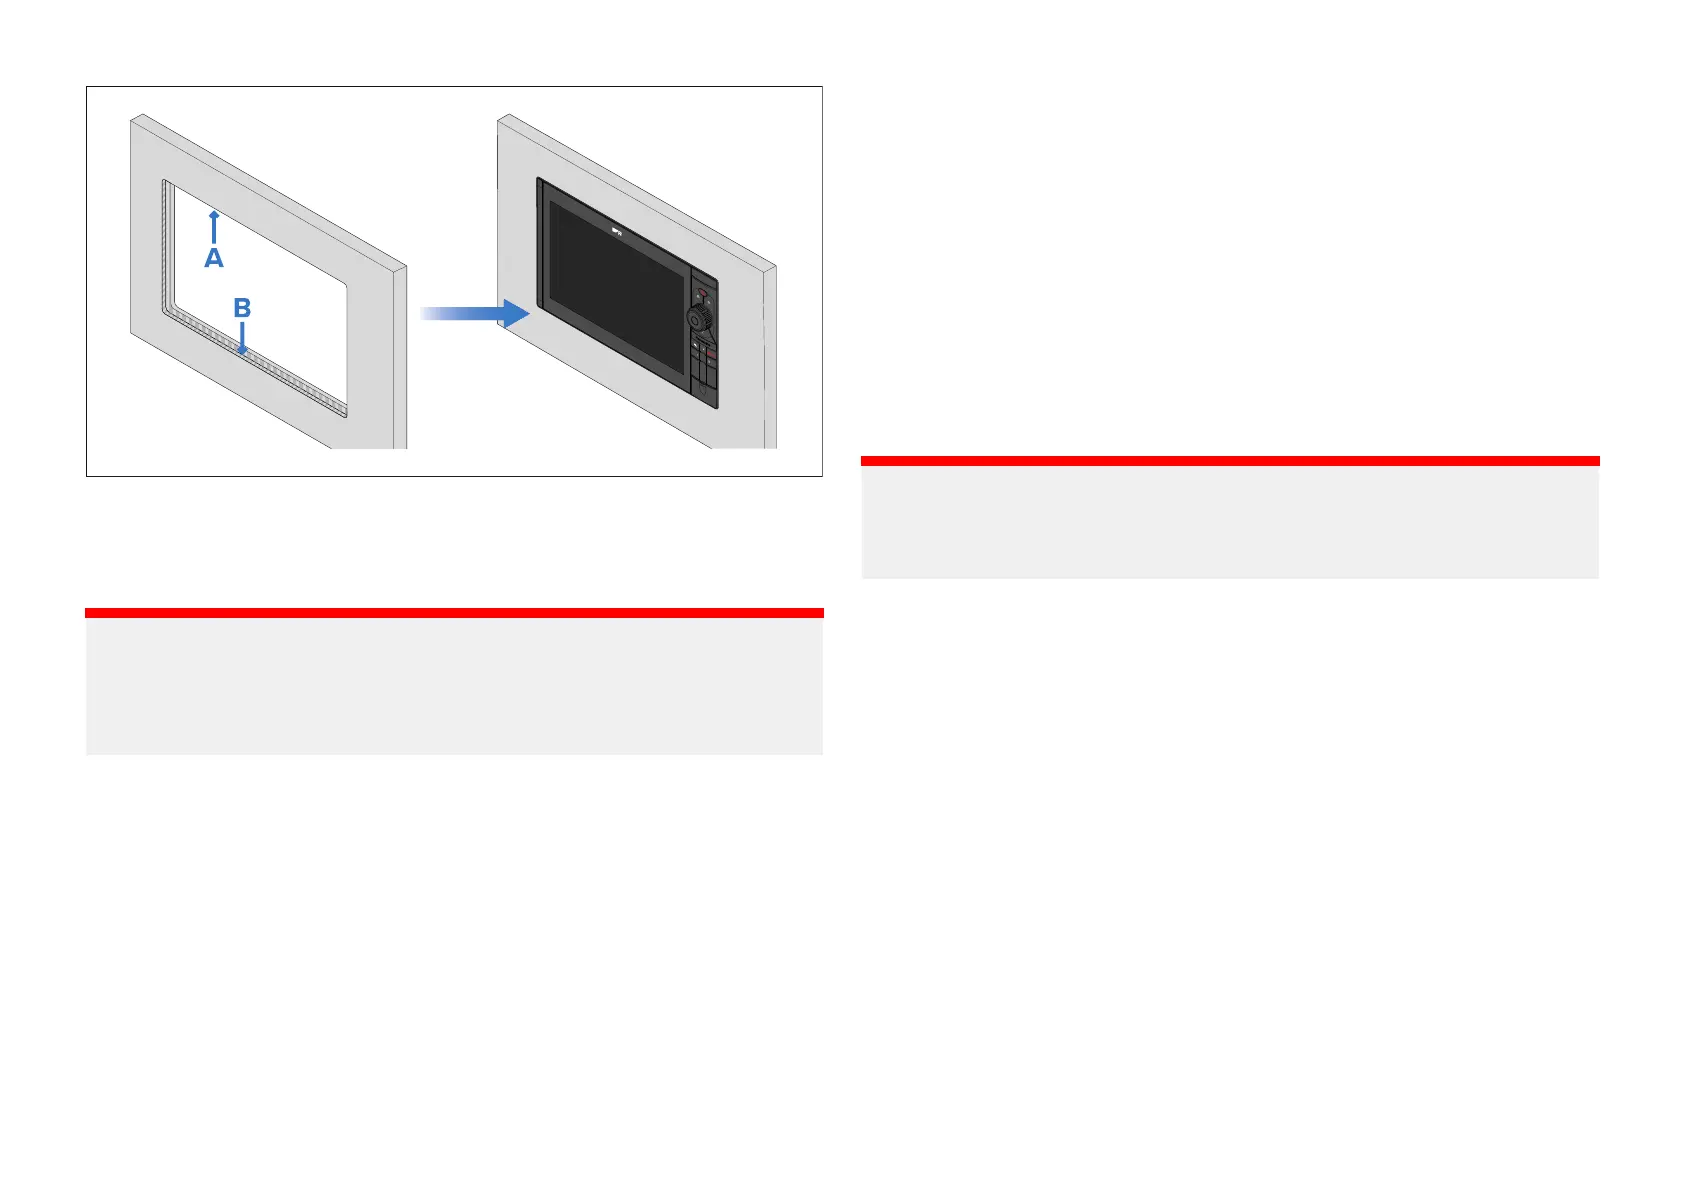
•A—Cutout(whenflushmountingthecutoutwillbethesamesizeas
forsurfacemounting.
•B—Flushmountingrequiresane xtrarebatetorecessthedisplayfullyin
themountingsurface.
Important:
Whenflushmountingthefixingsgothroughholesdrilledintherebated,
andthereforethinnest,partofthemountingsurface .Beforepreparingthe
mountingsurfaceensurethatsufficientthicknesswillremaintosecure
thedisplay.
1.MarktheCutoutlineidentifiedonthesuppliedmountingtemplateon
themountingsurface .
2.Markthe4holeforfixingscrewslocationsidentifiedonthesupplied
mountingtemplateonthemountingsurface.
3.MarktheRebateforflushmountlineidentifiedonthesuppliedmounting
templateonthemountingsurface.
4.Useadrillandanappropriatesizedrillbitorholecuttertocutoutthe
cornersoftheCutoutline.
Thecornerdiameterforthedisplaysare:
•33.00mm(1.30in)—Axiom®2Pro9.
•37.00mm(1.47in)—Axiom®2Pro12.
•38.00mm(1.5in)—Axiom®2Pro16.
5.Useajigsaworsimilarcuttingtooltocutouttheremainderofthecut
outarea.
6.Drillthe4fixingsholesatthemarkedlocationusinga3.7mm(
5
/
32
”)
drillbit.
7.Usearouterhandtooltorecessthemarkedrebateareatoadepthof
15.00mm(0.59in).
8.Useahalfroundfileand/orsandpapertosmoothandroughedgesor
bursonthecutouthole.
Flushmounting
Followthestepsbelowtoflushmountthedisplay.
Important:
Inabovedecksinstallations,marine-gradesealantshouldbeusedtoseal
thegapbetweentheedgeofthemountingsurfaceandtheedgeofthe
display.
Installation45
 Loading...