5.1Surfacemounting
Thedisplaycanbesurfacemounted.
Beforemountingtheunit,ensurethatyouhave:
•Selectedasuitablelocation.
•Identiedthecableconnectionsandroutethatthe
cableswilltake.
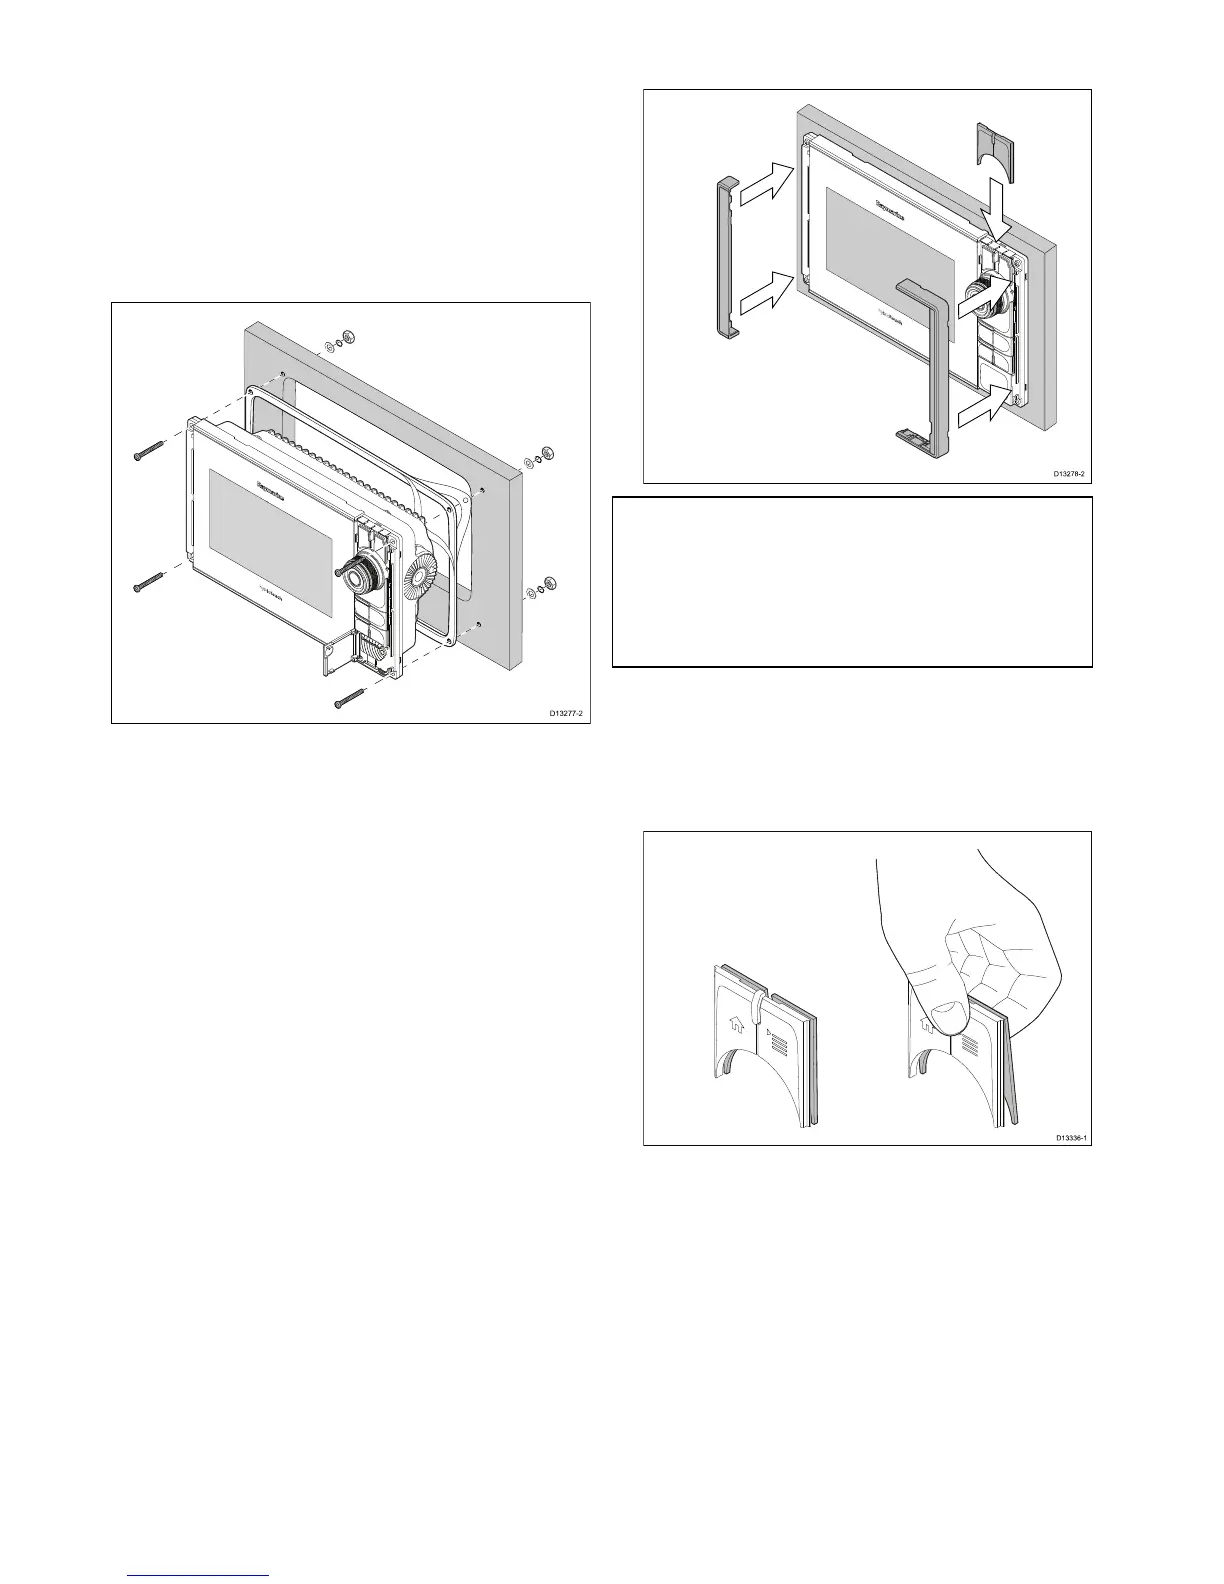
•DetachedtheMenu/Homebuttonskeypad.
•Detachedthefrontscrewcovers.
1.Checktheselectedlocationfortheunit.Aclear,
atareawithsuitableclearancebehindthepanel
isrequired.
2.Fixtheappropriatecuttingtemplate,supplied
withtheproducttotheselectedlocation,using
maskingorself-adhesivetape.
3.Usingasuitableholesaw(thesizeisindicated
onthetemplate),makeaholeineachcornerof
thecut-outarea.
4.Usingasuitablesaw,cutalongtheinsideedge
ofthecut-outline.
5.Ensurethattheunittsintotheremovedarea
andthenlearoundtheroughedgeuntilsmooth.
6.Drill4holesasindicatedonthetemplateto
acceptthexings.
7.Placethegasketontotherearofthedisplayand
pressrmlyontotheange.
8.Connectthepower,dataandothercablestothe
unit.
9.Slidetheunitintoplaceandsecureusingthe
xingsprovided.
10.AttachtheMenu/Homebuttonskeypad,bysliding
itdownfromabovethedisplay.
11.Attachthescrewcovers,byslidinginfromeither
sideofthedisplay.
Note:Thesuppliedgasketprovidesaseal
betweentheunitandasuitablyatandstiff
mountingsurfaceorbinnacle.Thegasketshould
beusedinallinstallations.Itmayalsobe
necessarytouseamarine-gradesealantifthe
mountingsurfaceorbinnacleisnotentirelyatand
stifforhasaroughsurfacenish.
FittingtheMenu-Homebutton
FollowthestepsbelowtottheMenu/Homebutton
tothedisplay.
1.Squeezethetopofthebuttonassemblybetween
yourngersandthumb.
Squeezingthetopwillleverthebottomofthe
backingplatefartherawayfromthebuttons,
creatingabiggergaptoenabletheassemblyto
betted.
58eSSeriesinstallationinstructions

 Loading...